By Jayne Elwell
Learn how to make flowers with paper, then design and create your own flower crown.
Don’t forget to share your work or post online and tag @natsatclub
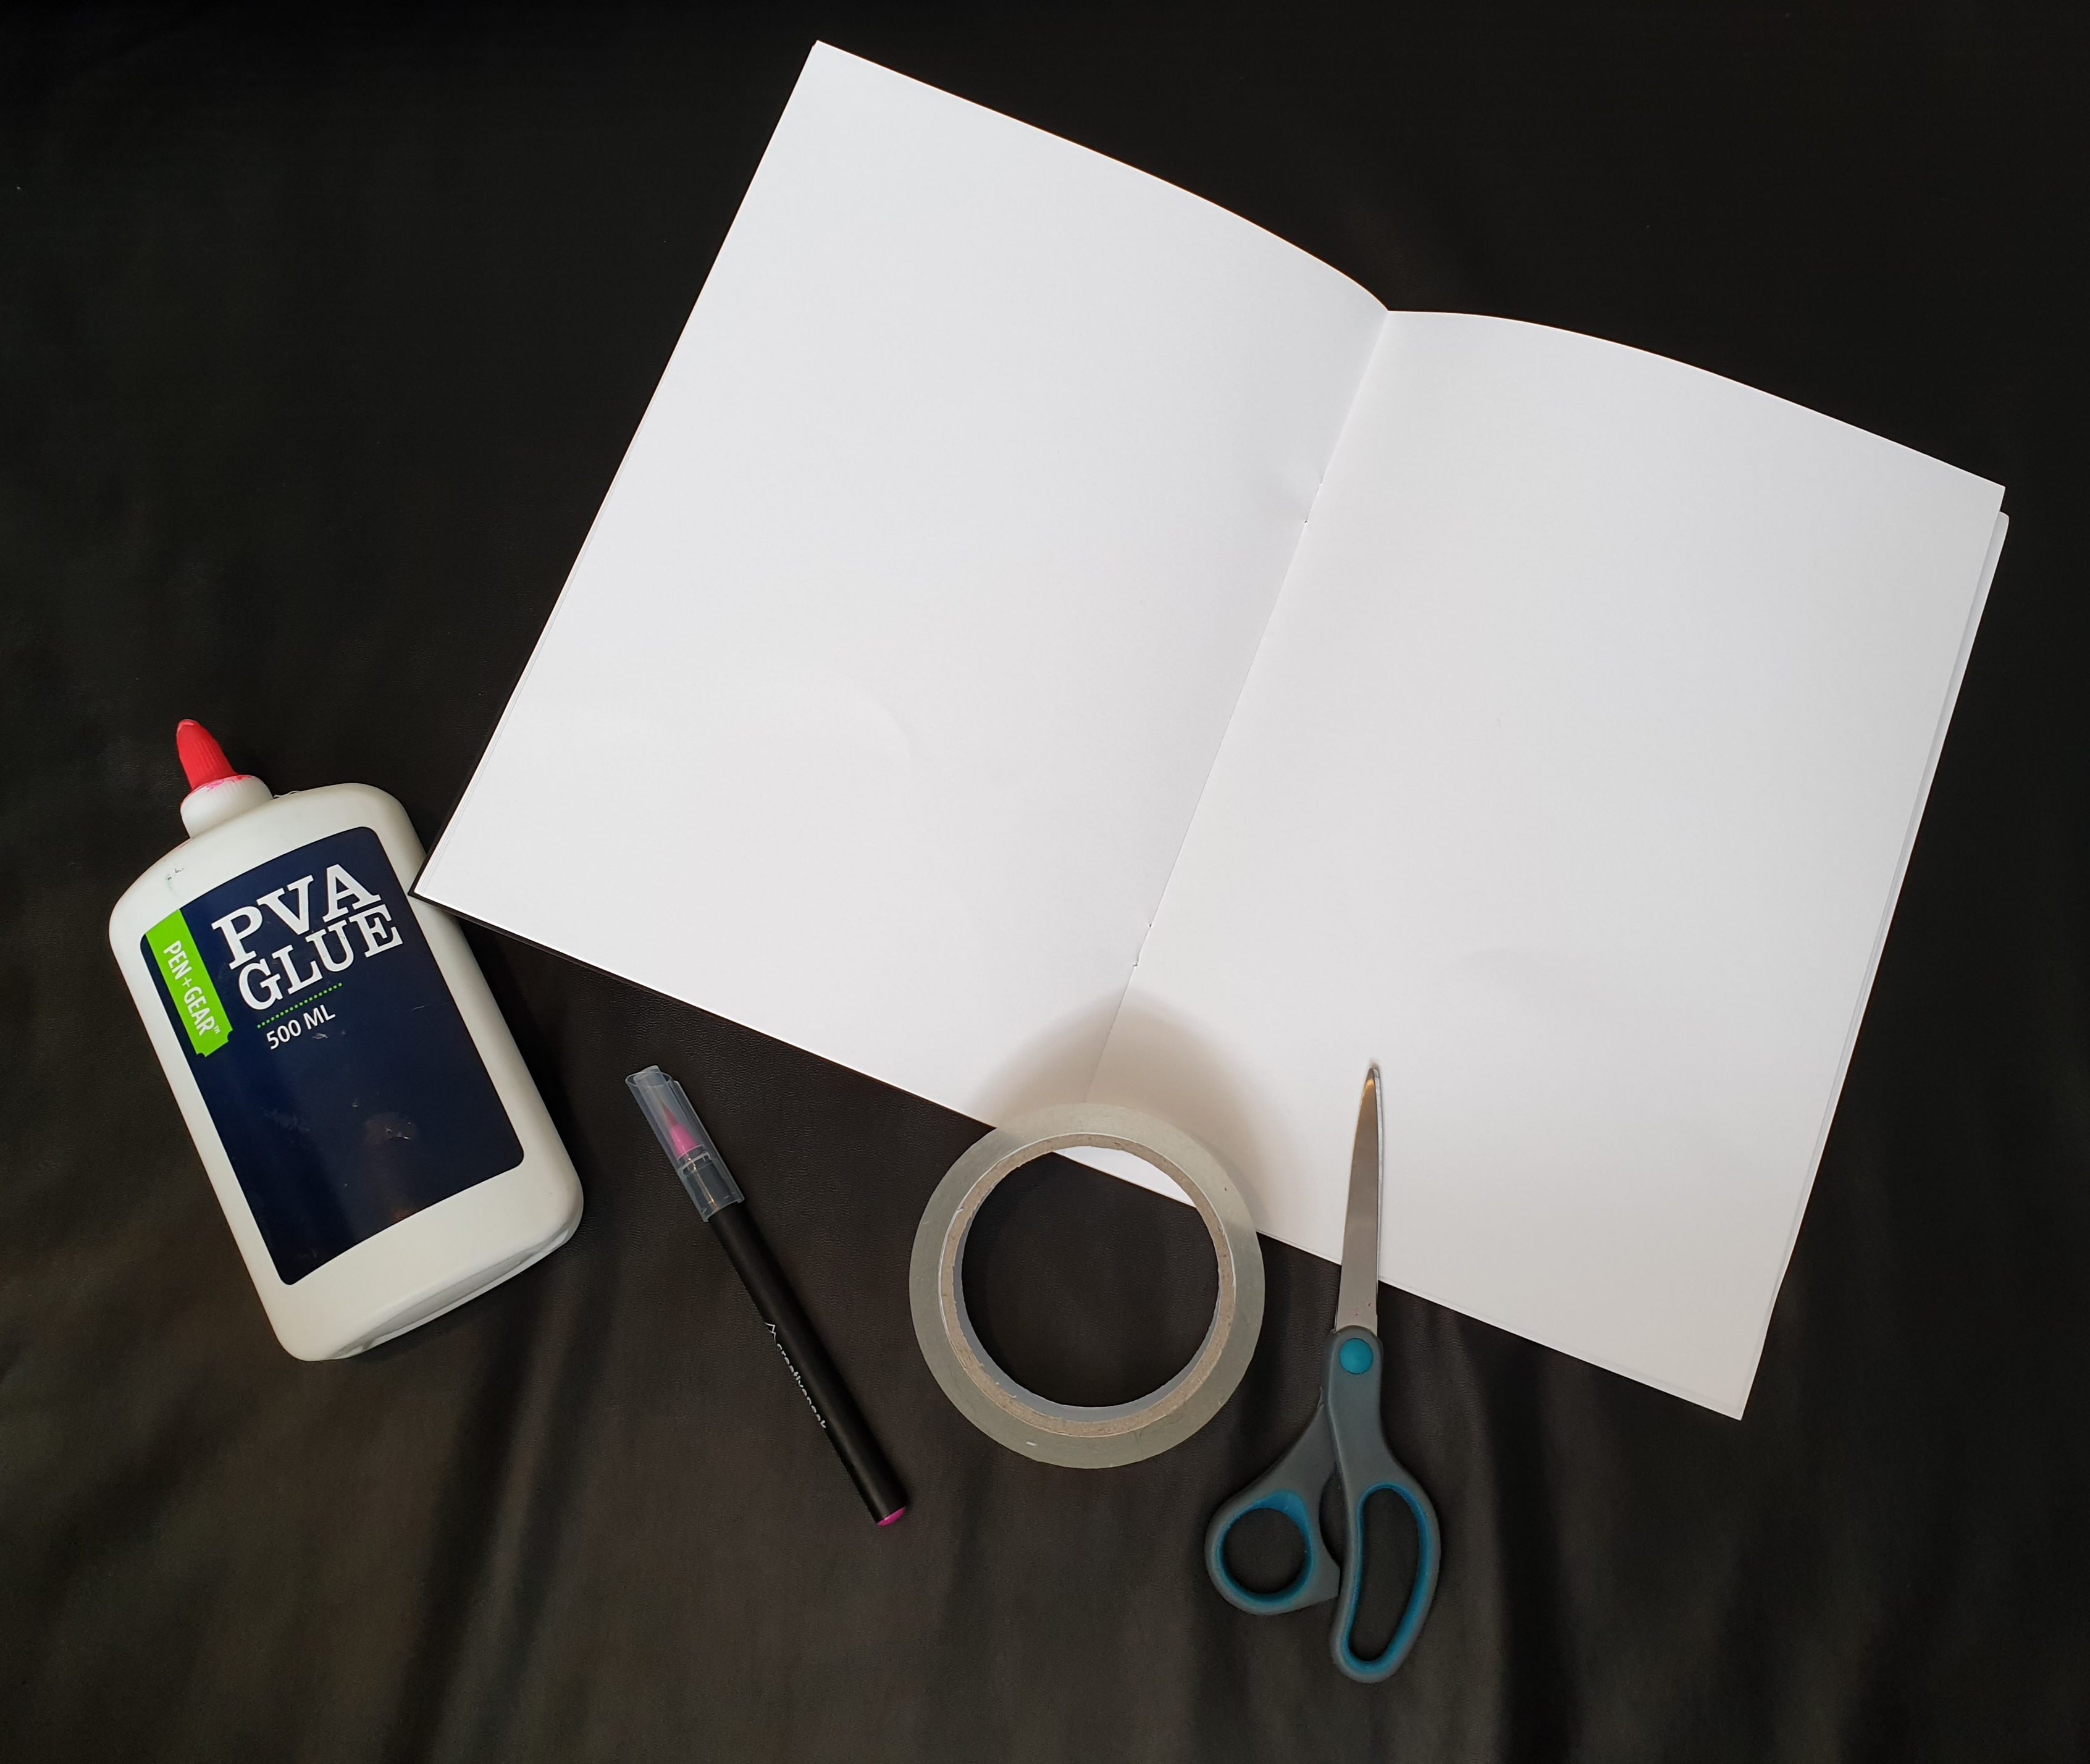
Materials needed
- Any type of paper, new or used. You can even use newspaper or paper that has been drawn on.
- Sticky tape
- Glue or a needle and thread
- Scissors
- Pencil / pen
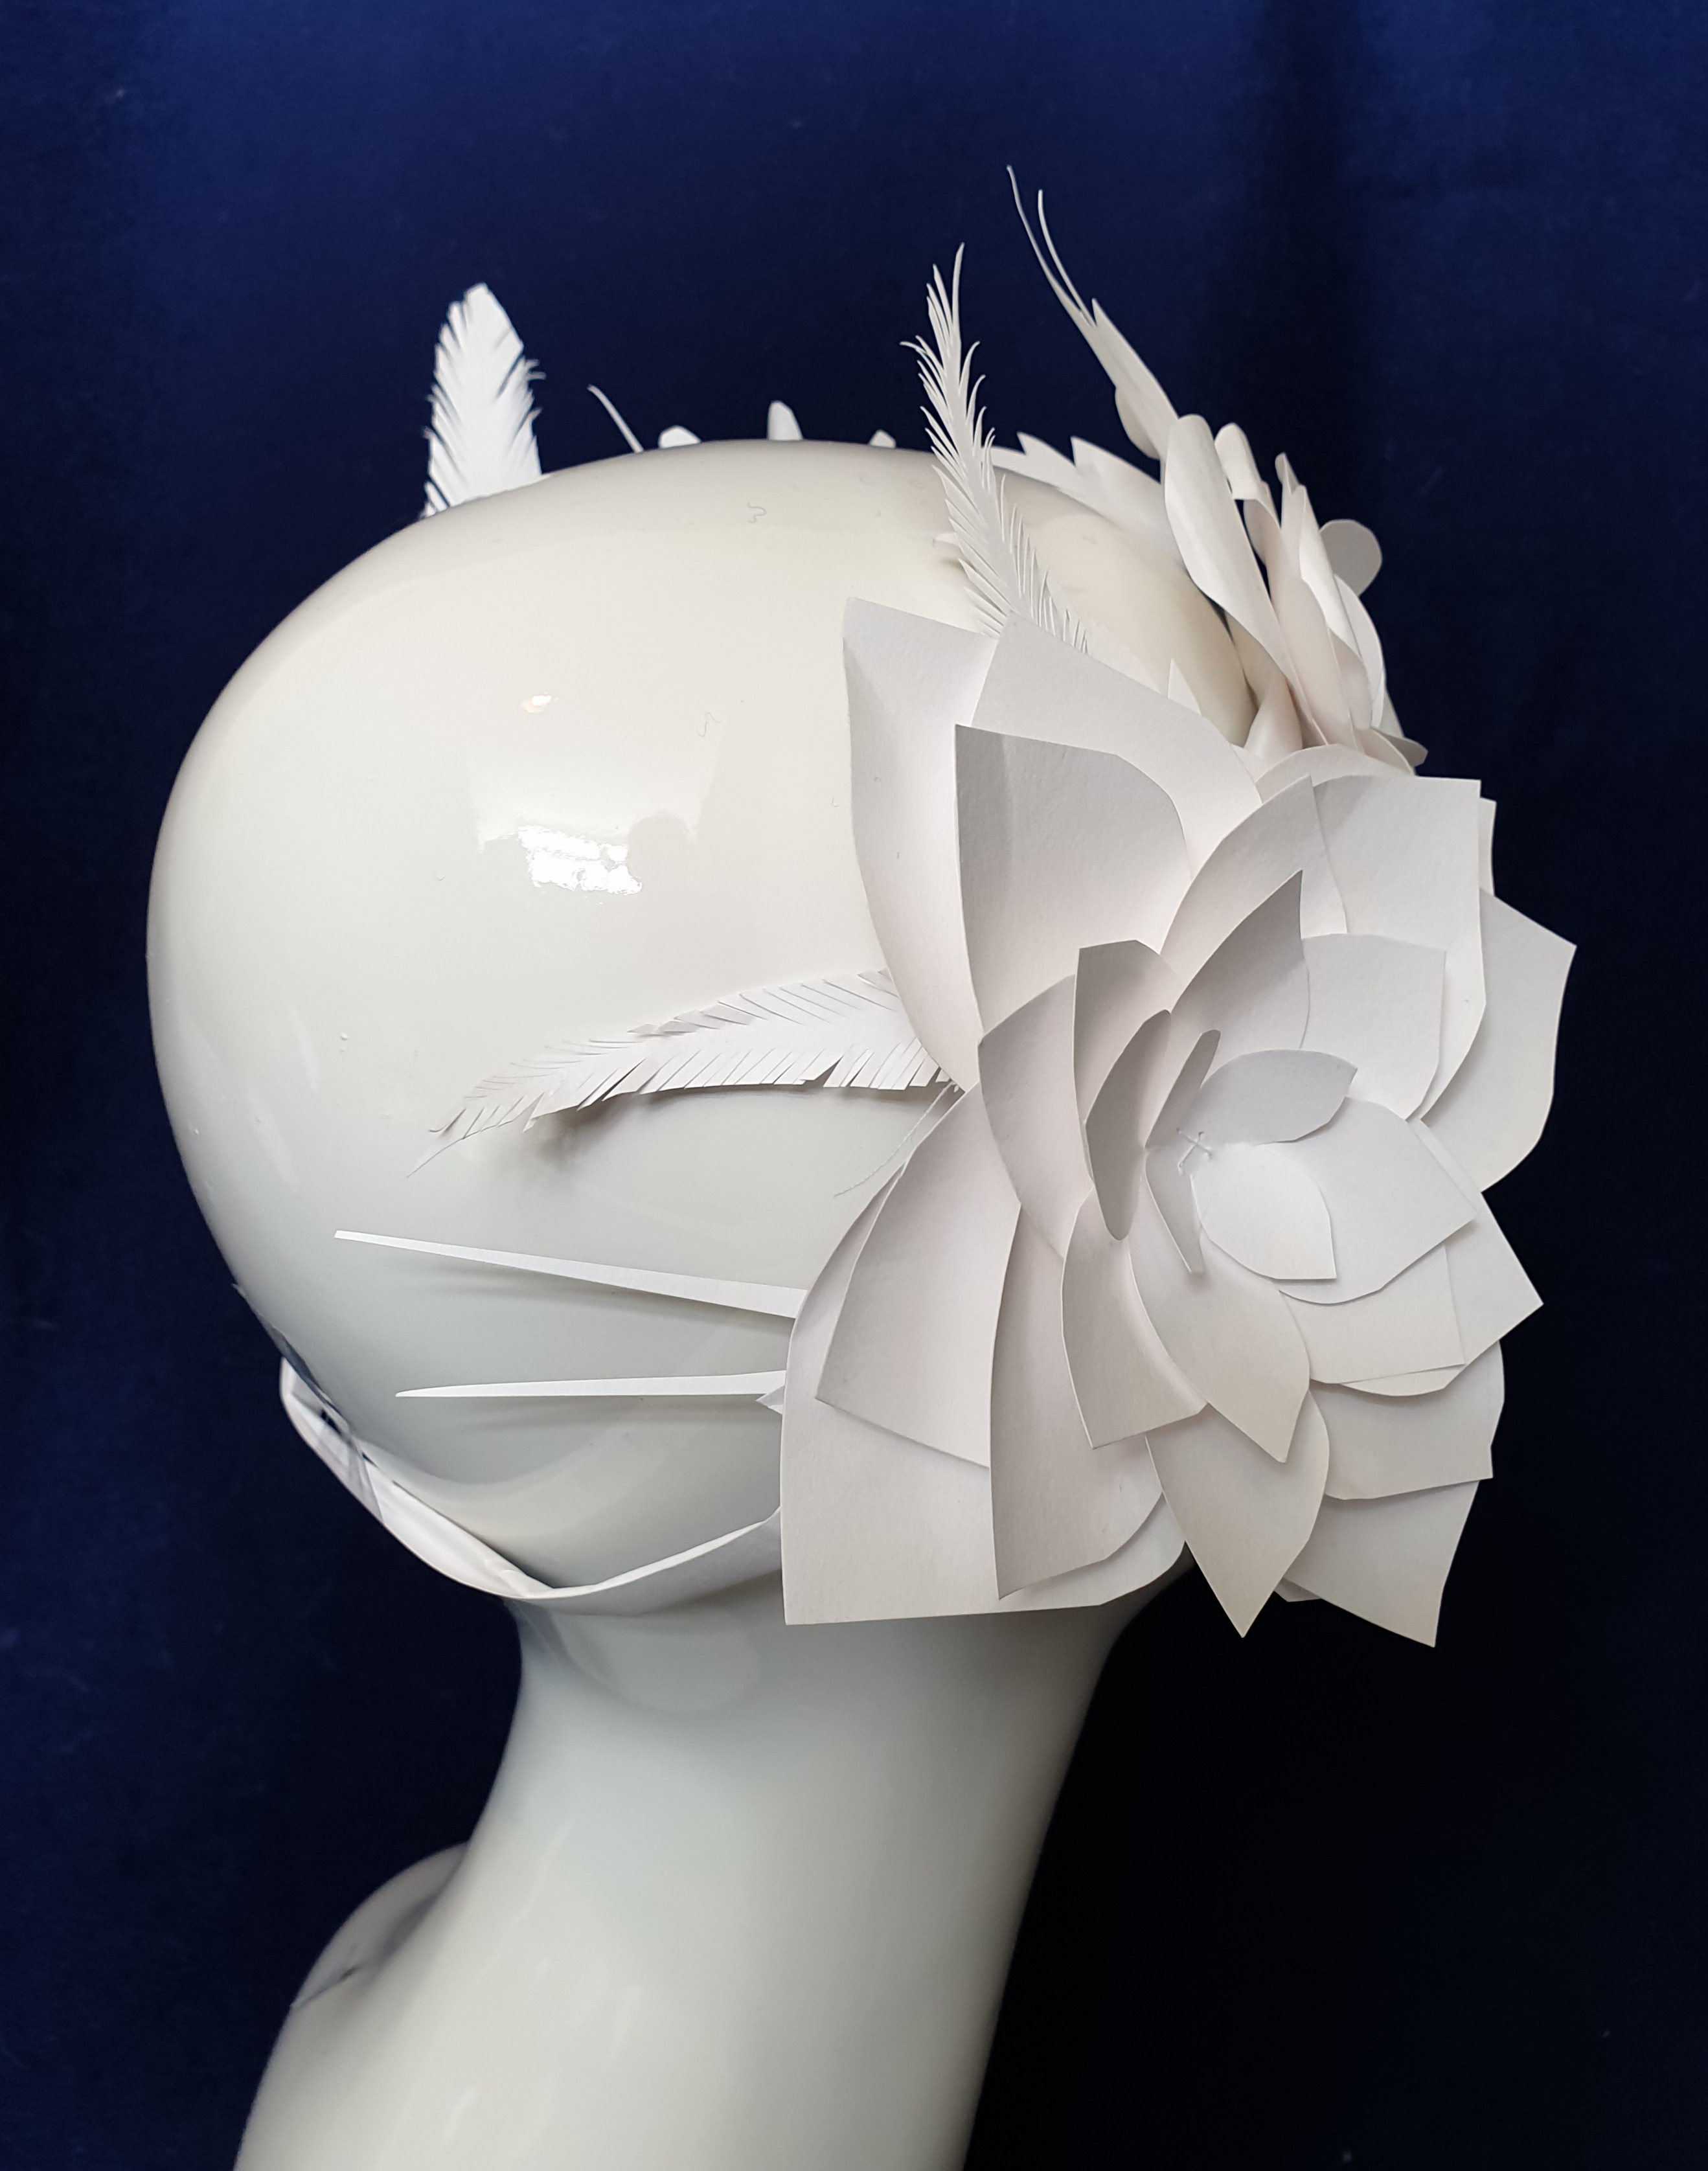
Activity part one – Make your flowers
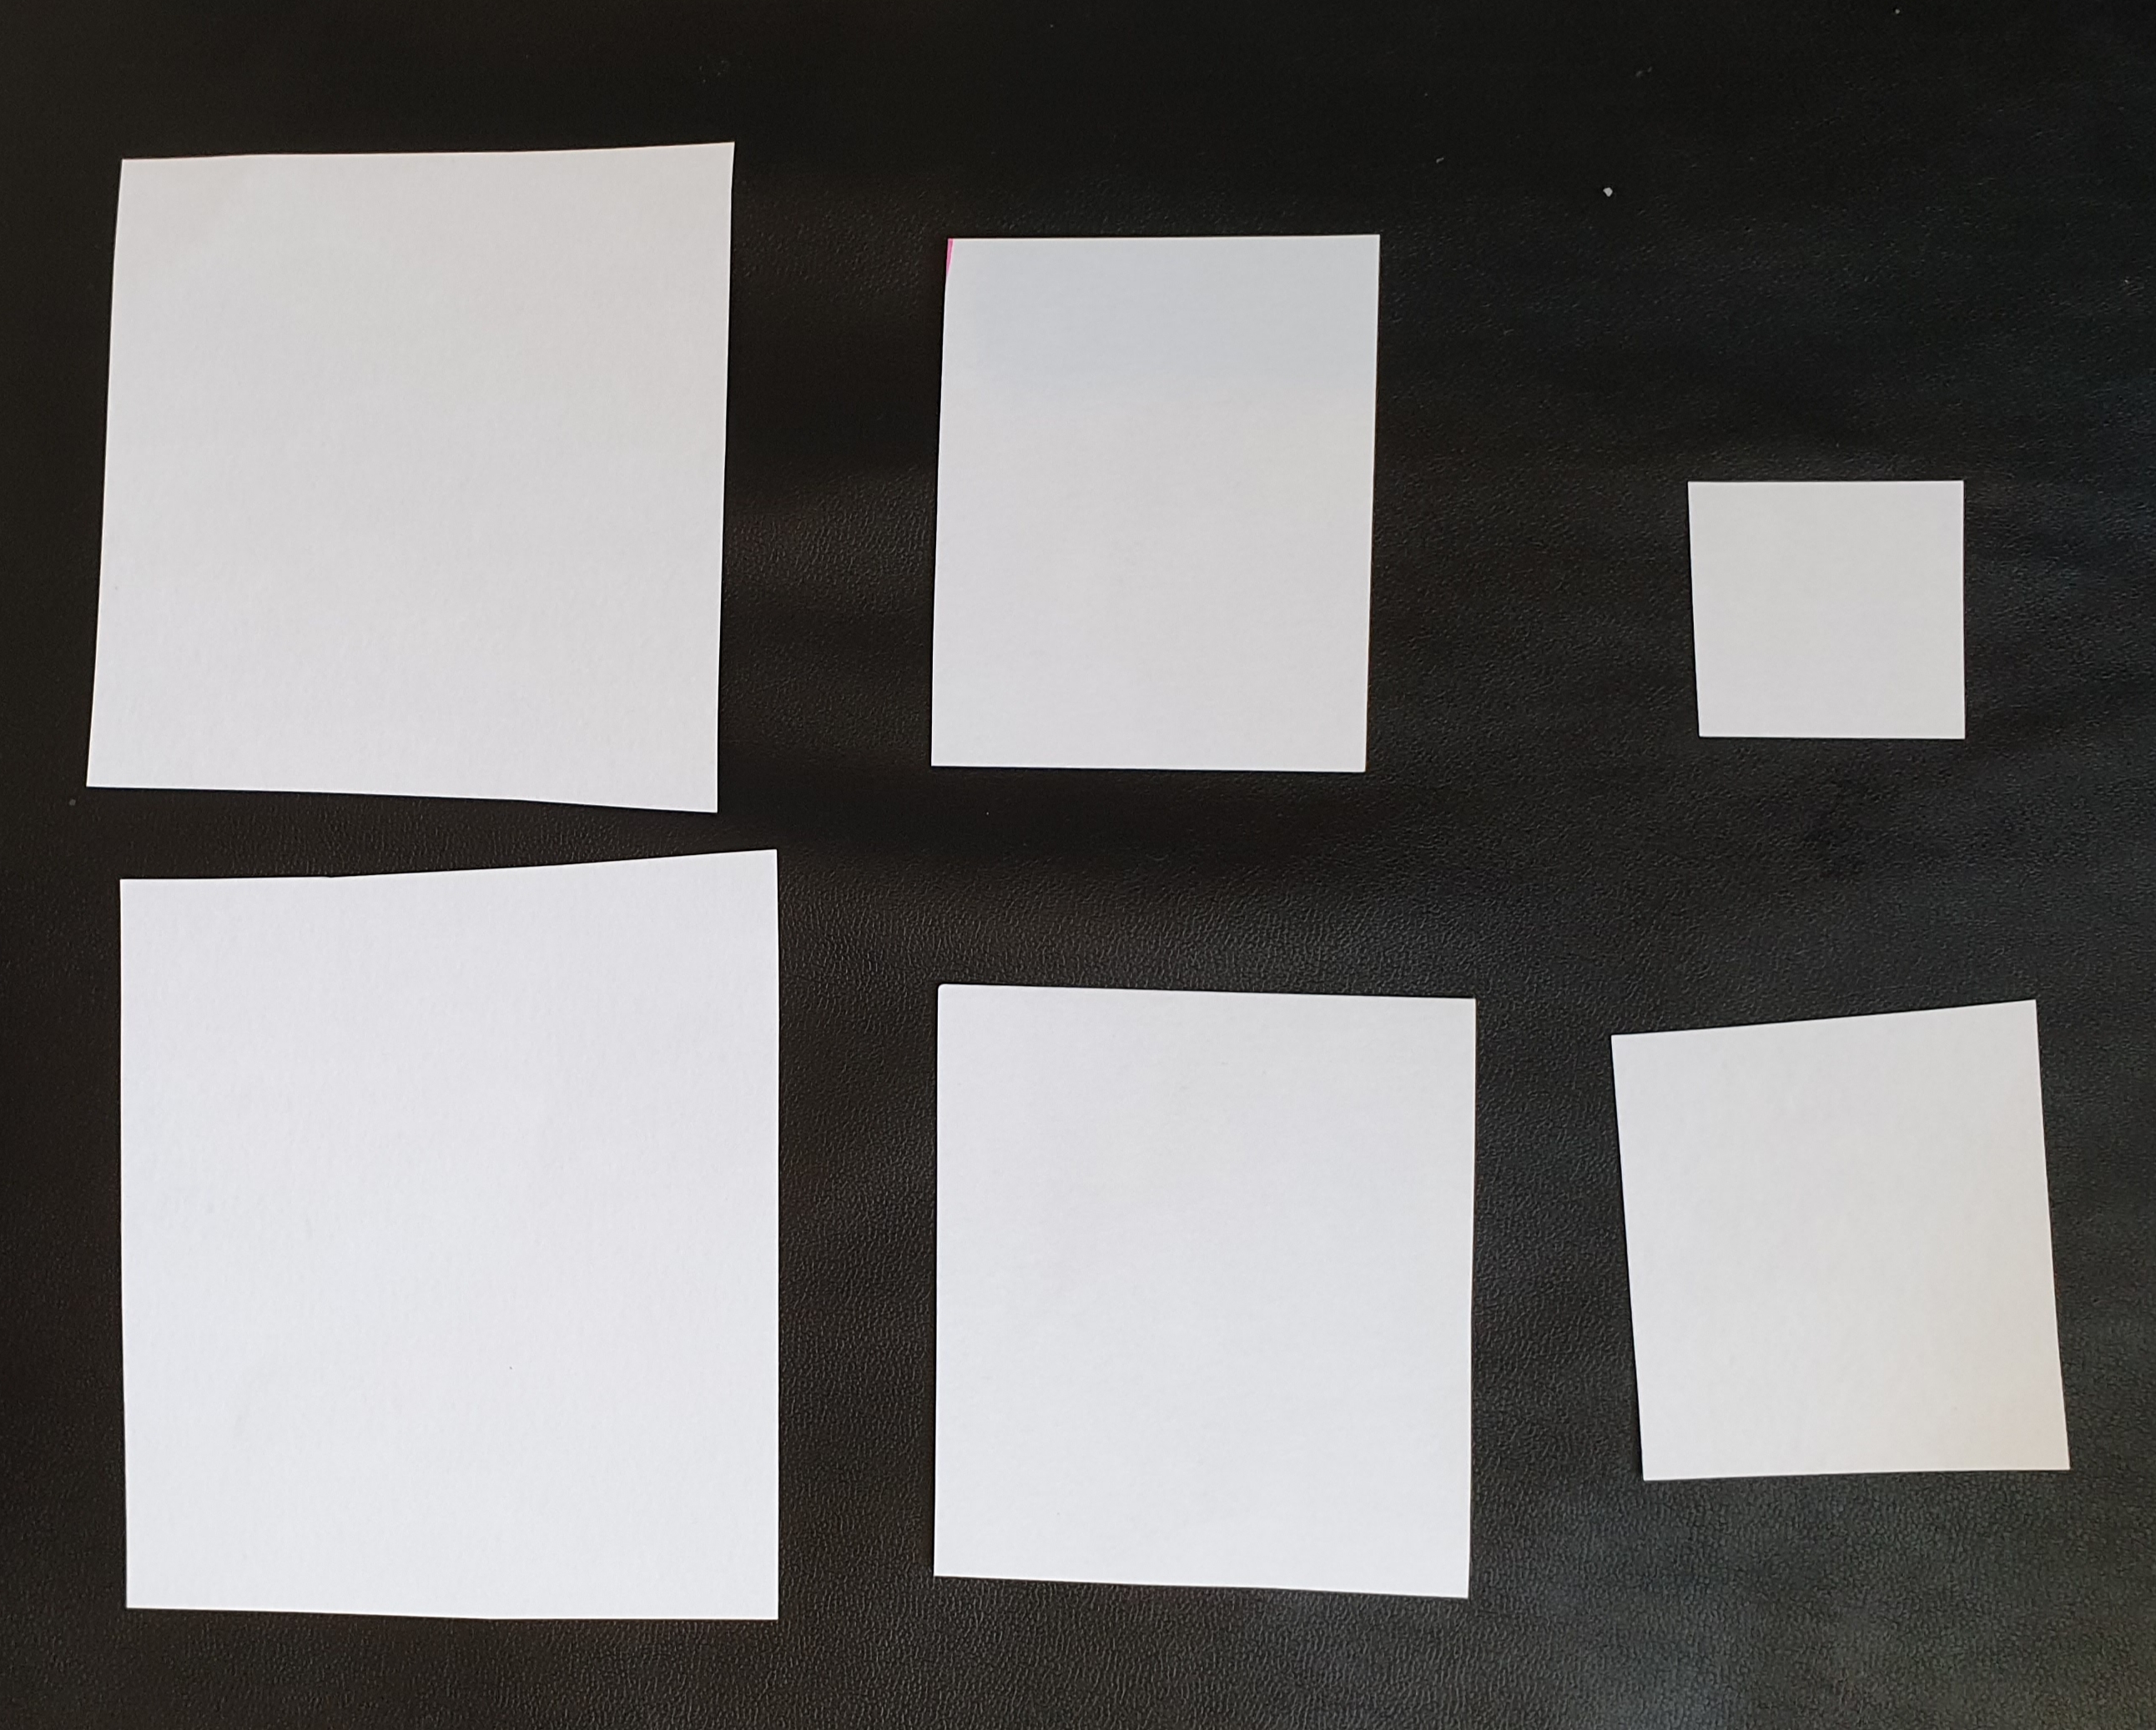
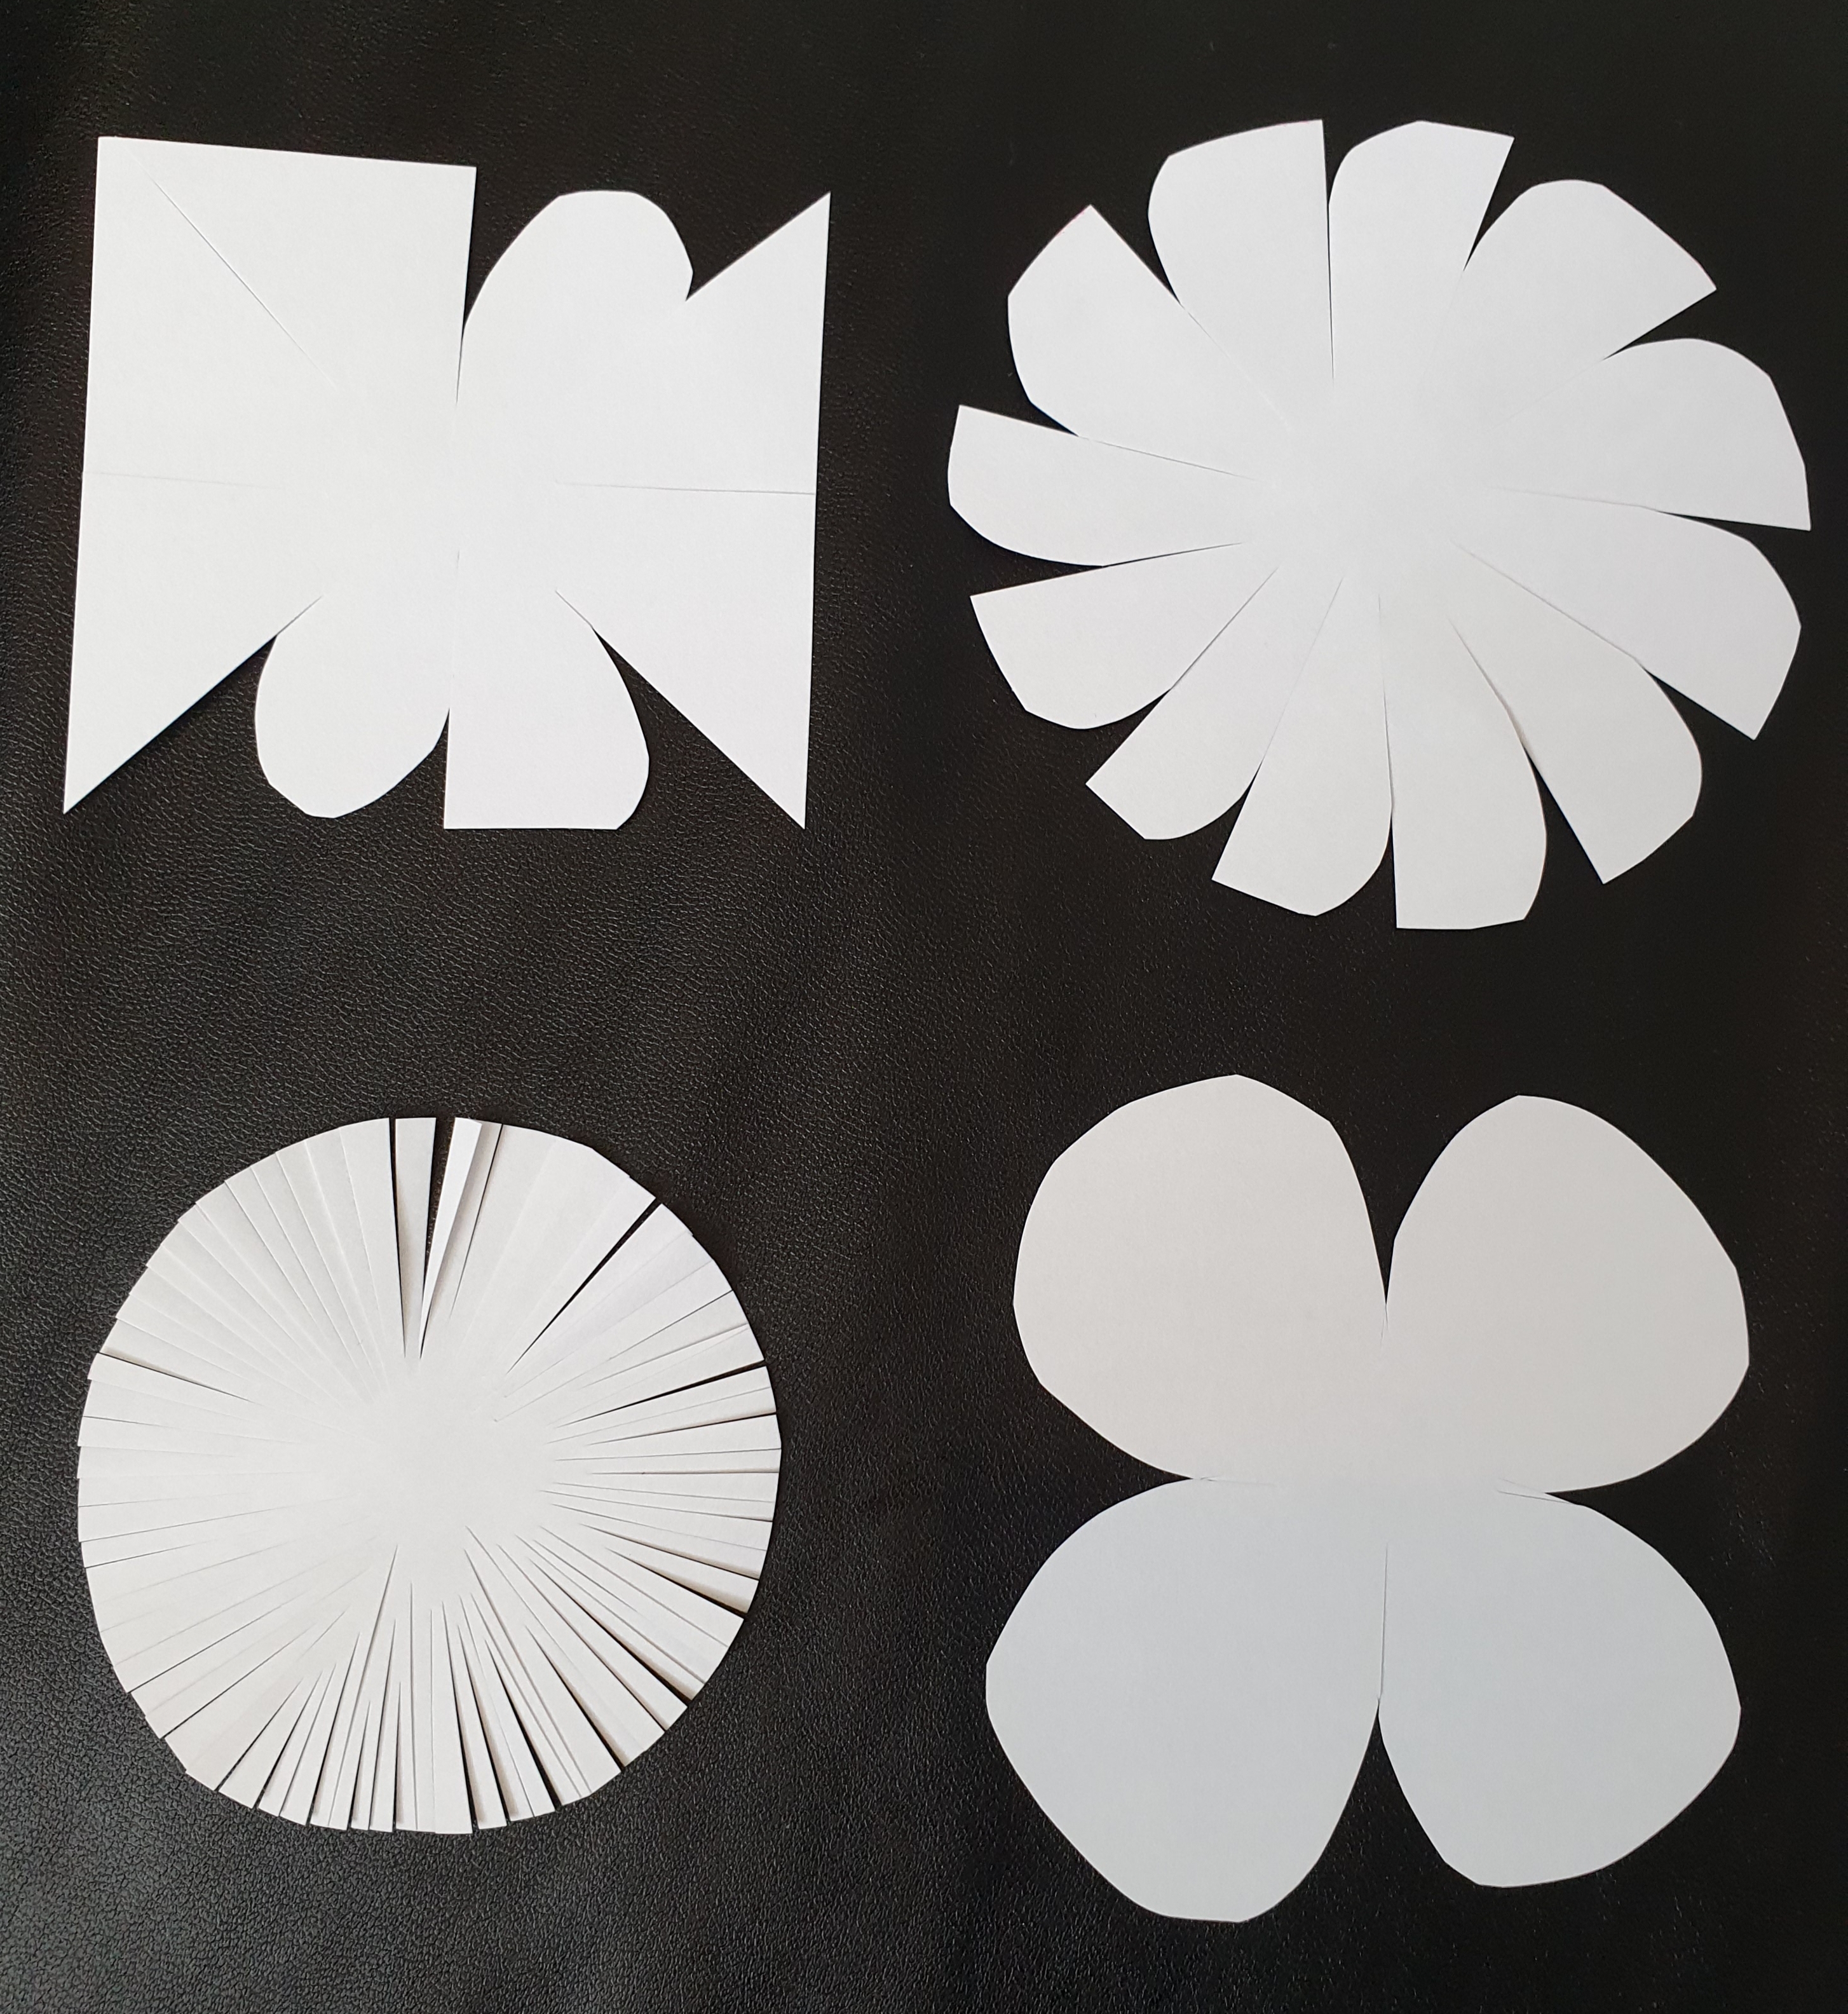
To start making a basic paper flower, simply cut a square of paper to the size you would like your flower to be. This will be the back four petals of your flower. Then cut some more squares that gradually decrease in size – the squares do not have to be accurate or precise.
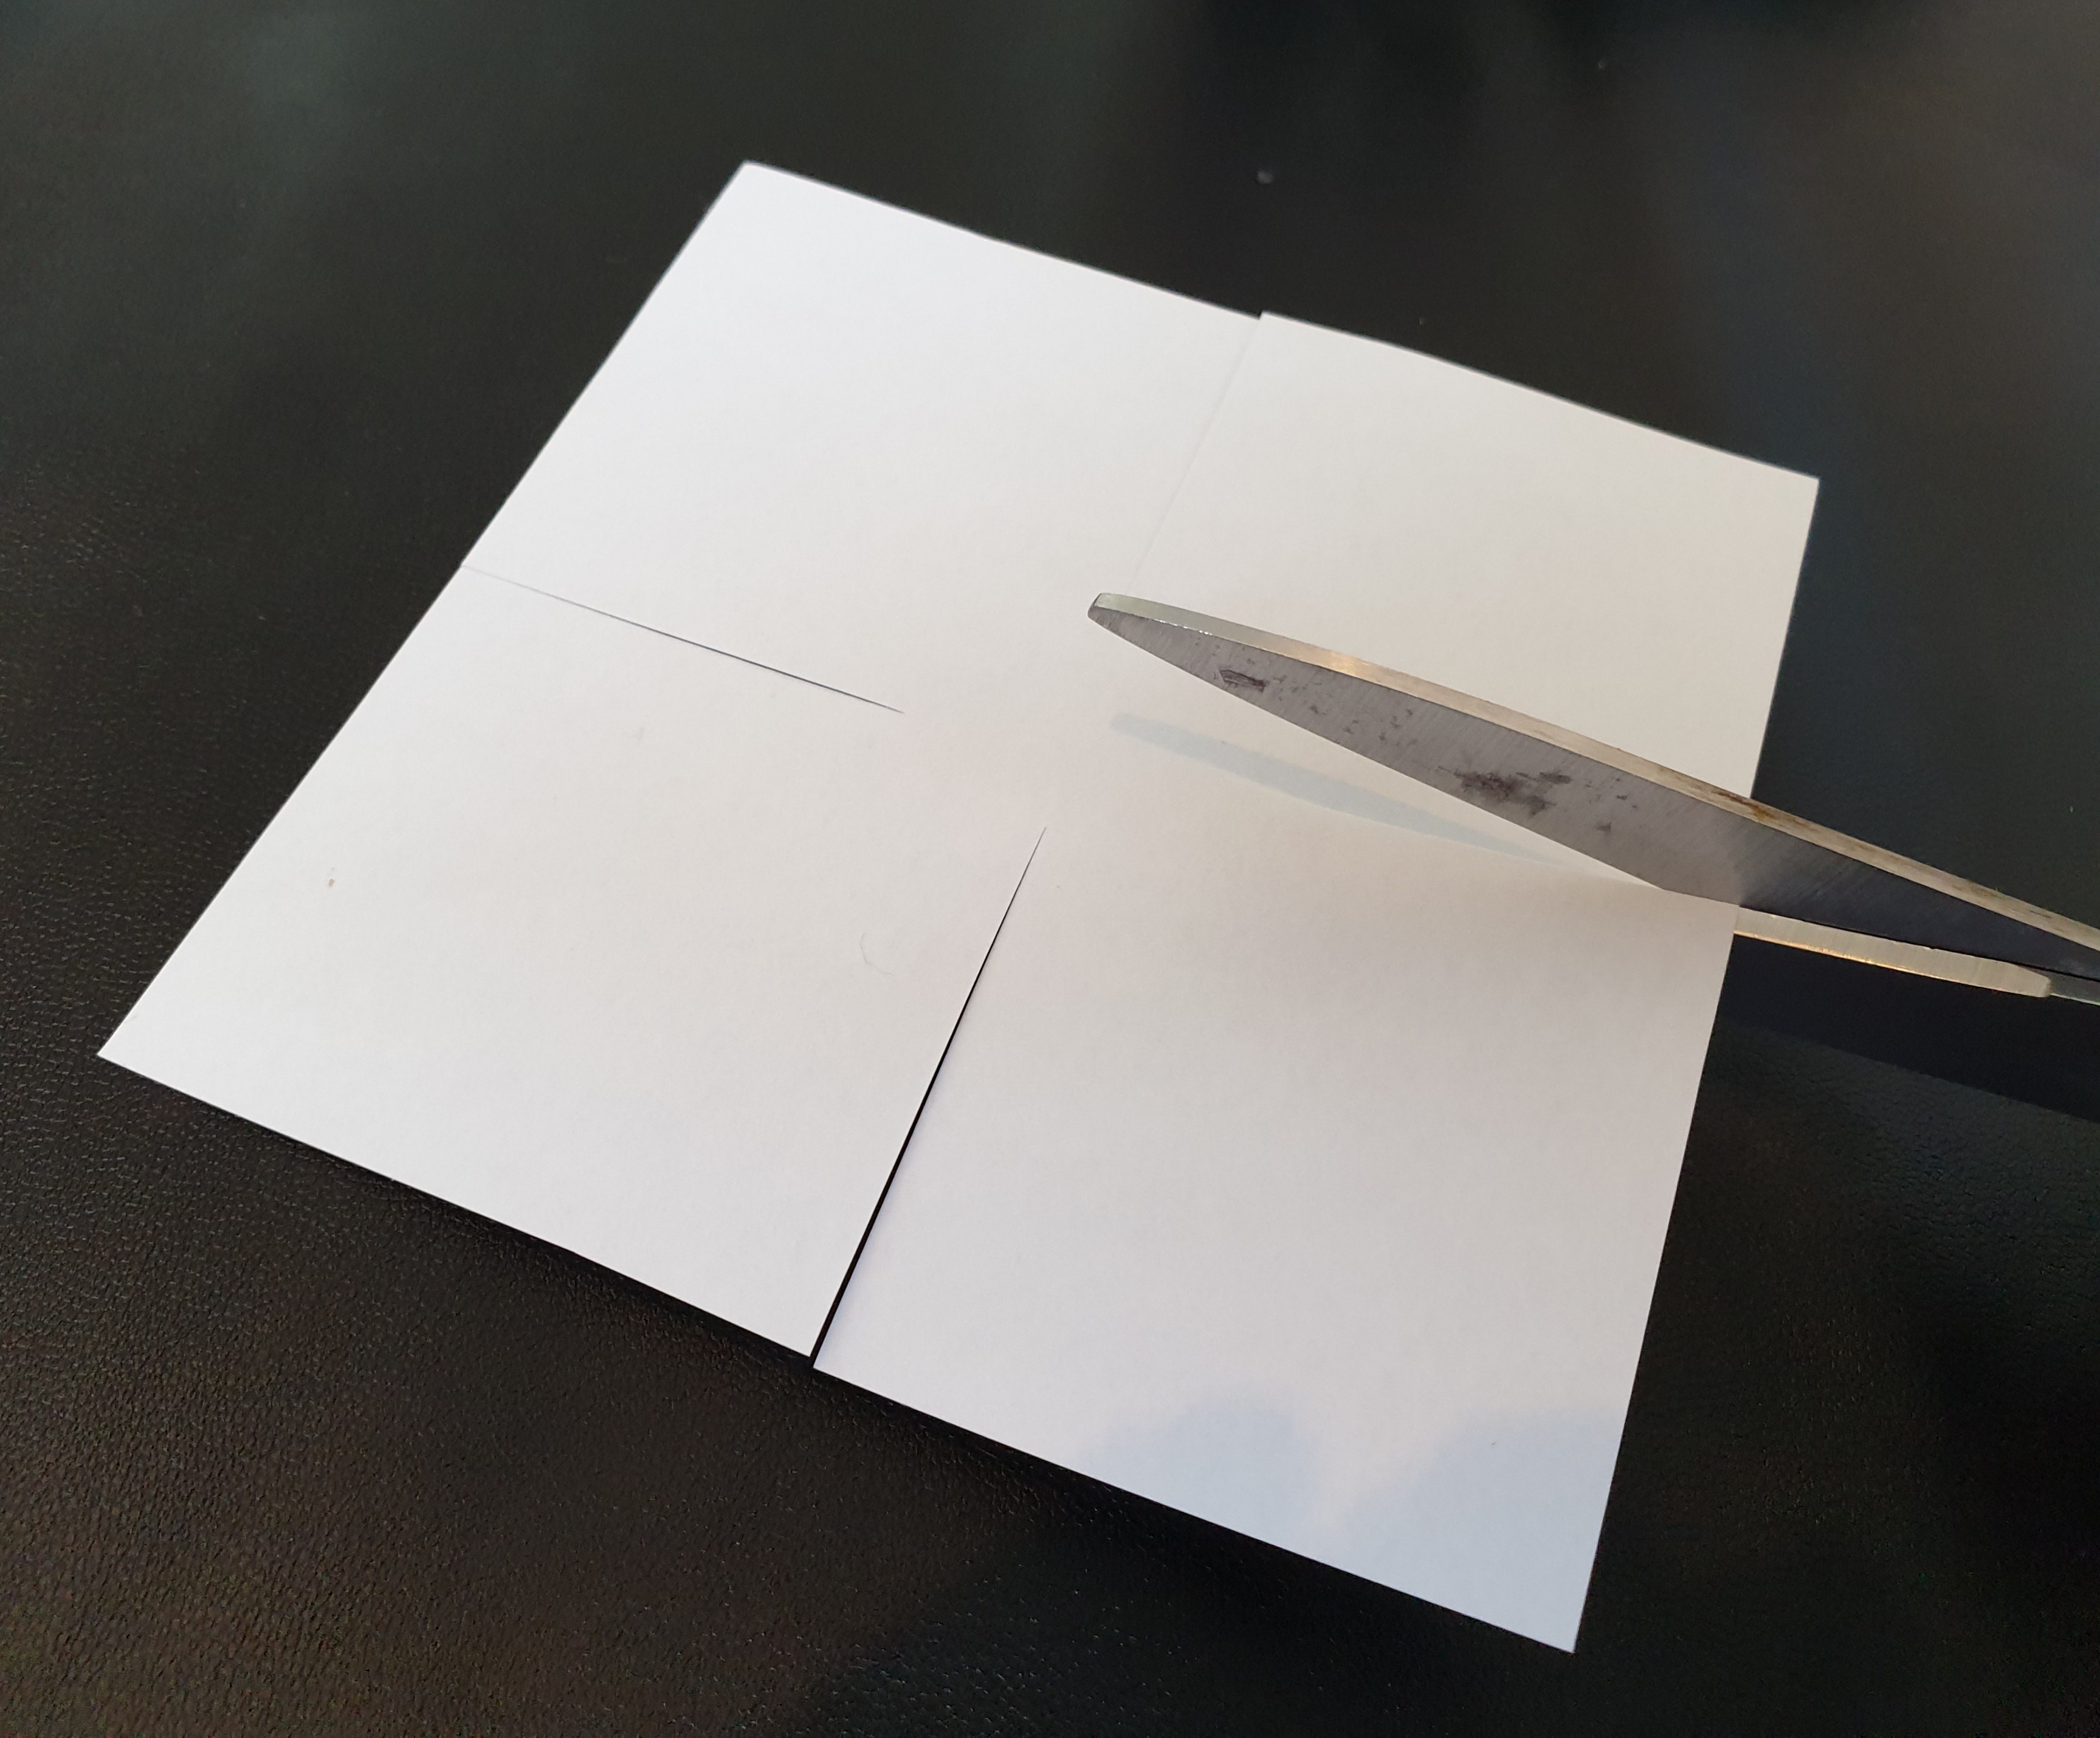
Then, cut into the squares and round the edges as the images below show.
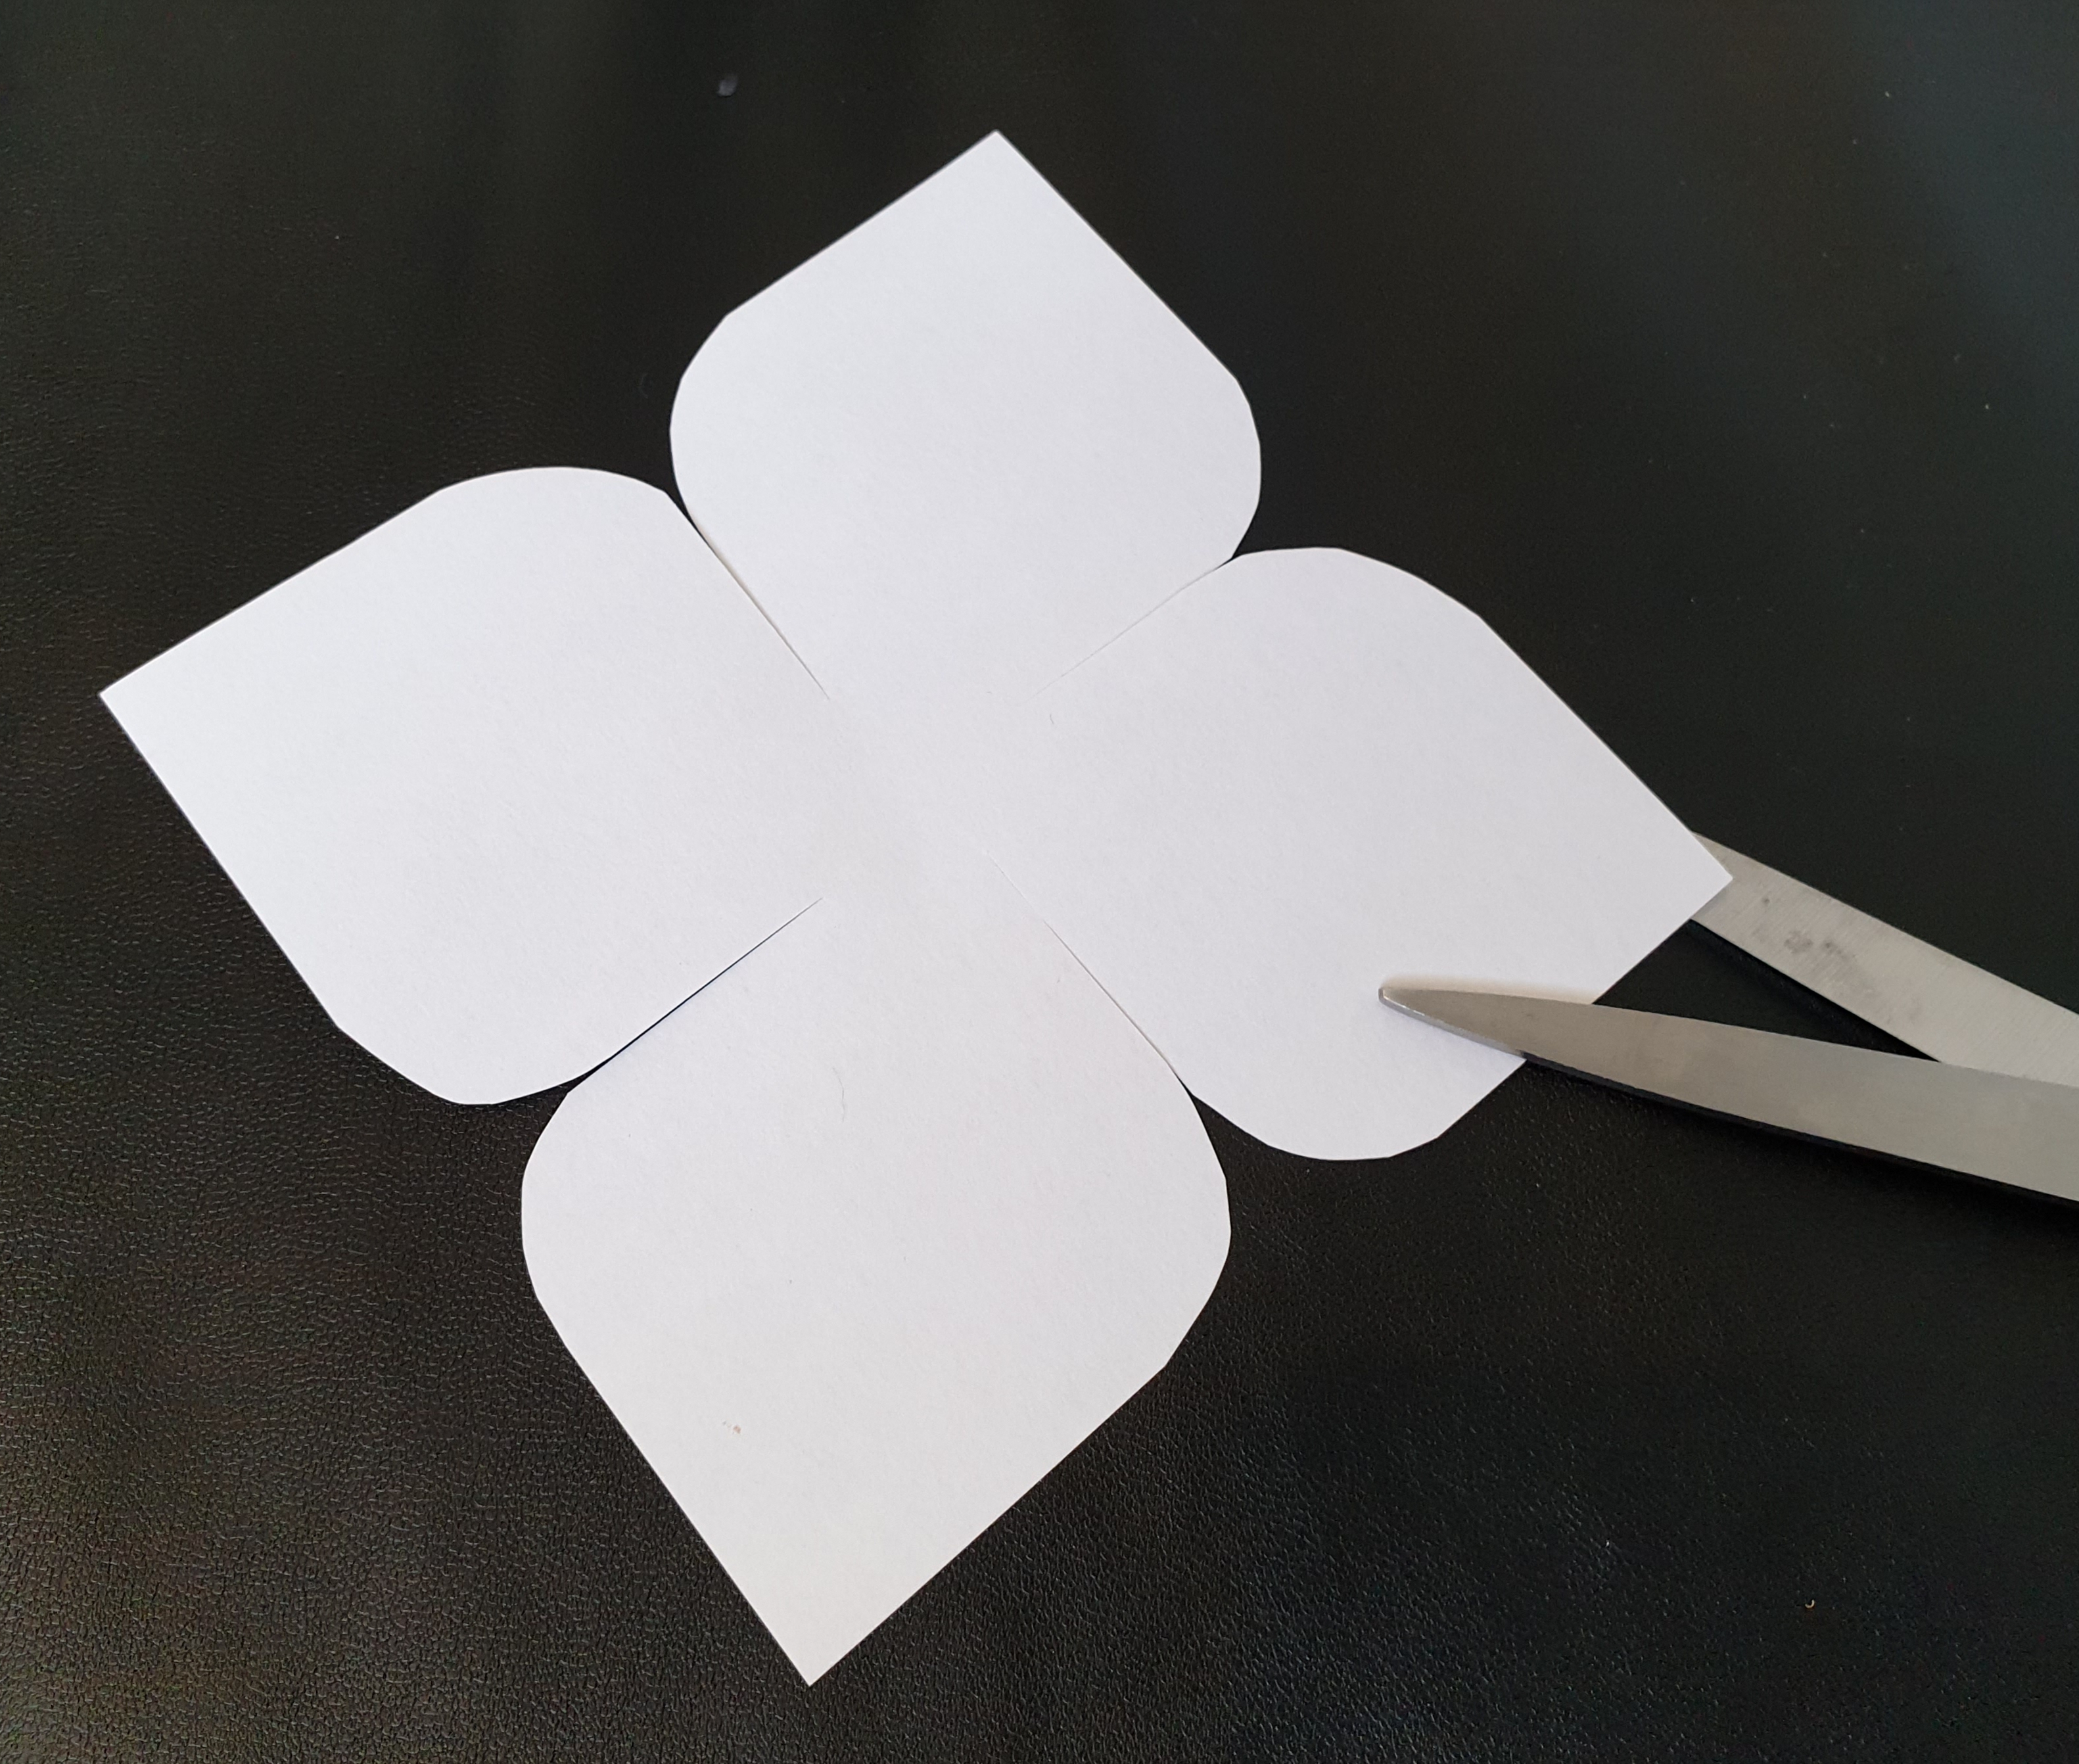
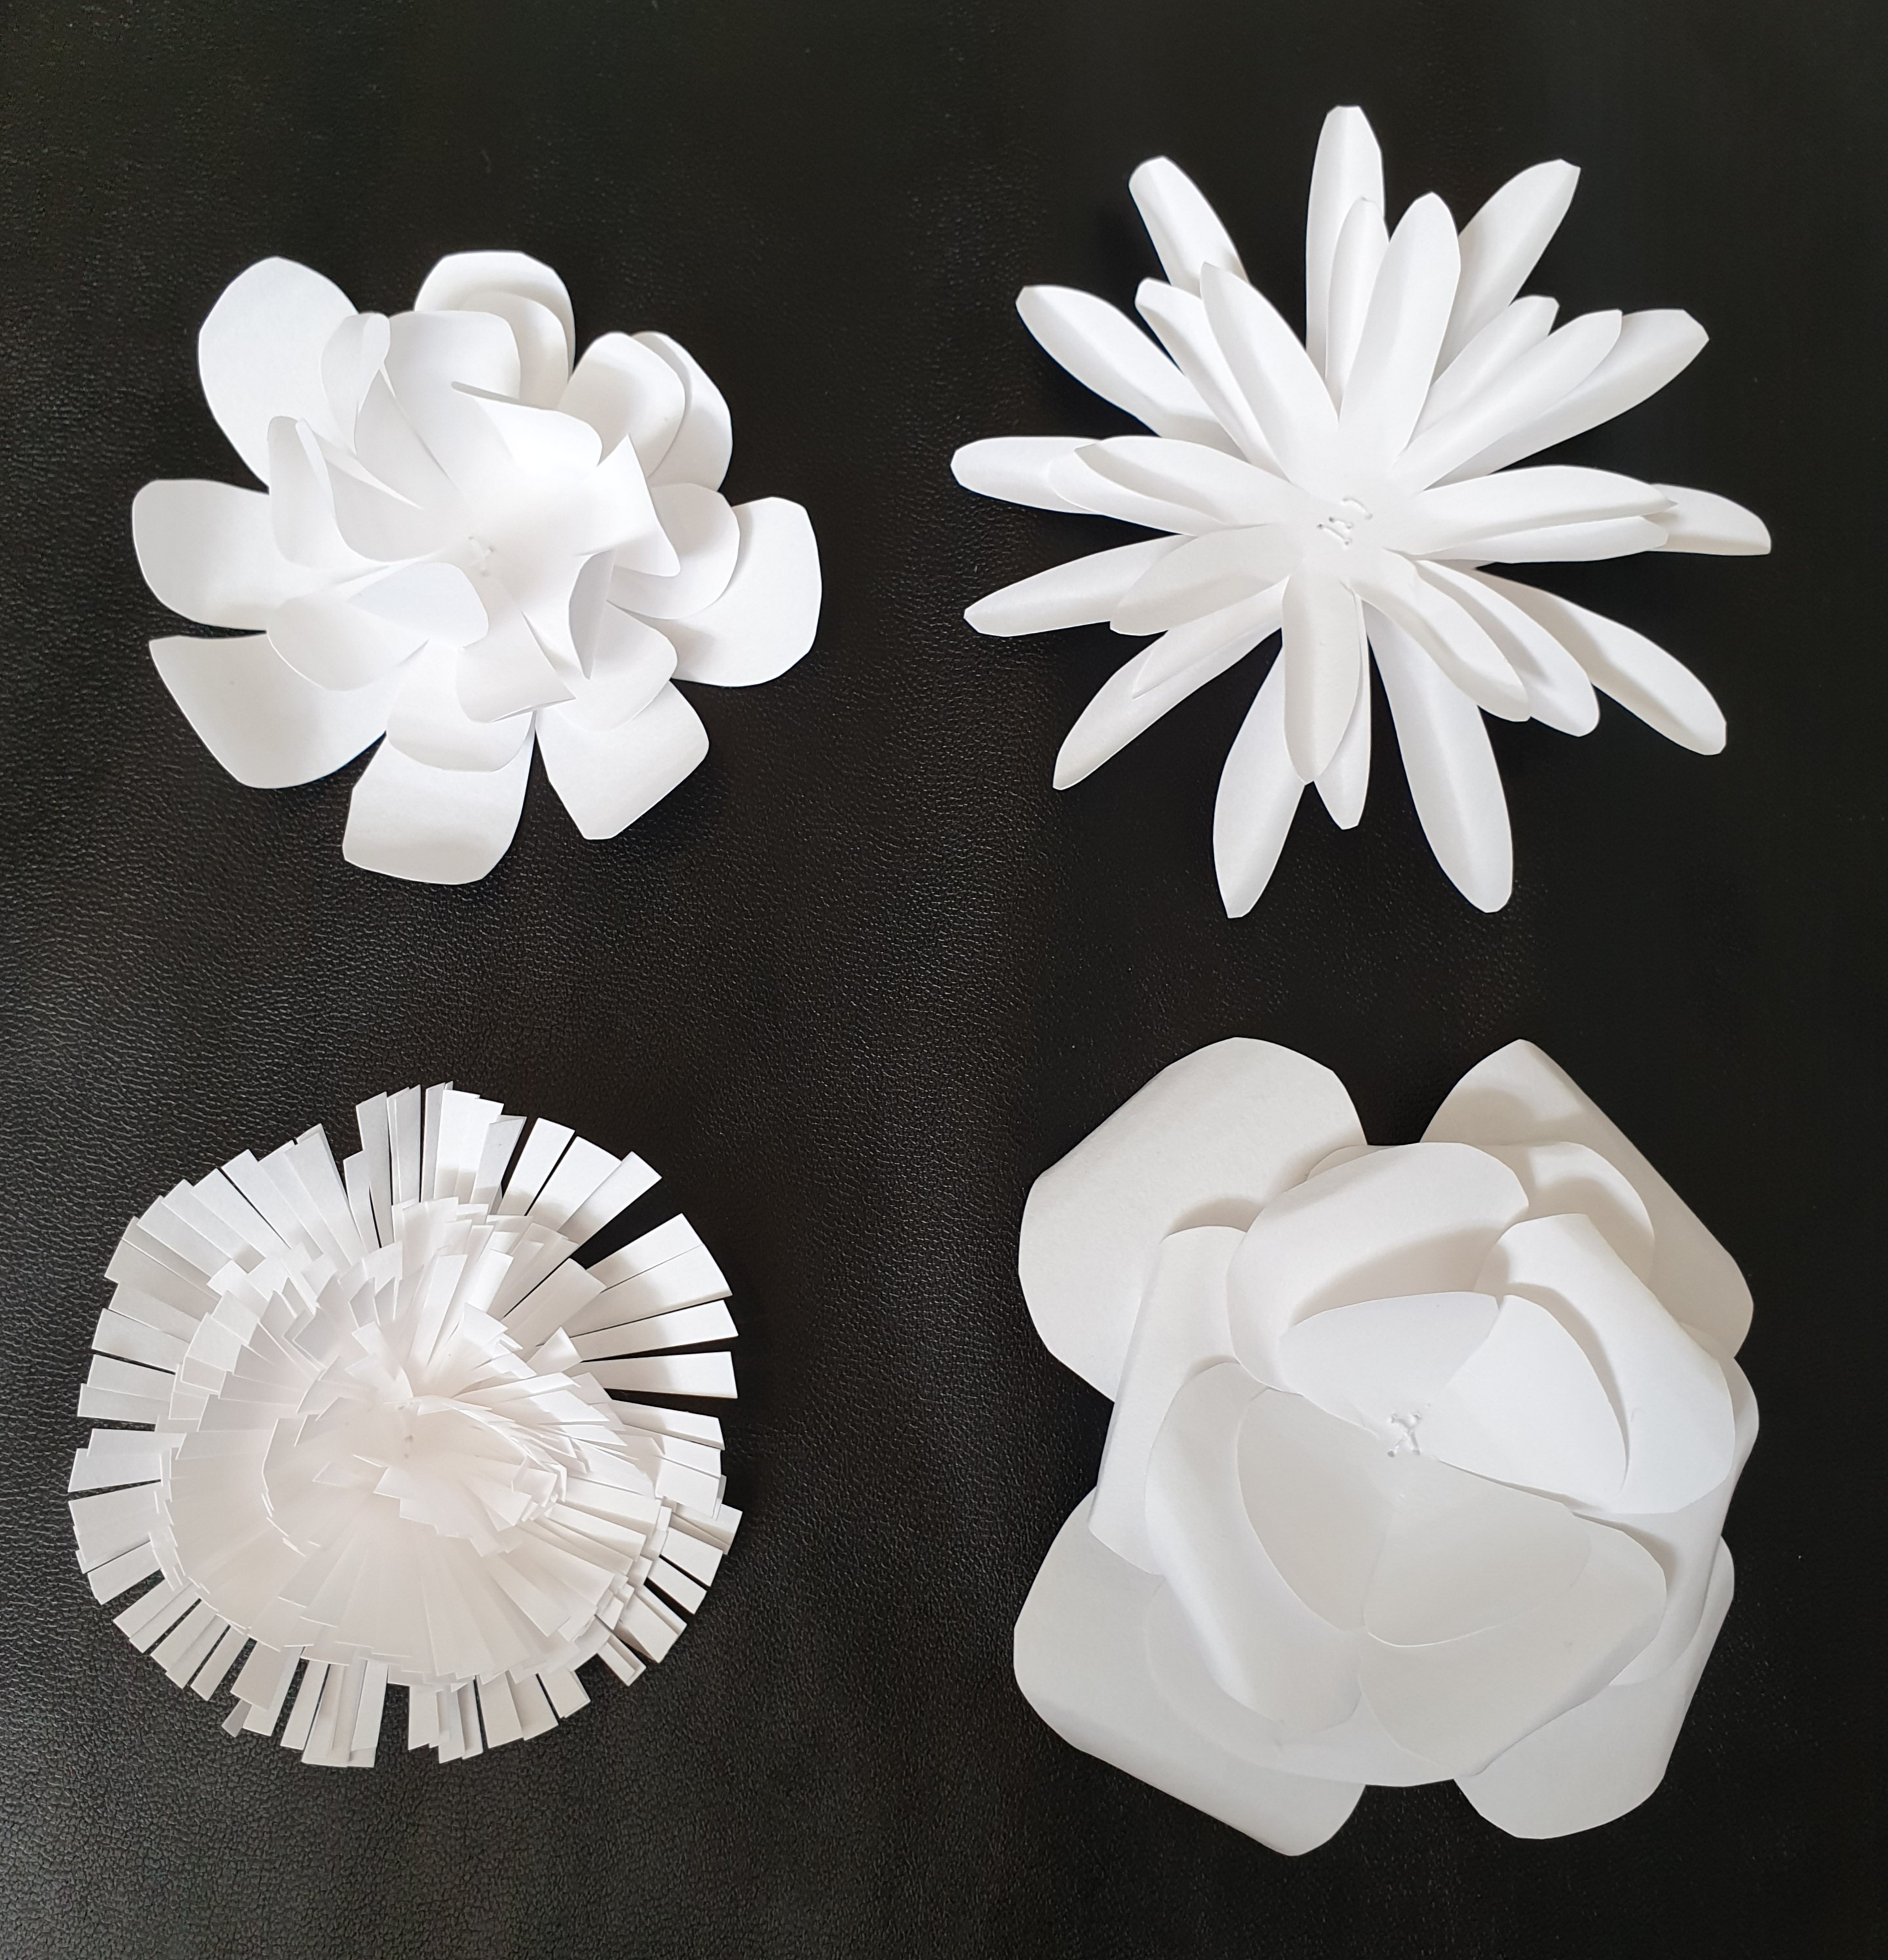
You can now start to shape the paper to create your petals. I used a pen and my fingers to curve and curl the paper.
Once all the petals have been shaped, it is time to stack them on top of each other. The largest at the back and smallest at the front. Ensure all the petals are spread out evenly.
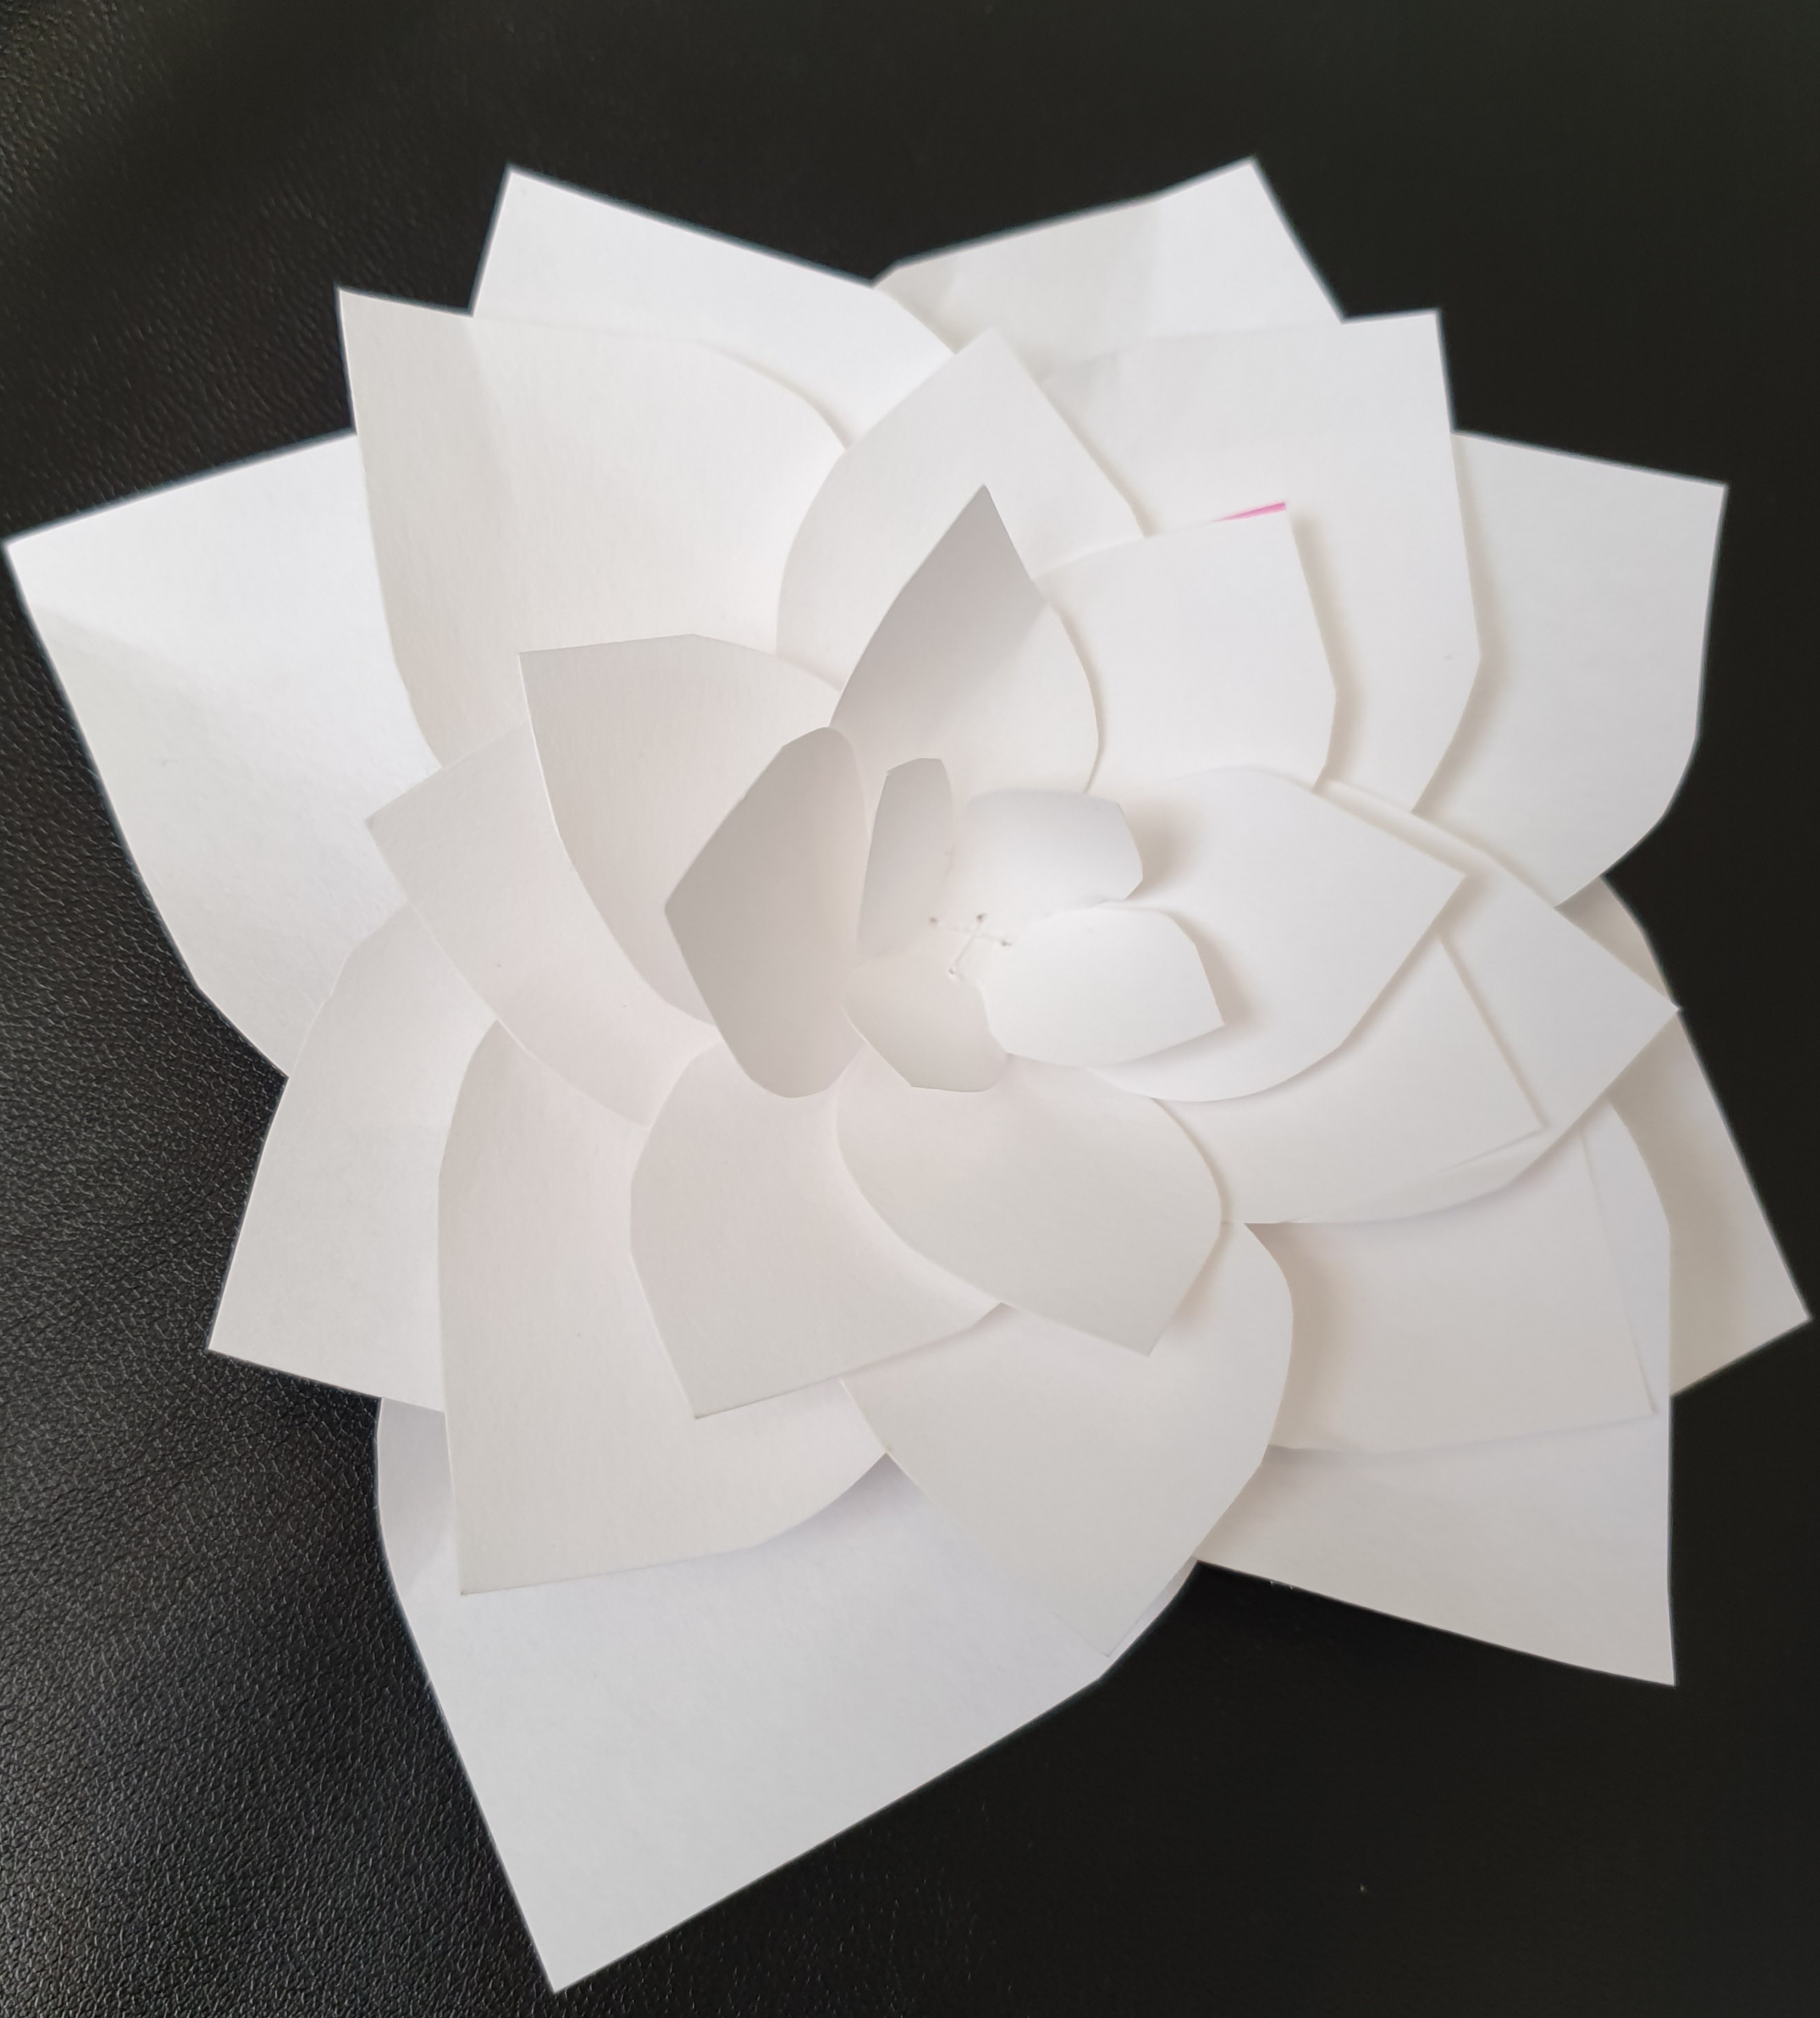
You can now either glue all the pieces together in the middle, or you can stitch them together. Gluing will keep the pieces in place better, but stitching will still work if you don’t have glue to hand.
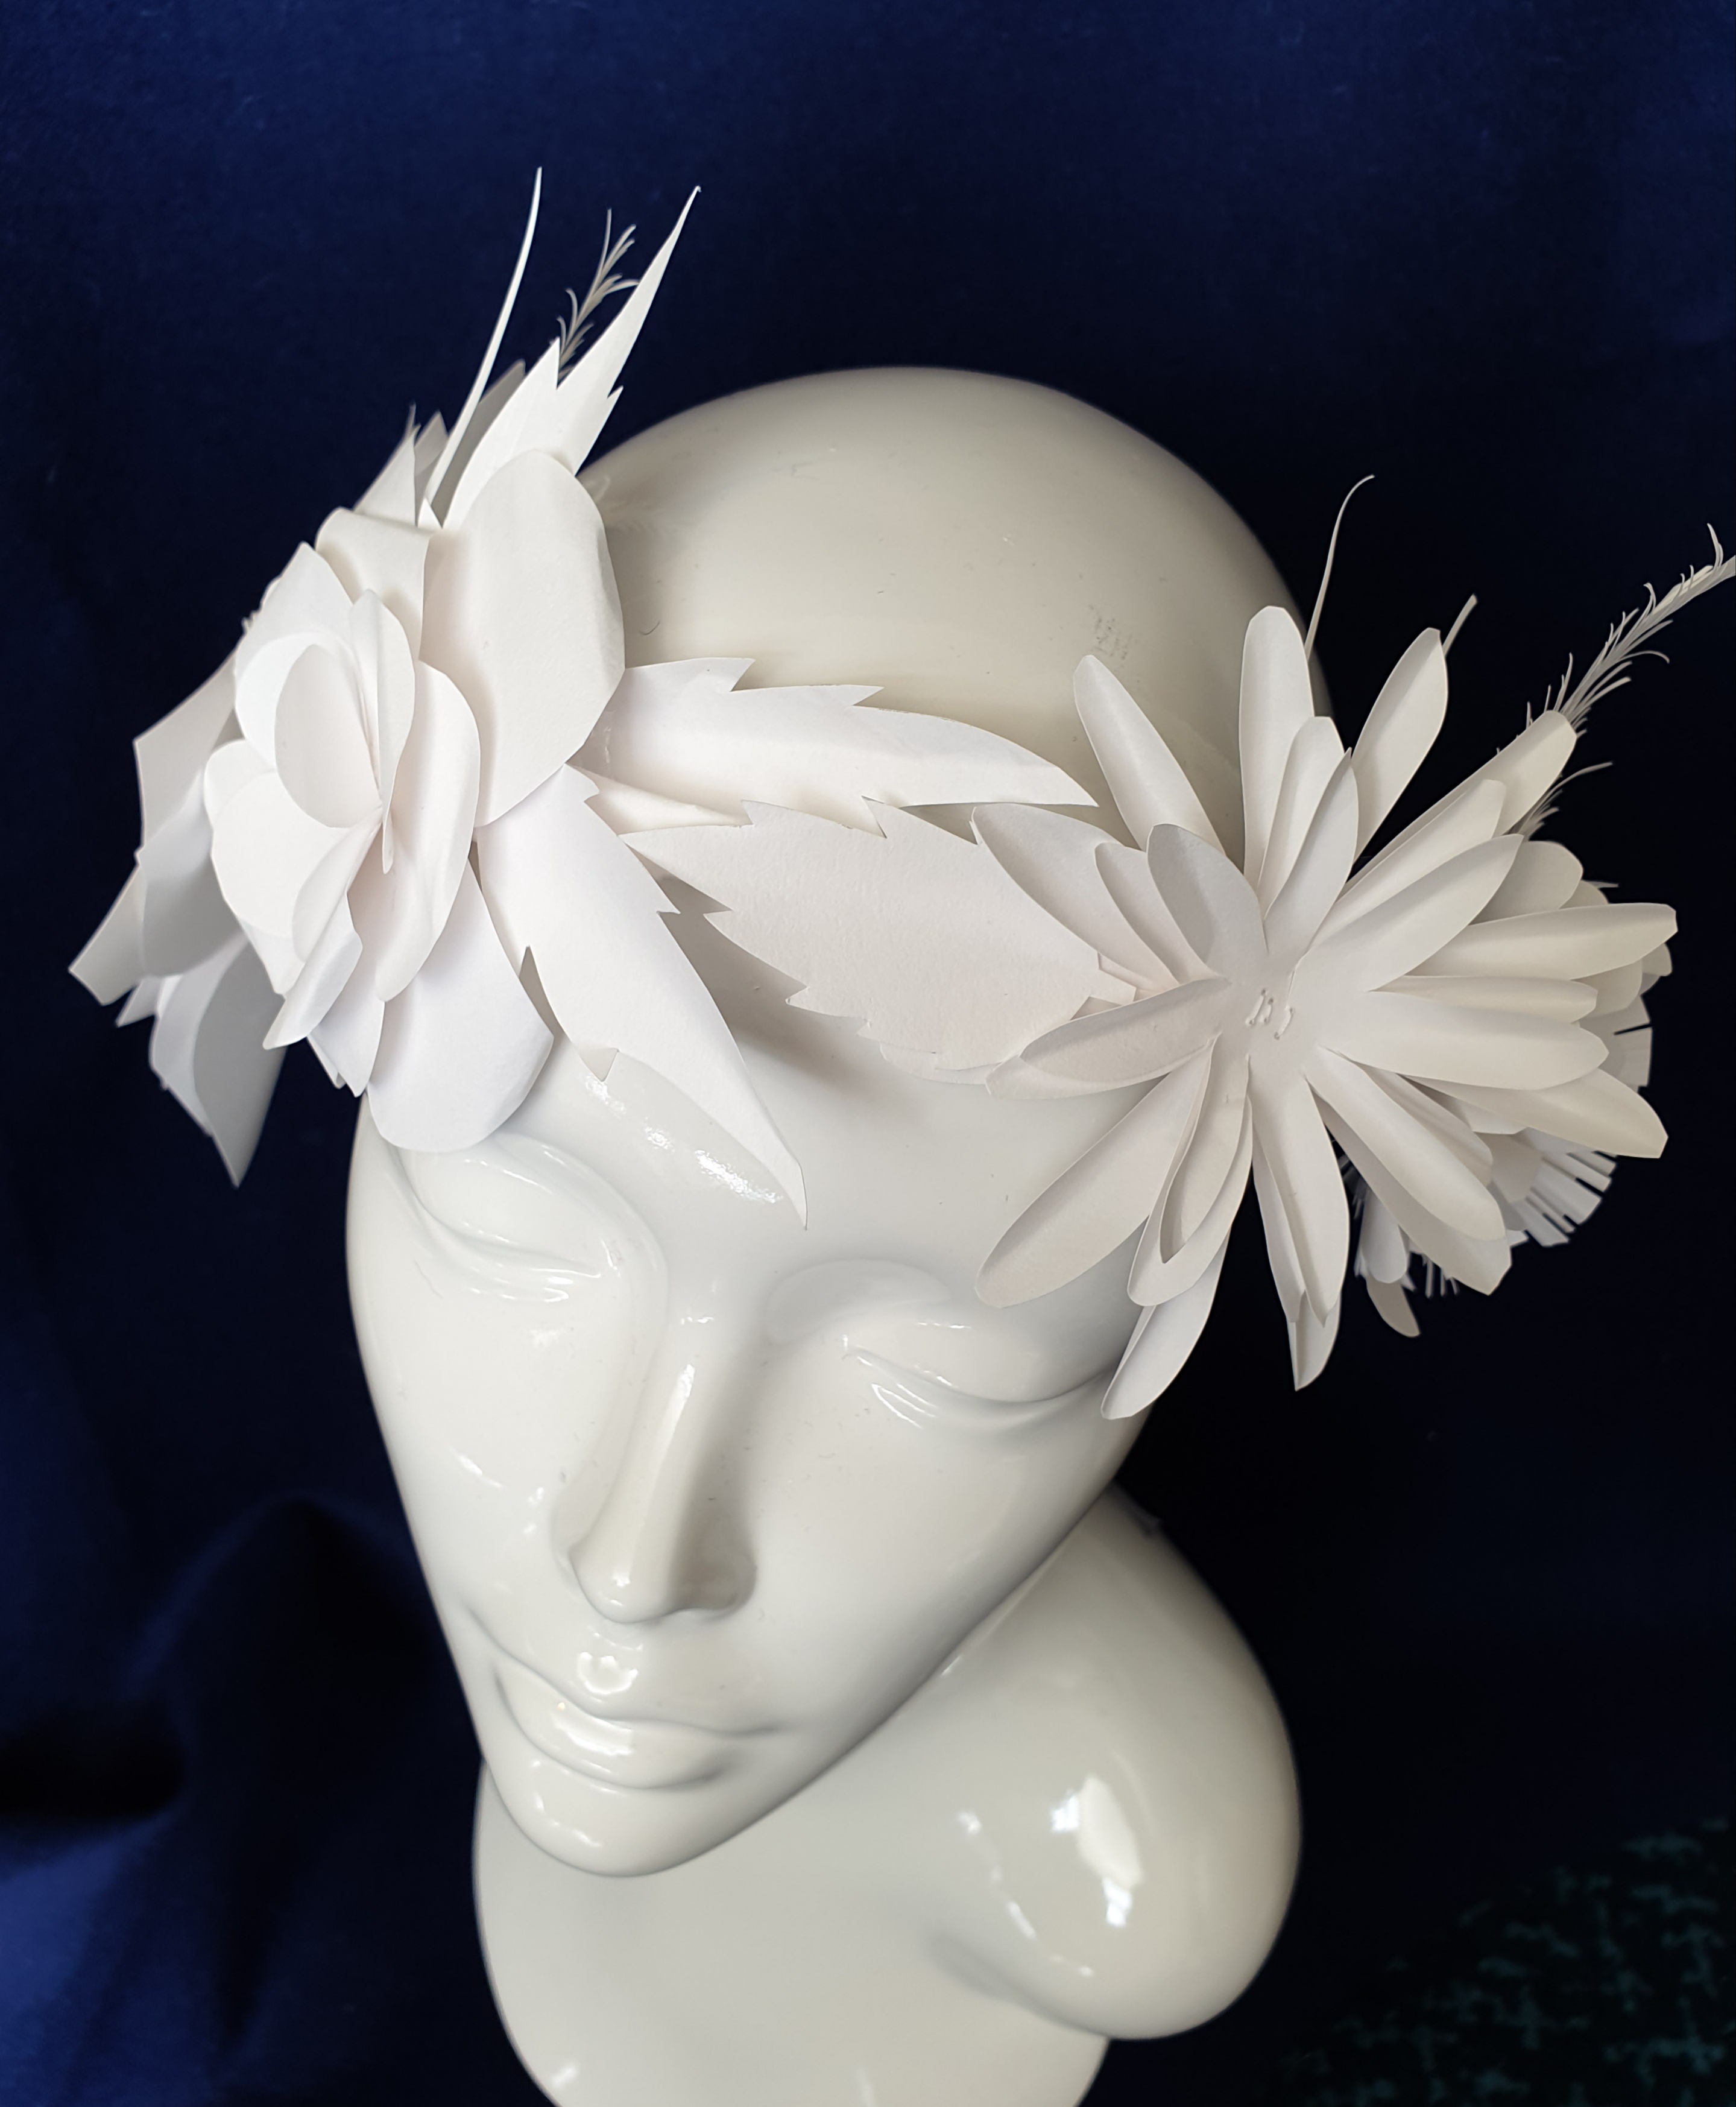
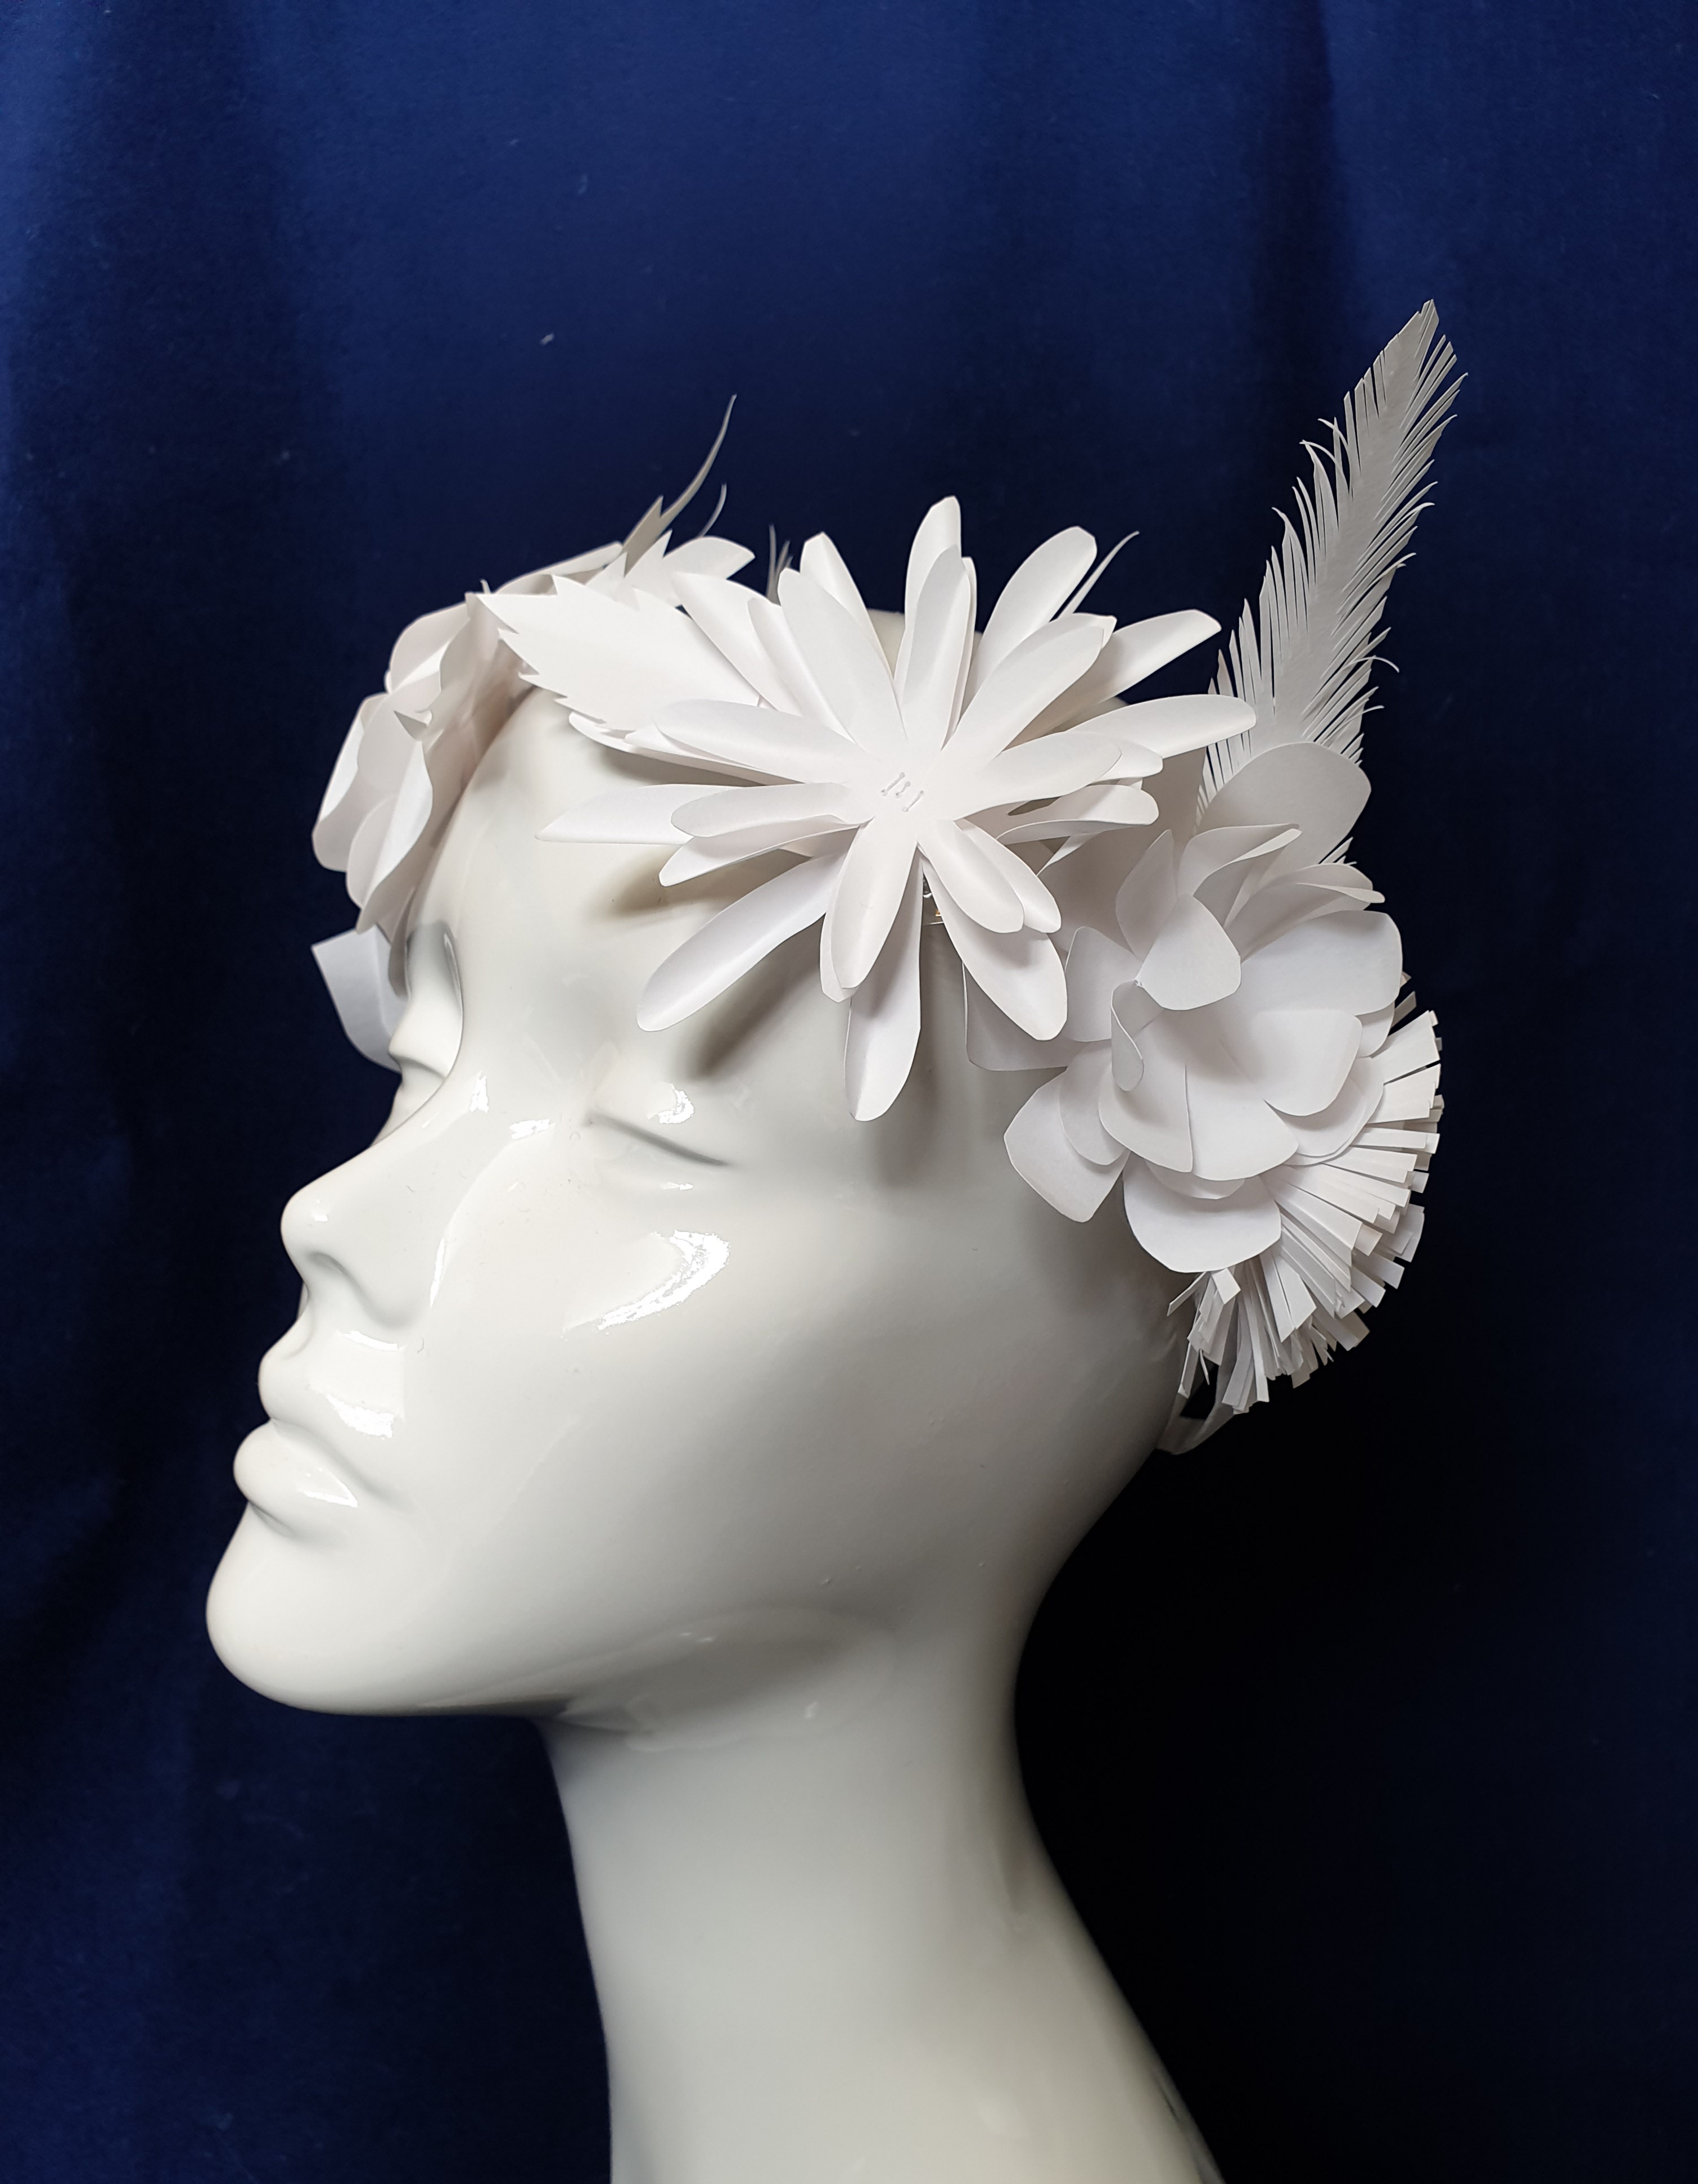
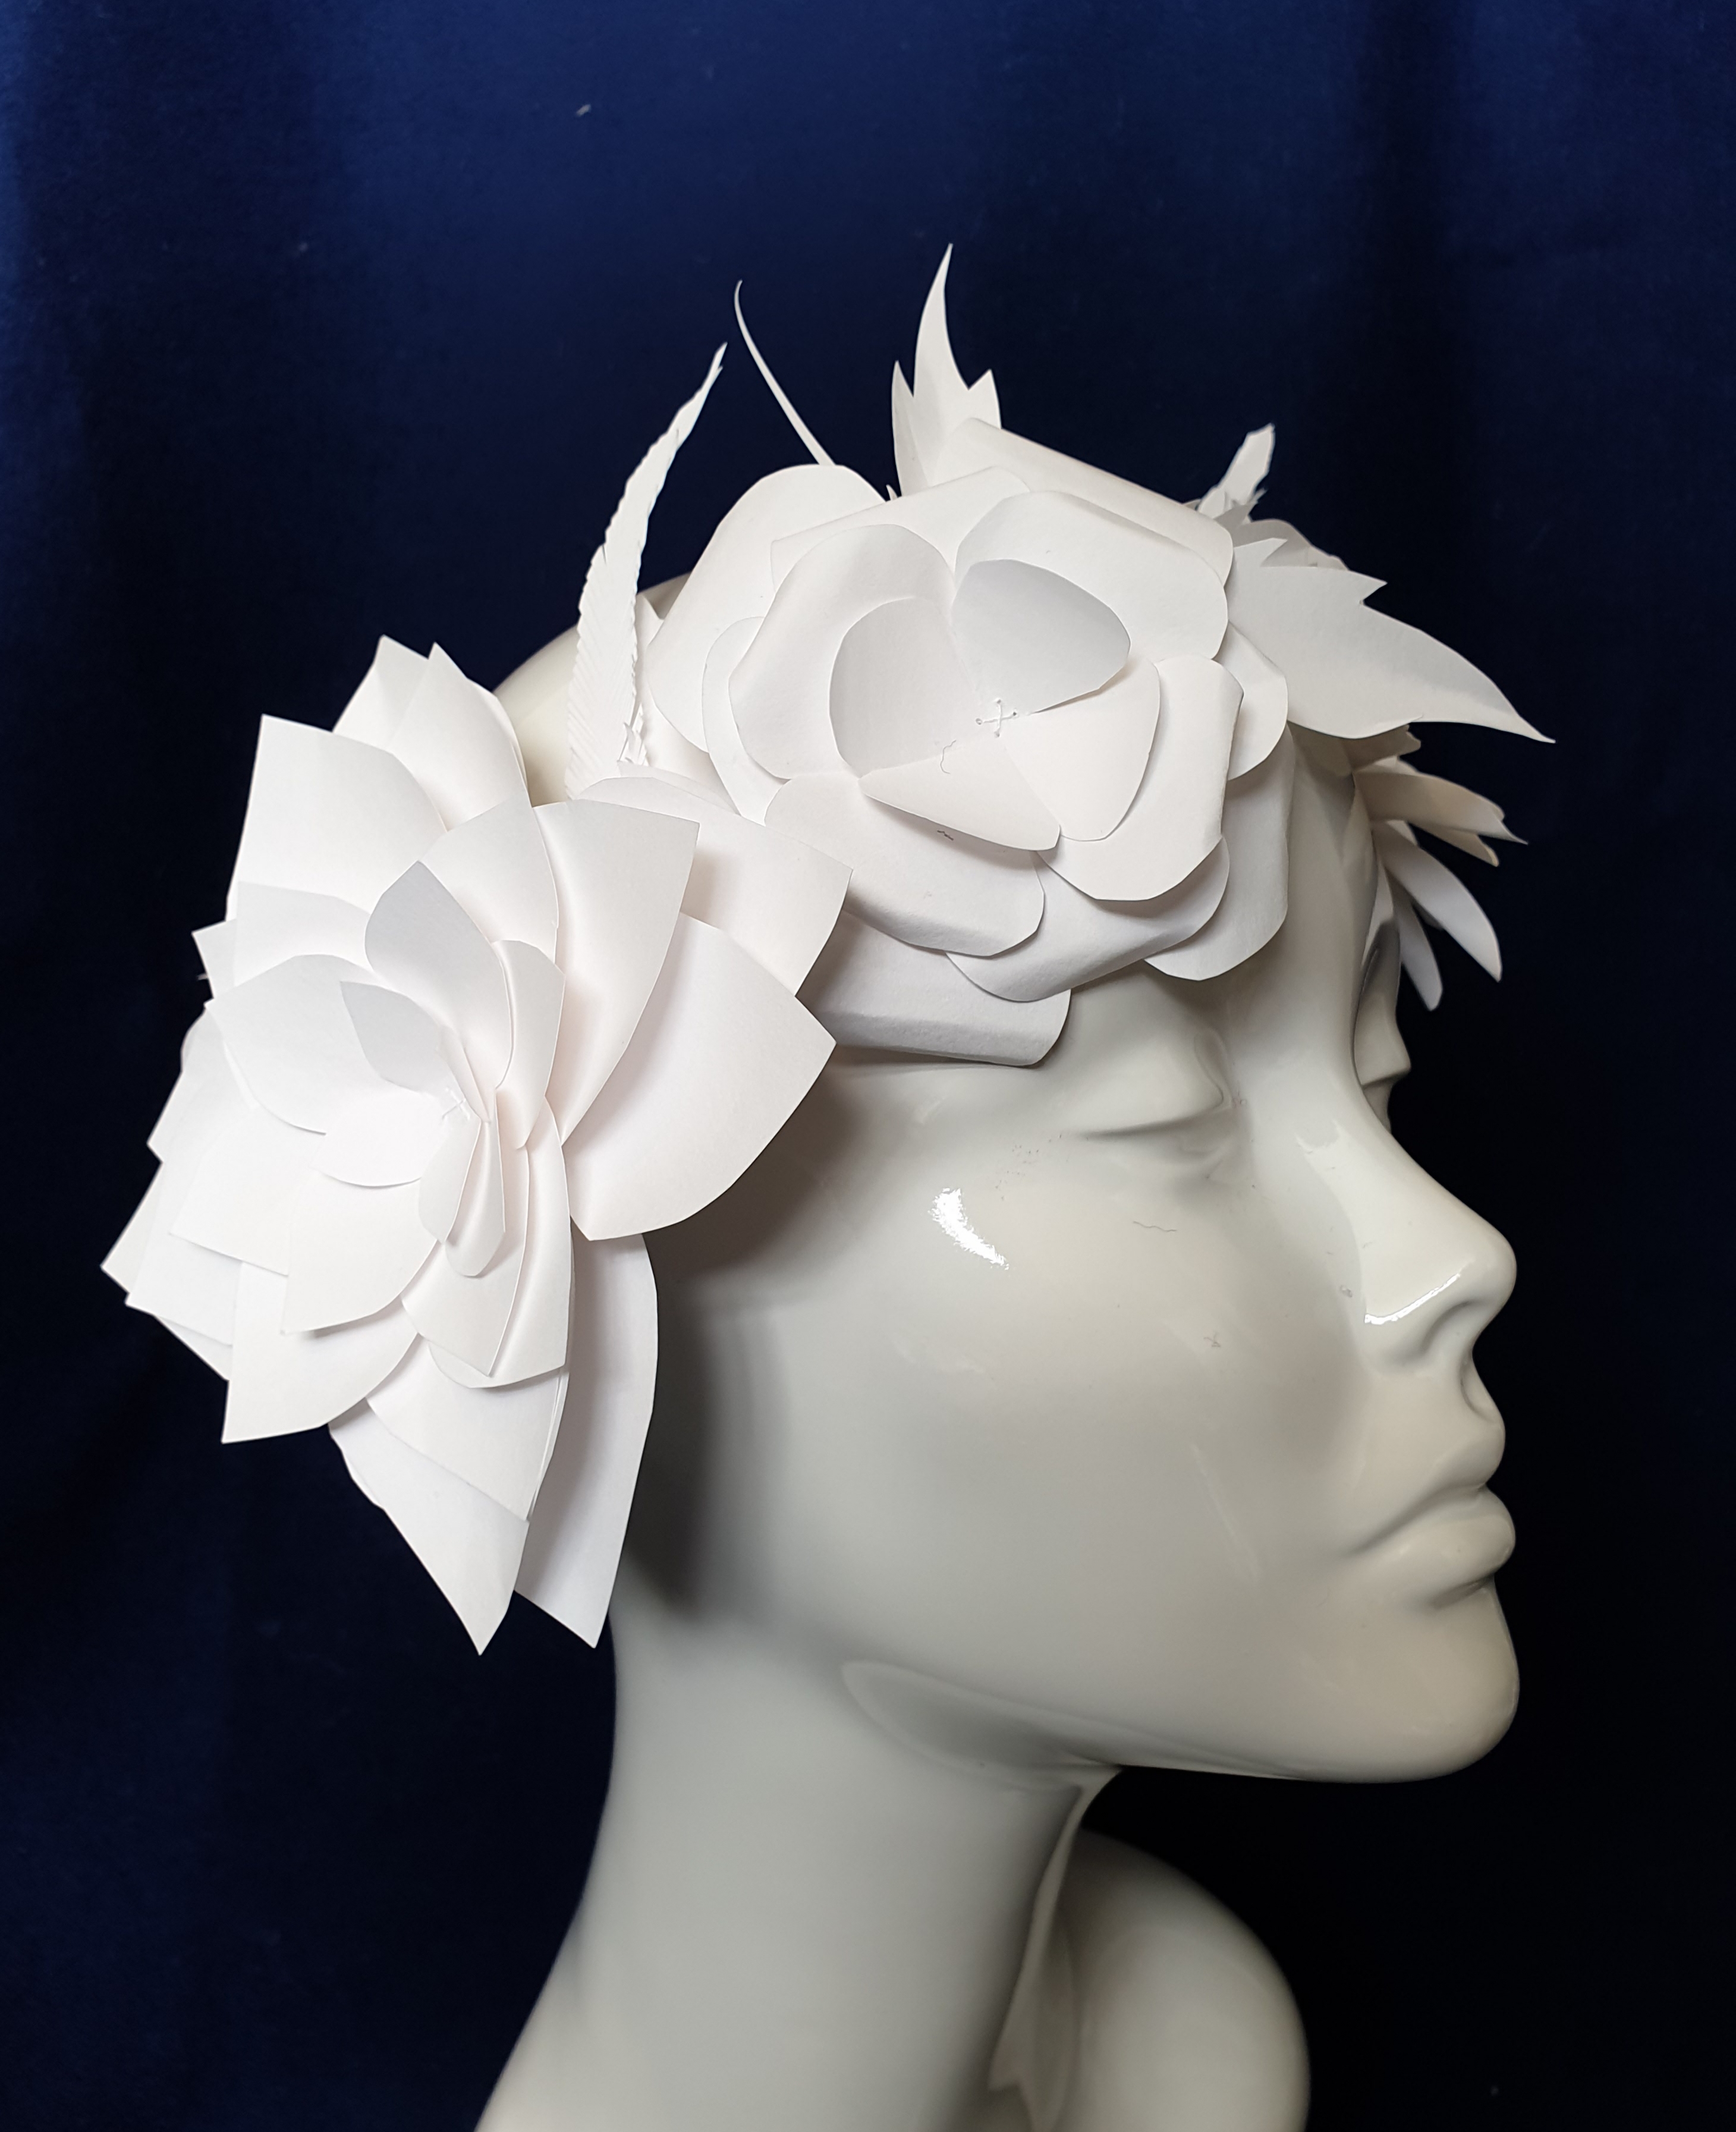
Now you have completed a basic flower, you can begin to experiment and adapt the process to create your own designs. Try different shape petals, sizes and quantities. Mix and match petal designs in each flower head for different looks.
When you have made enough flowers for your crown (you can make as many or as few as you like), you can then create some leaves and feathers.
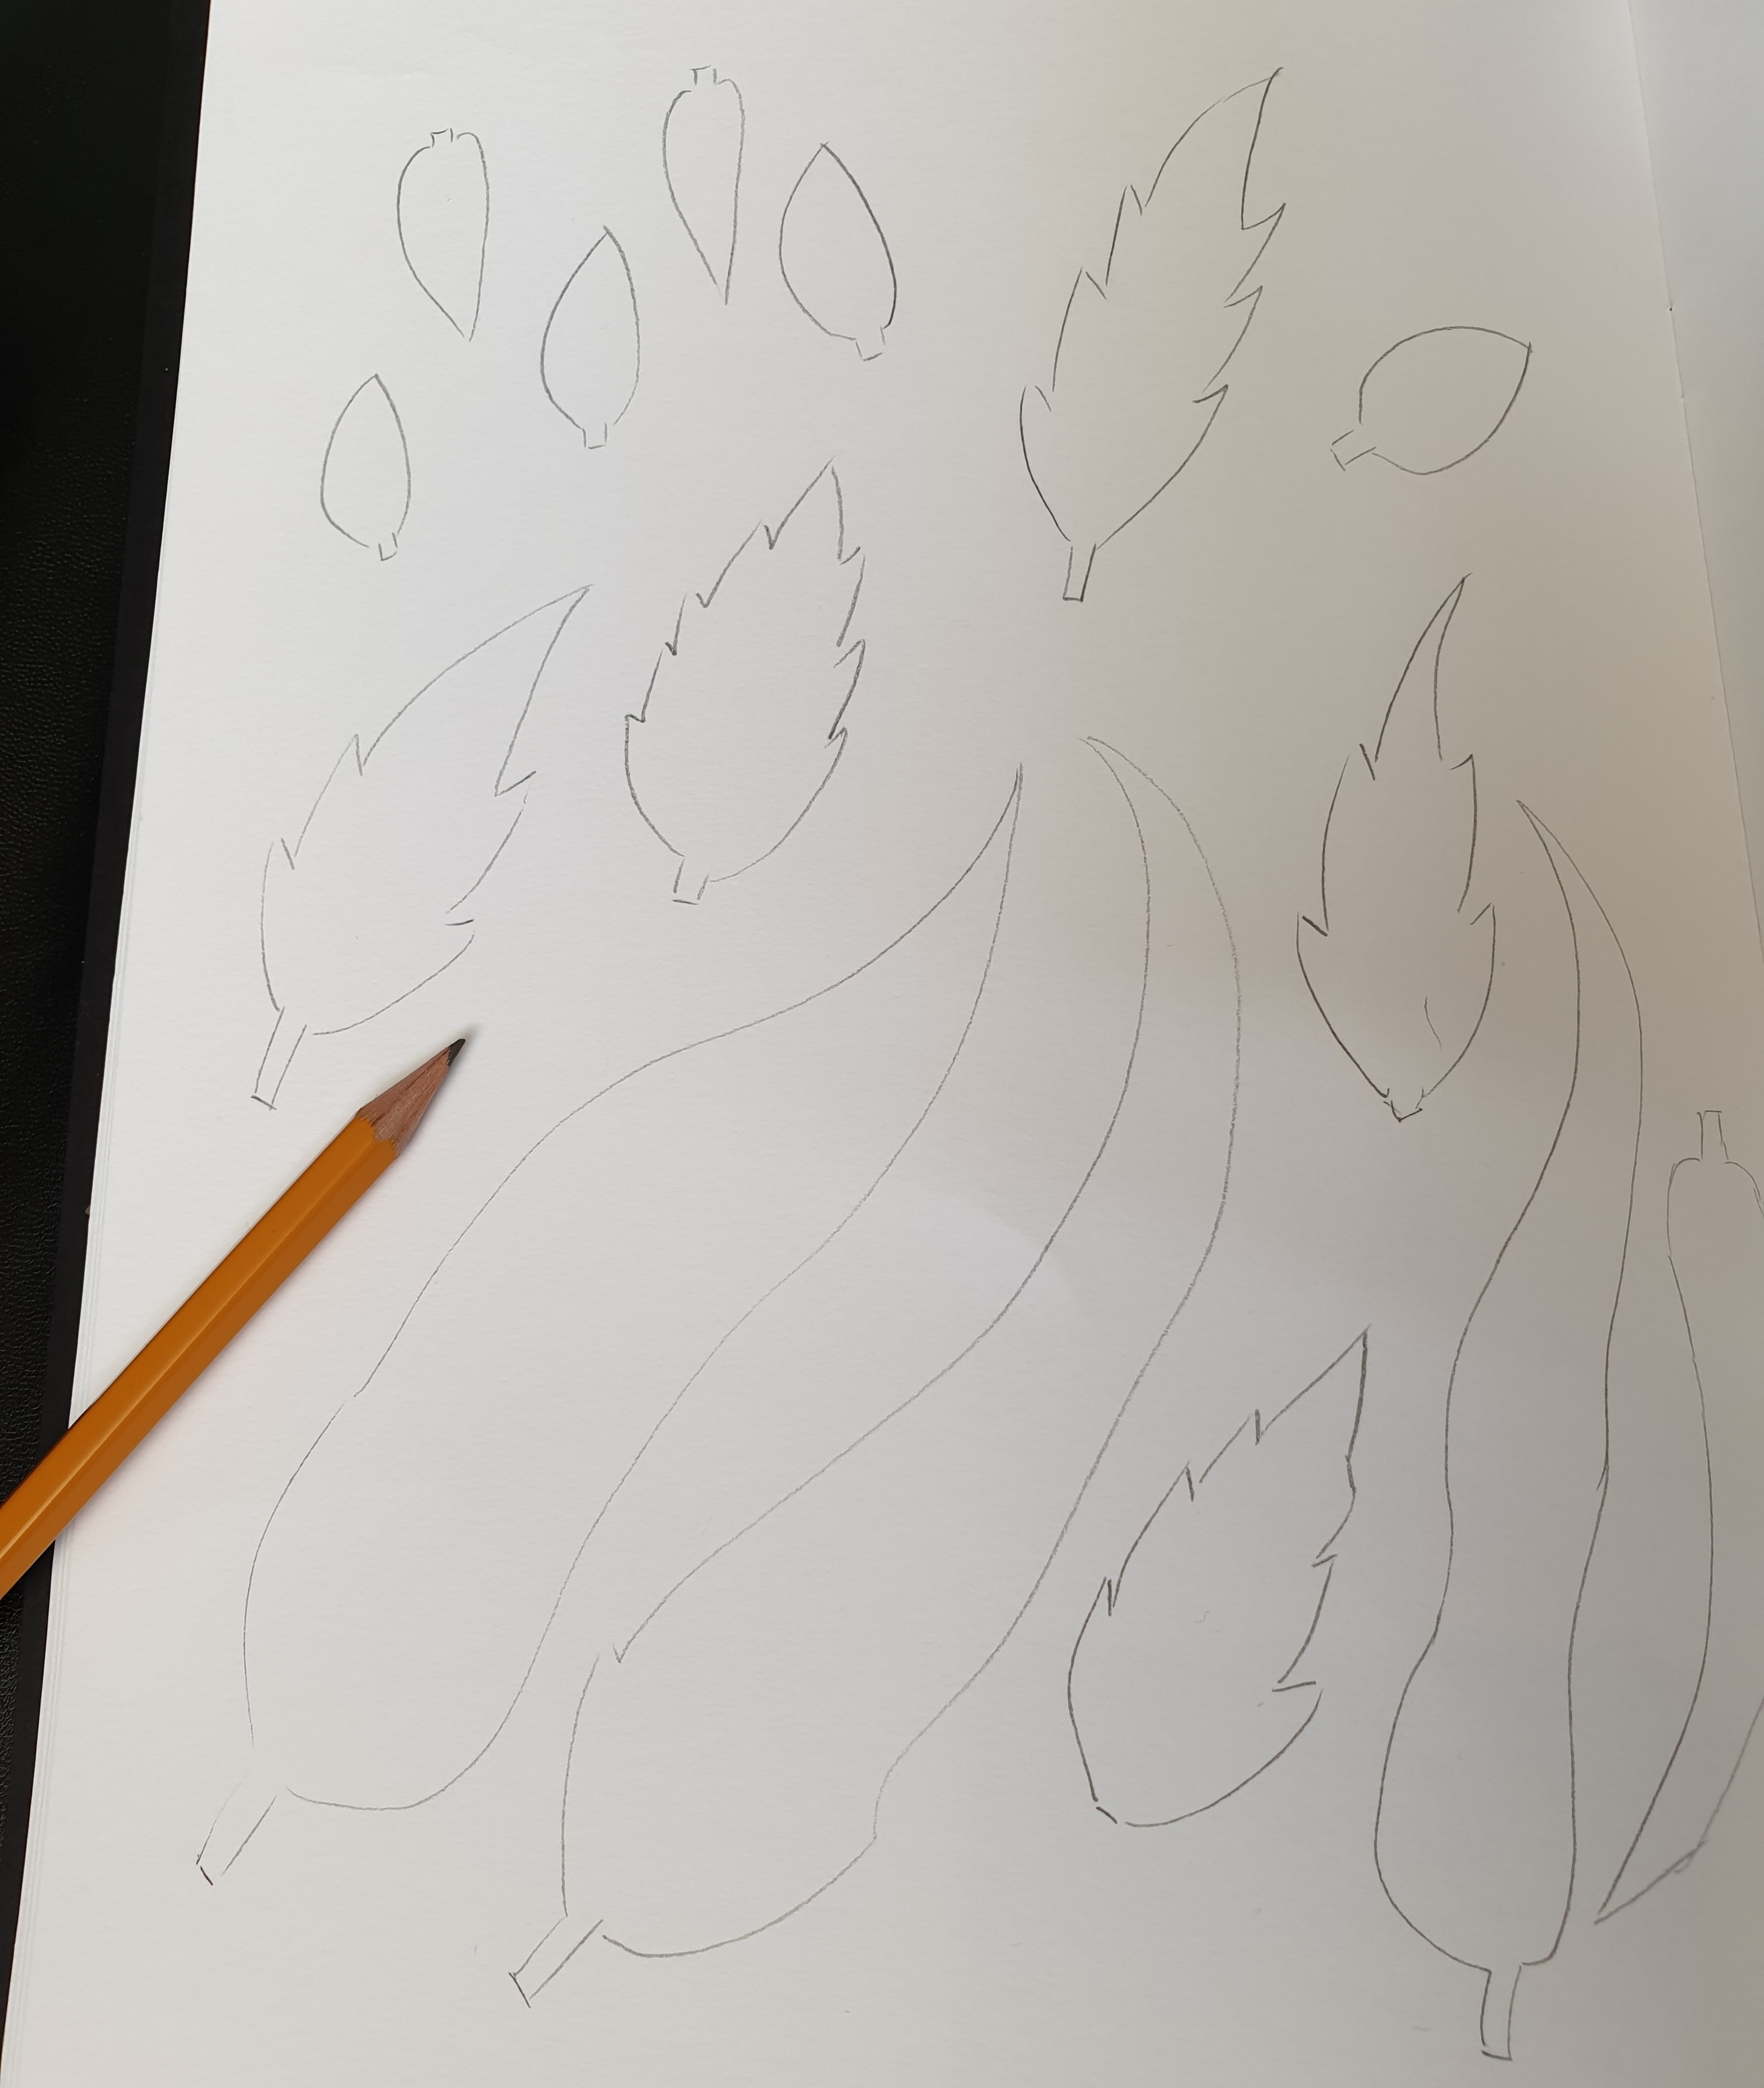
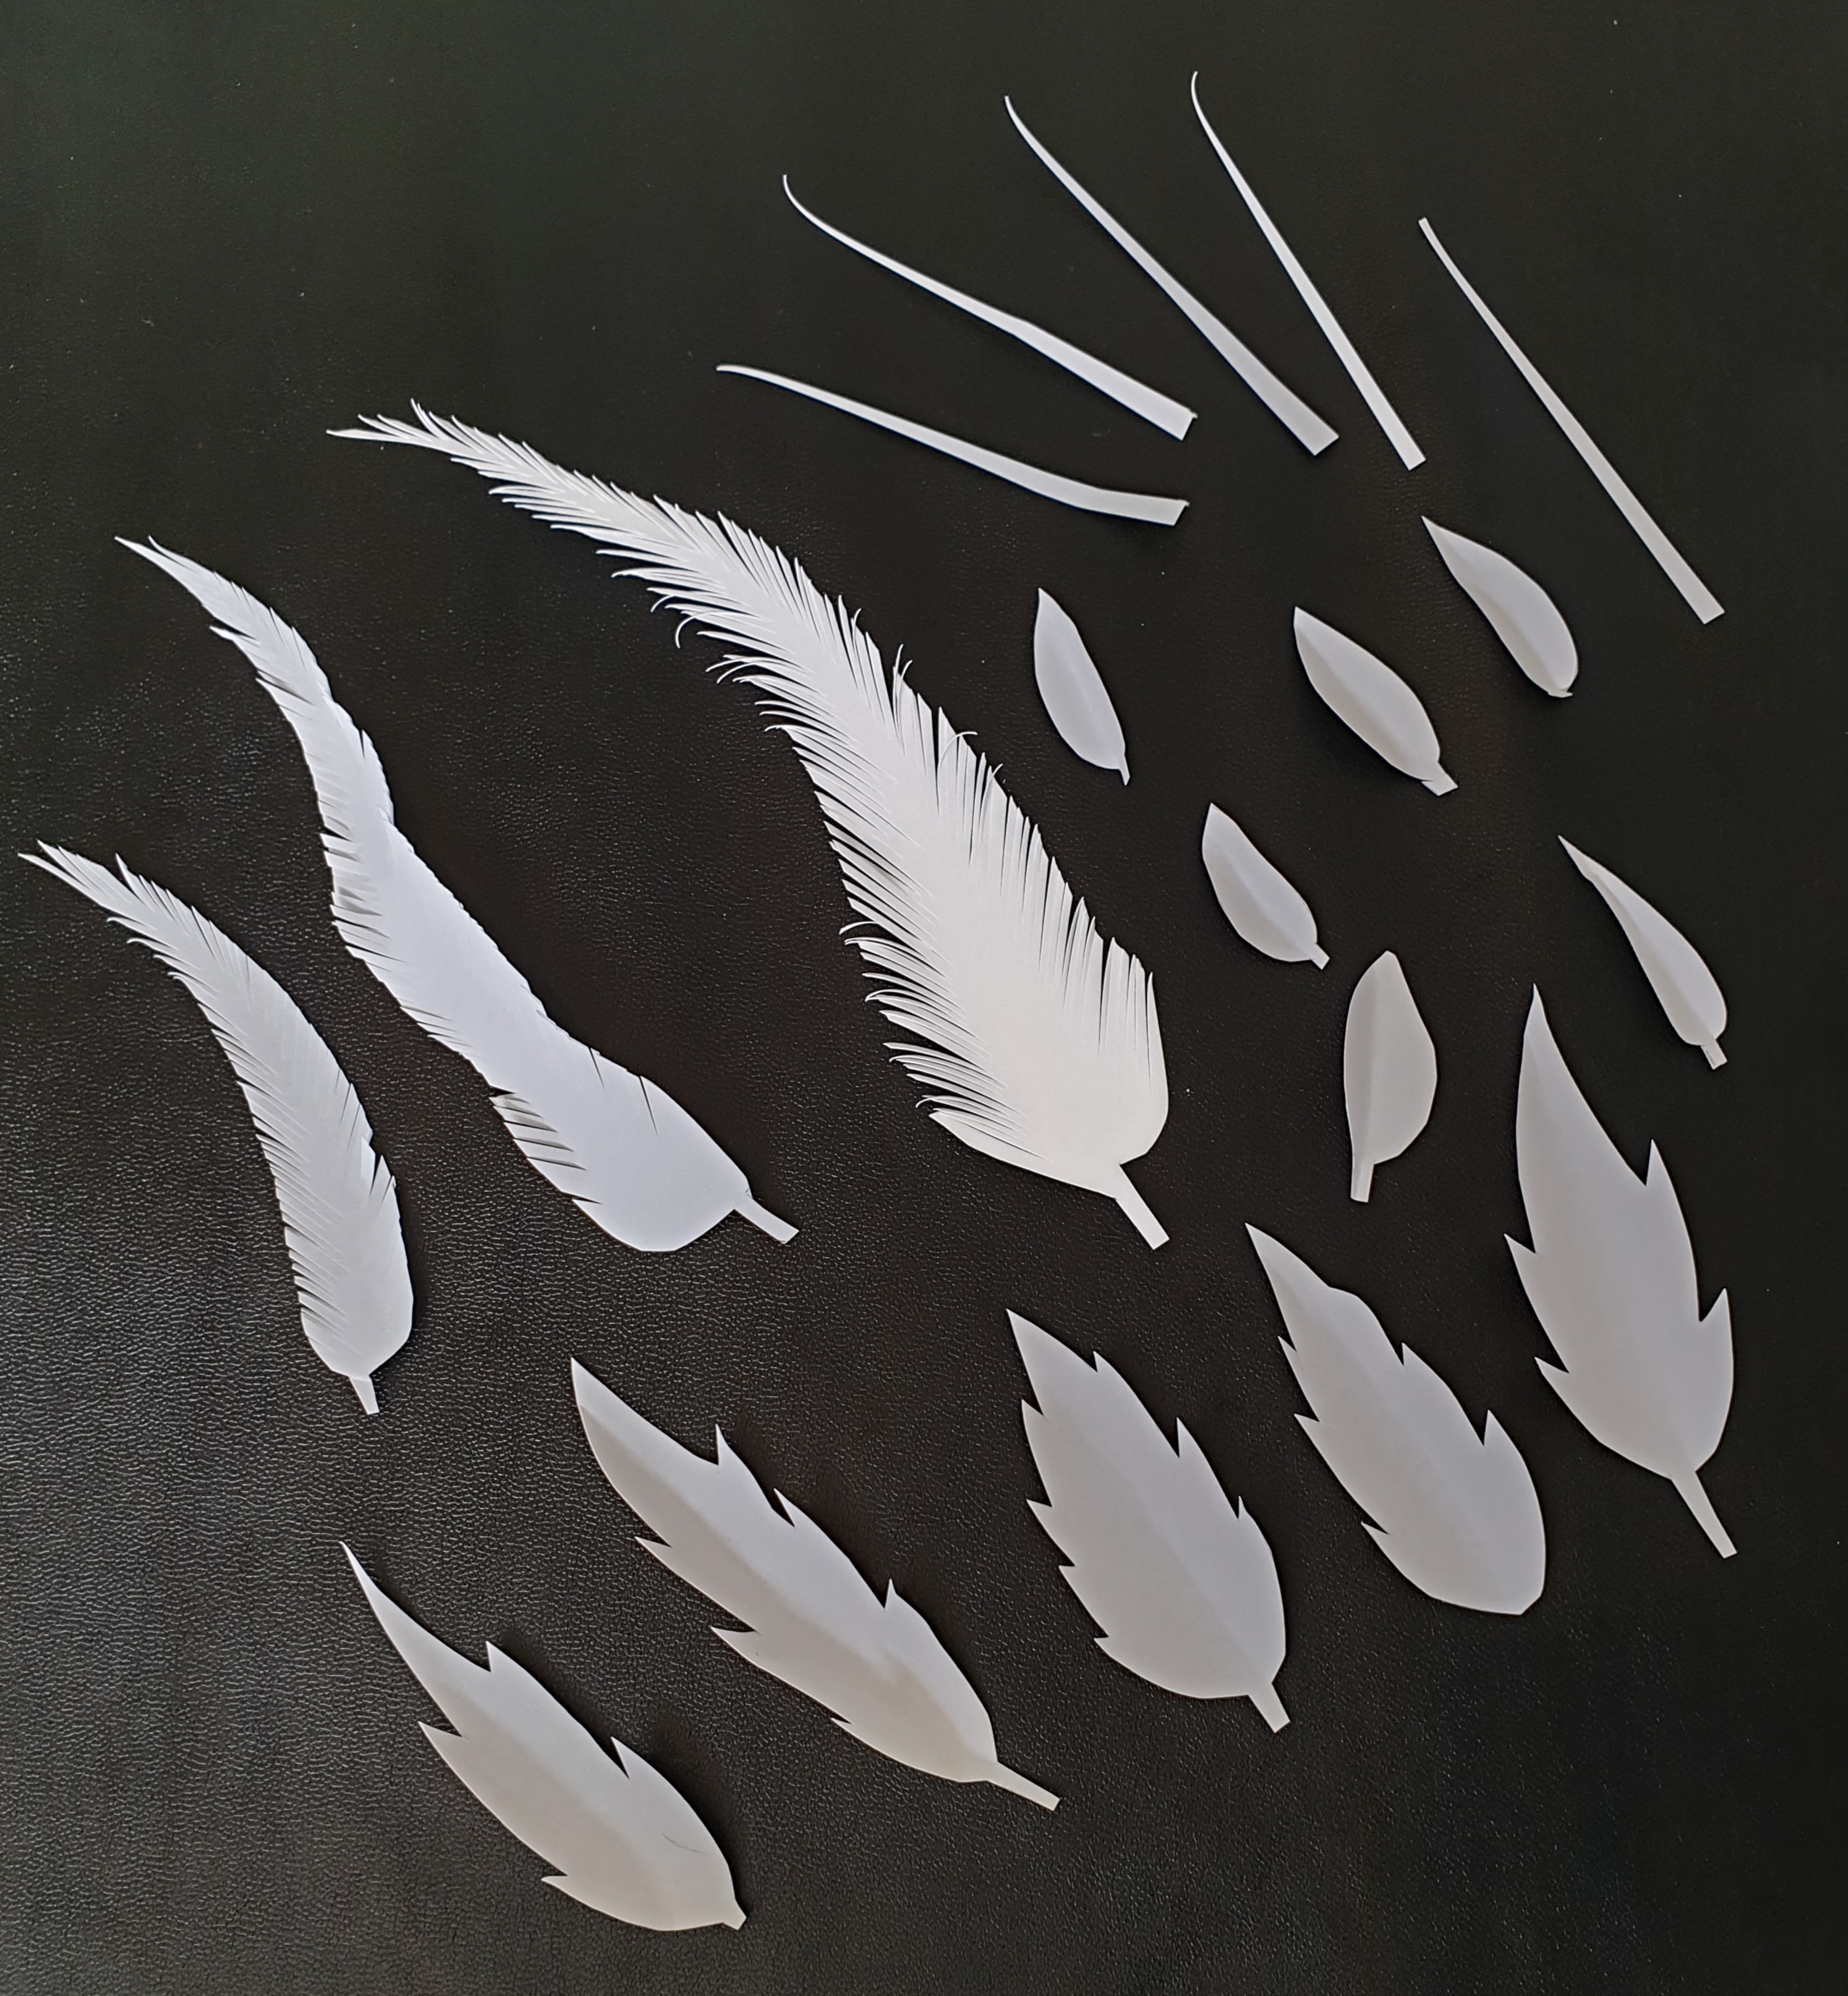
Once cut out, you can shape, fold and curl the paper to get your desired look.
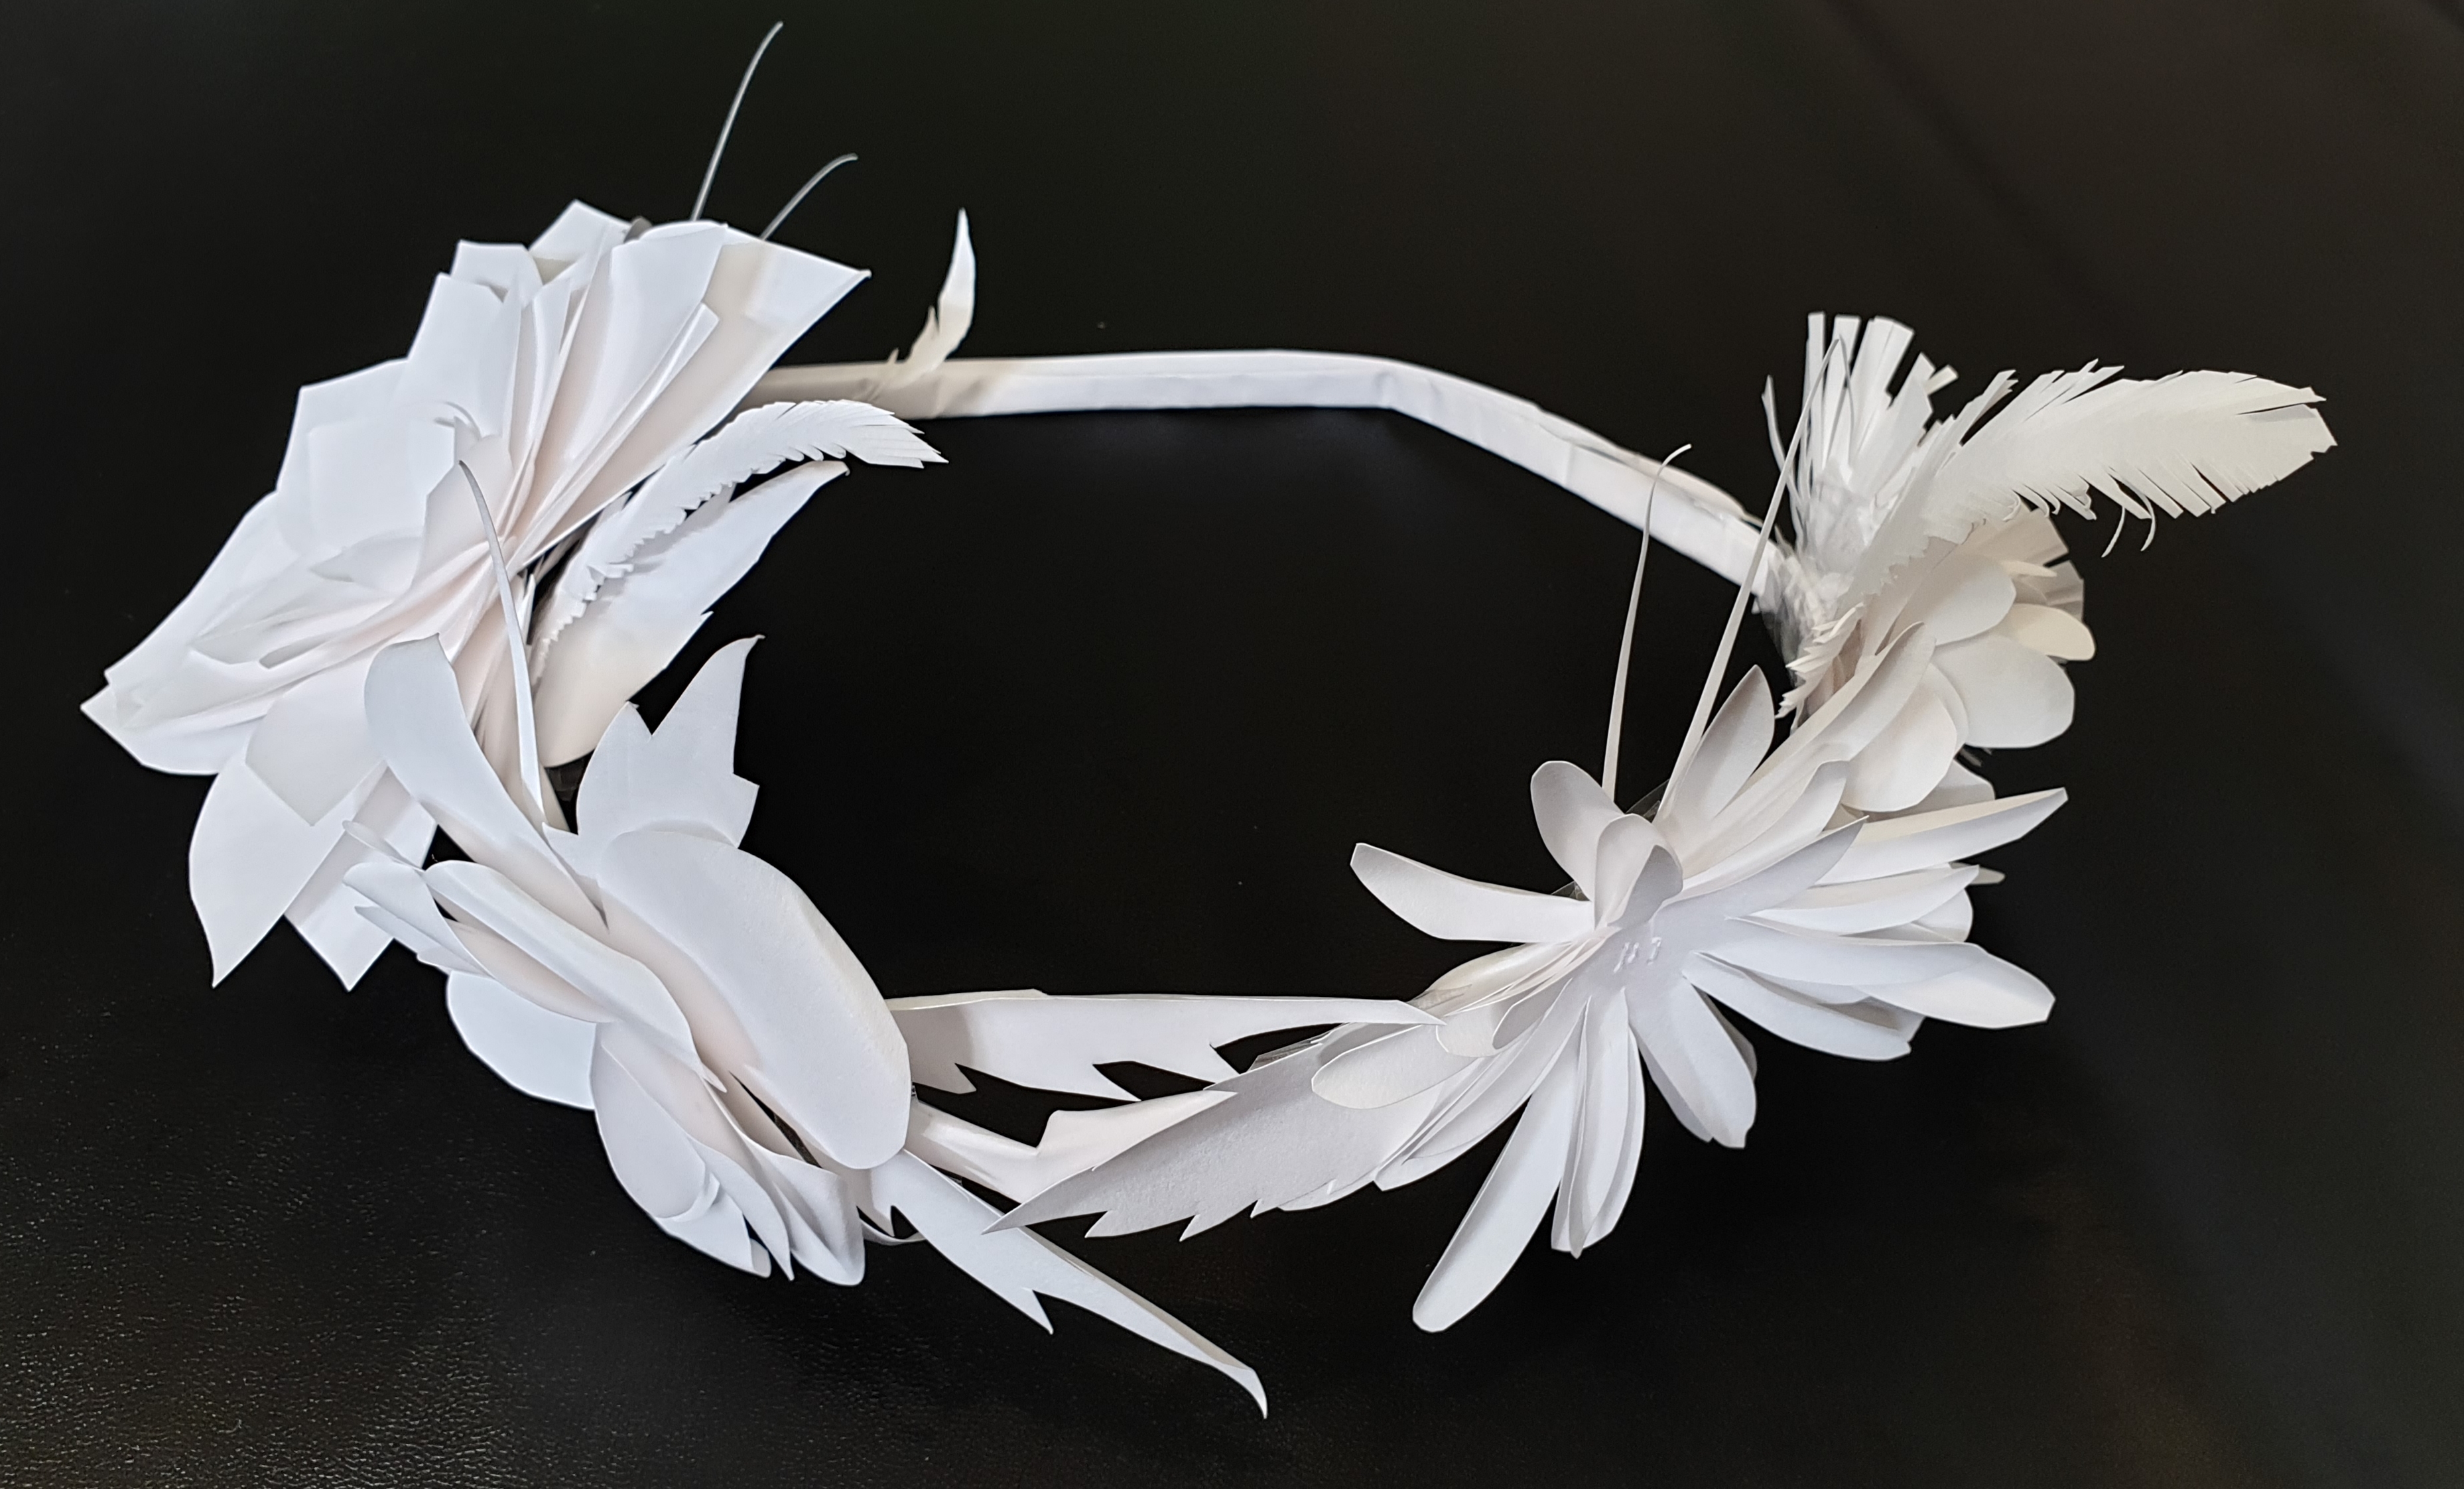
Activity part two – Assemble your crown
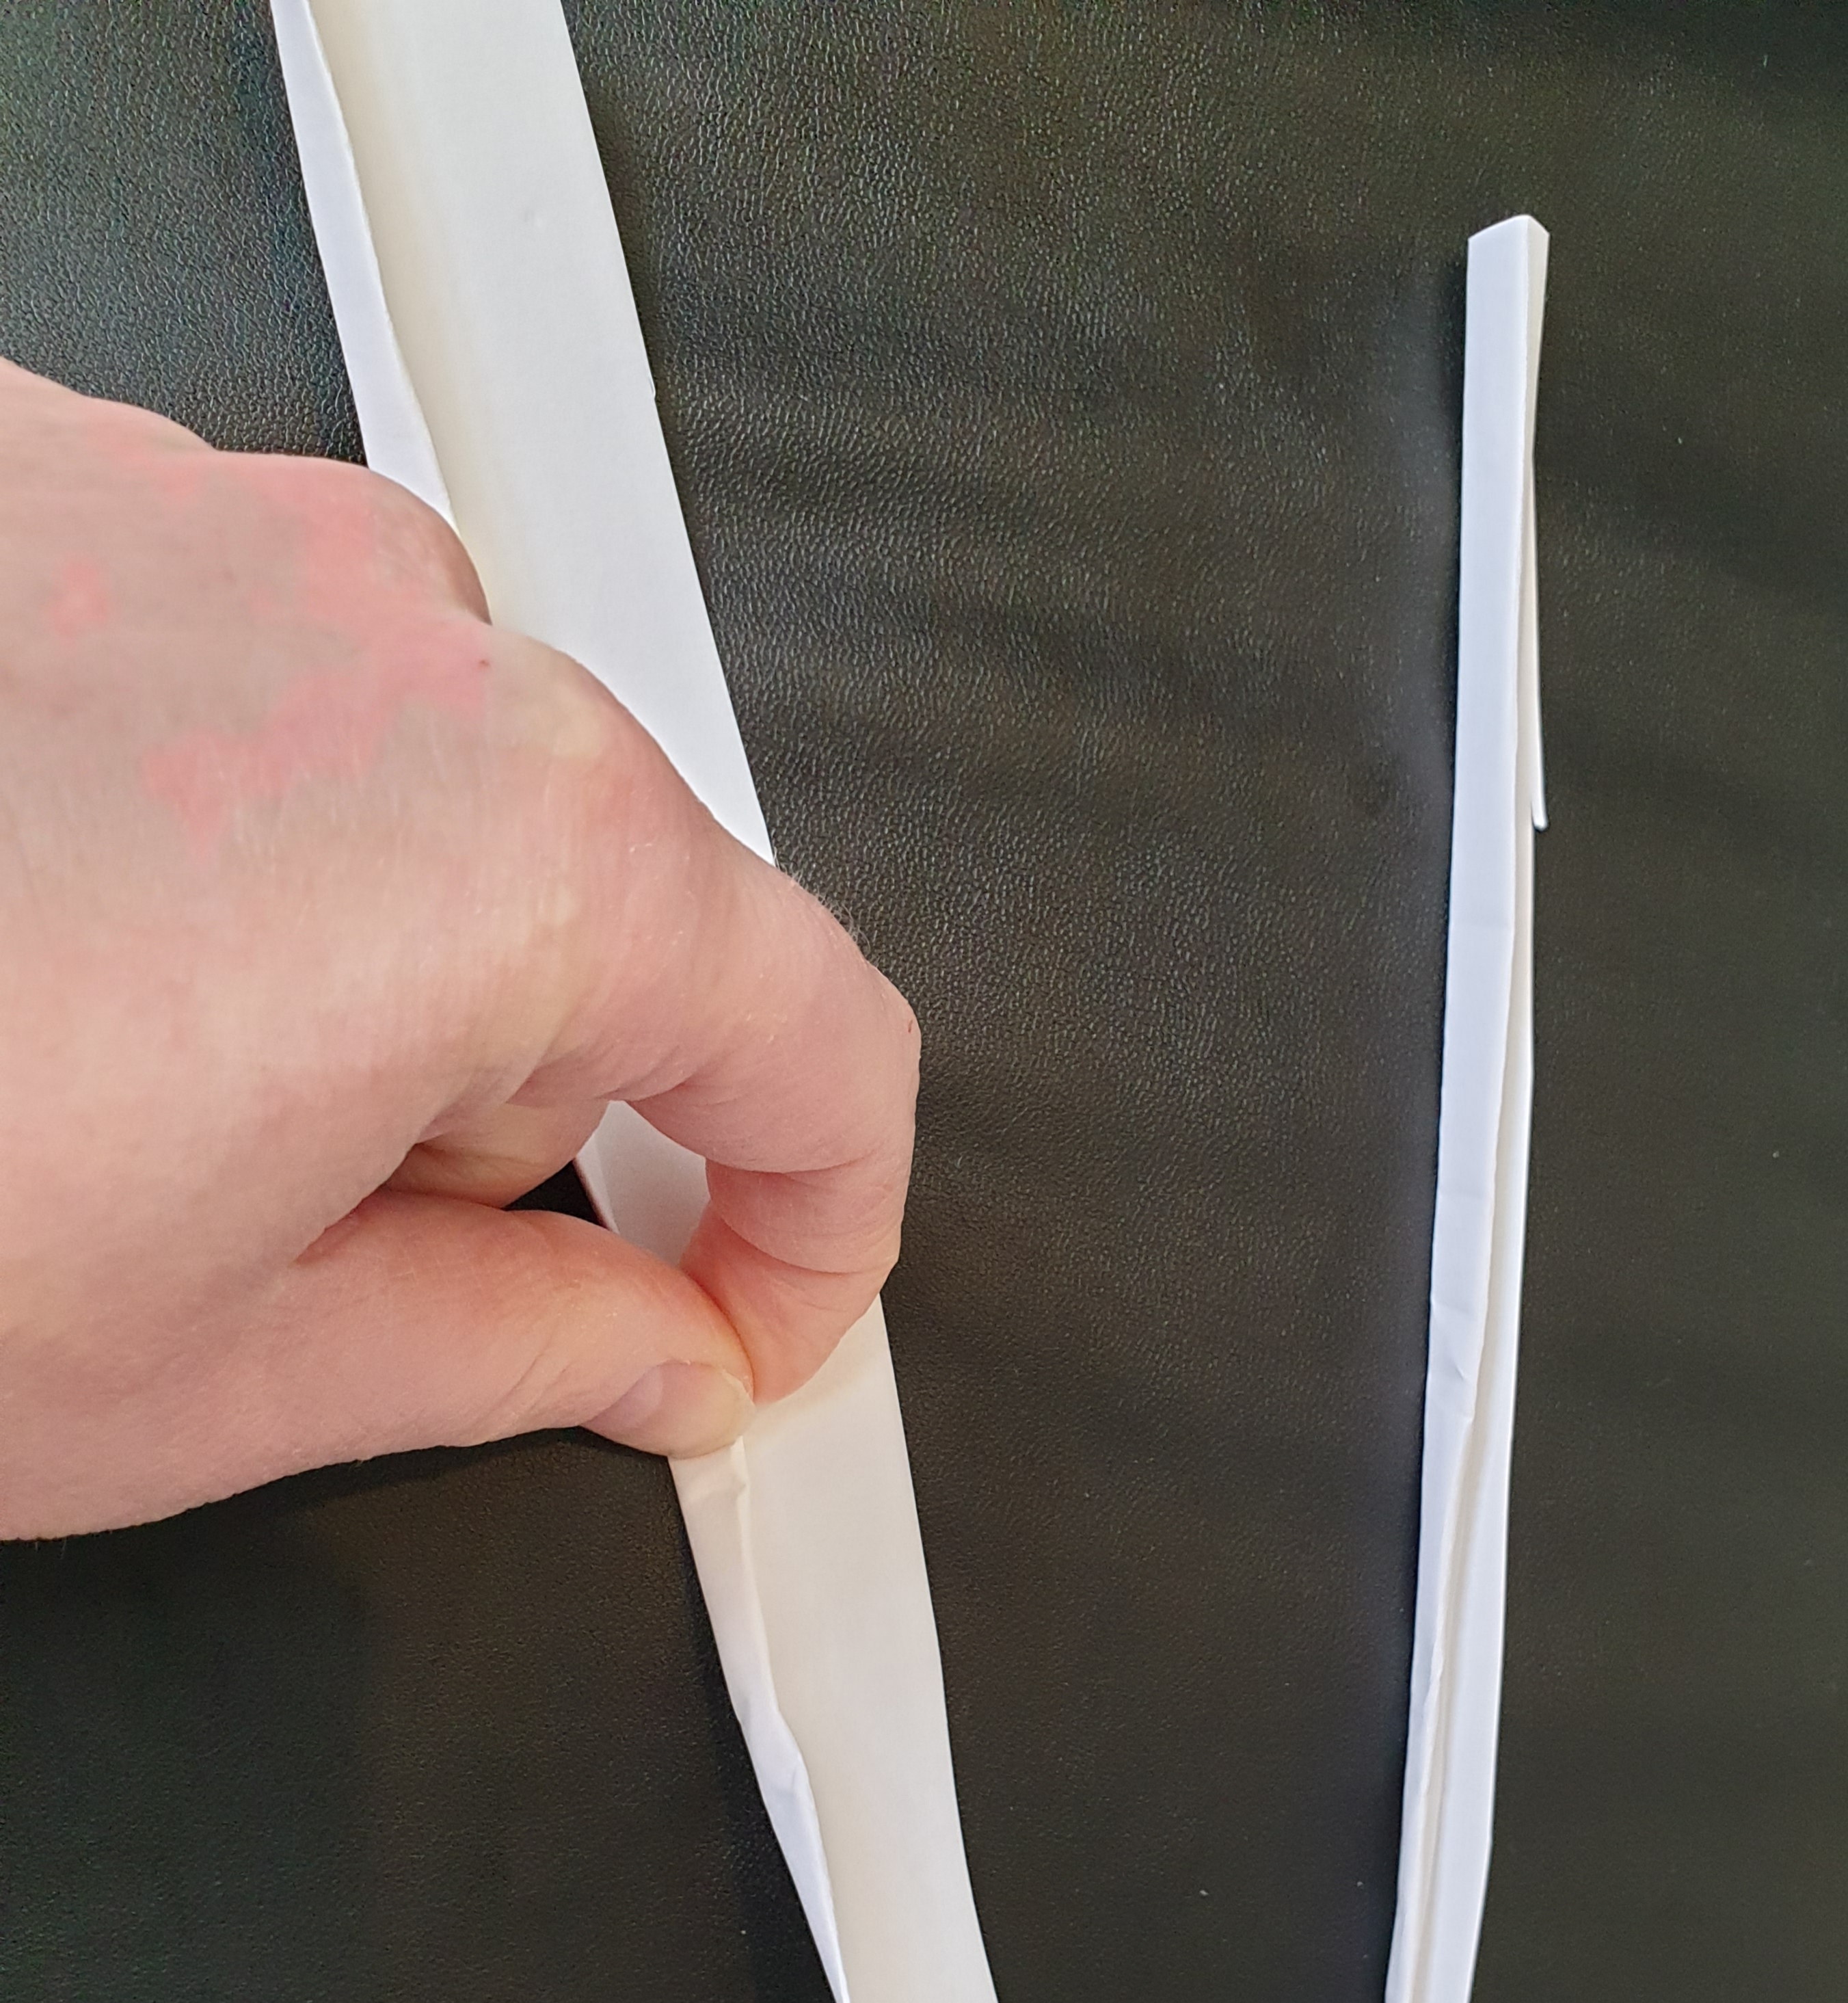
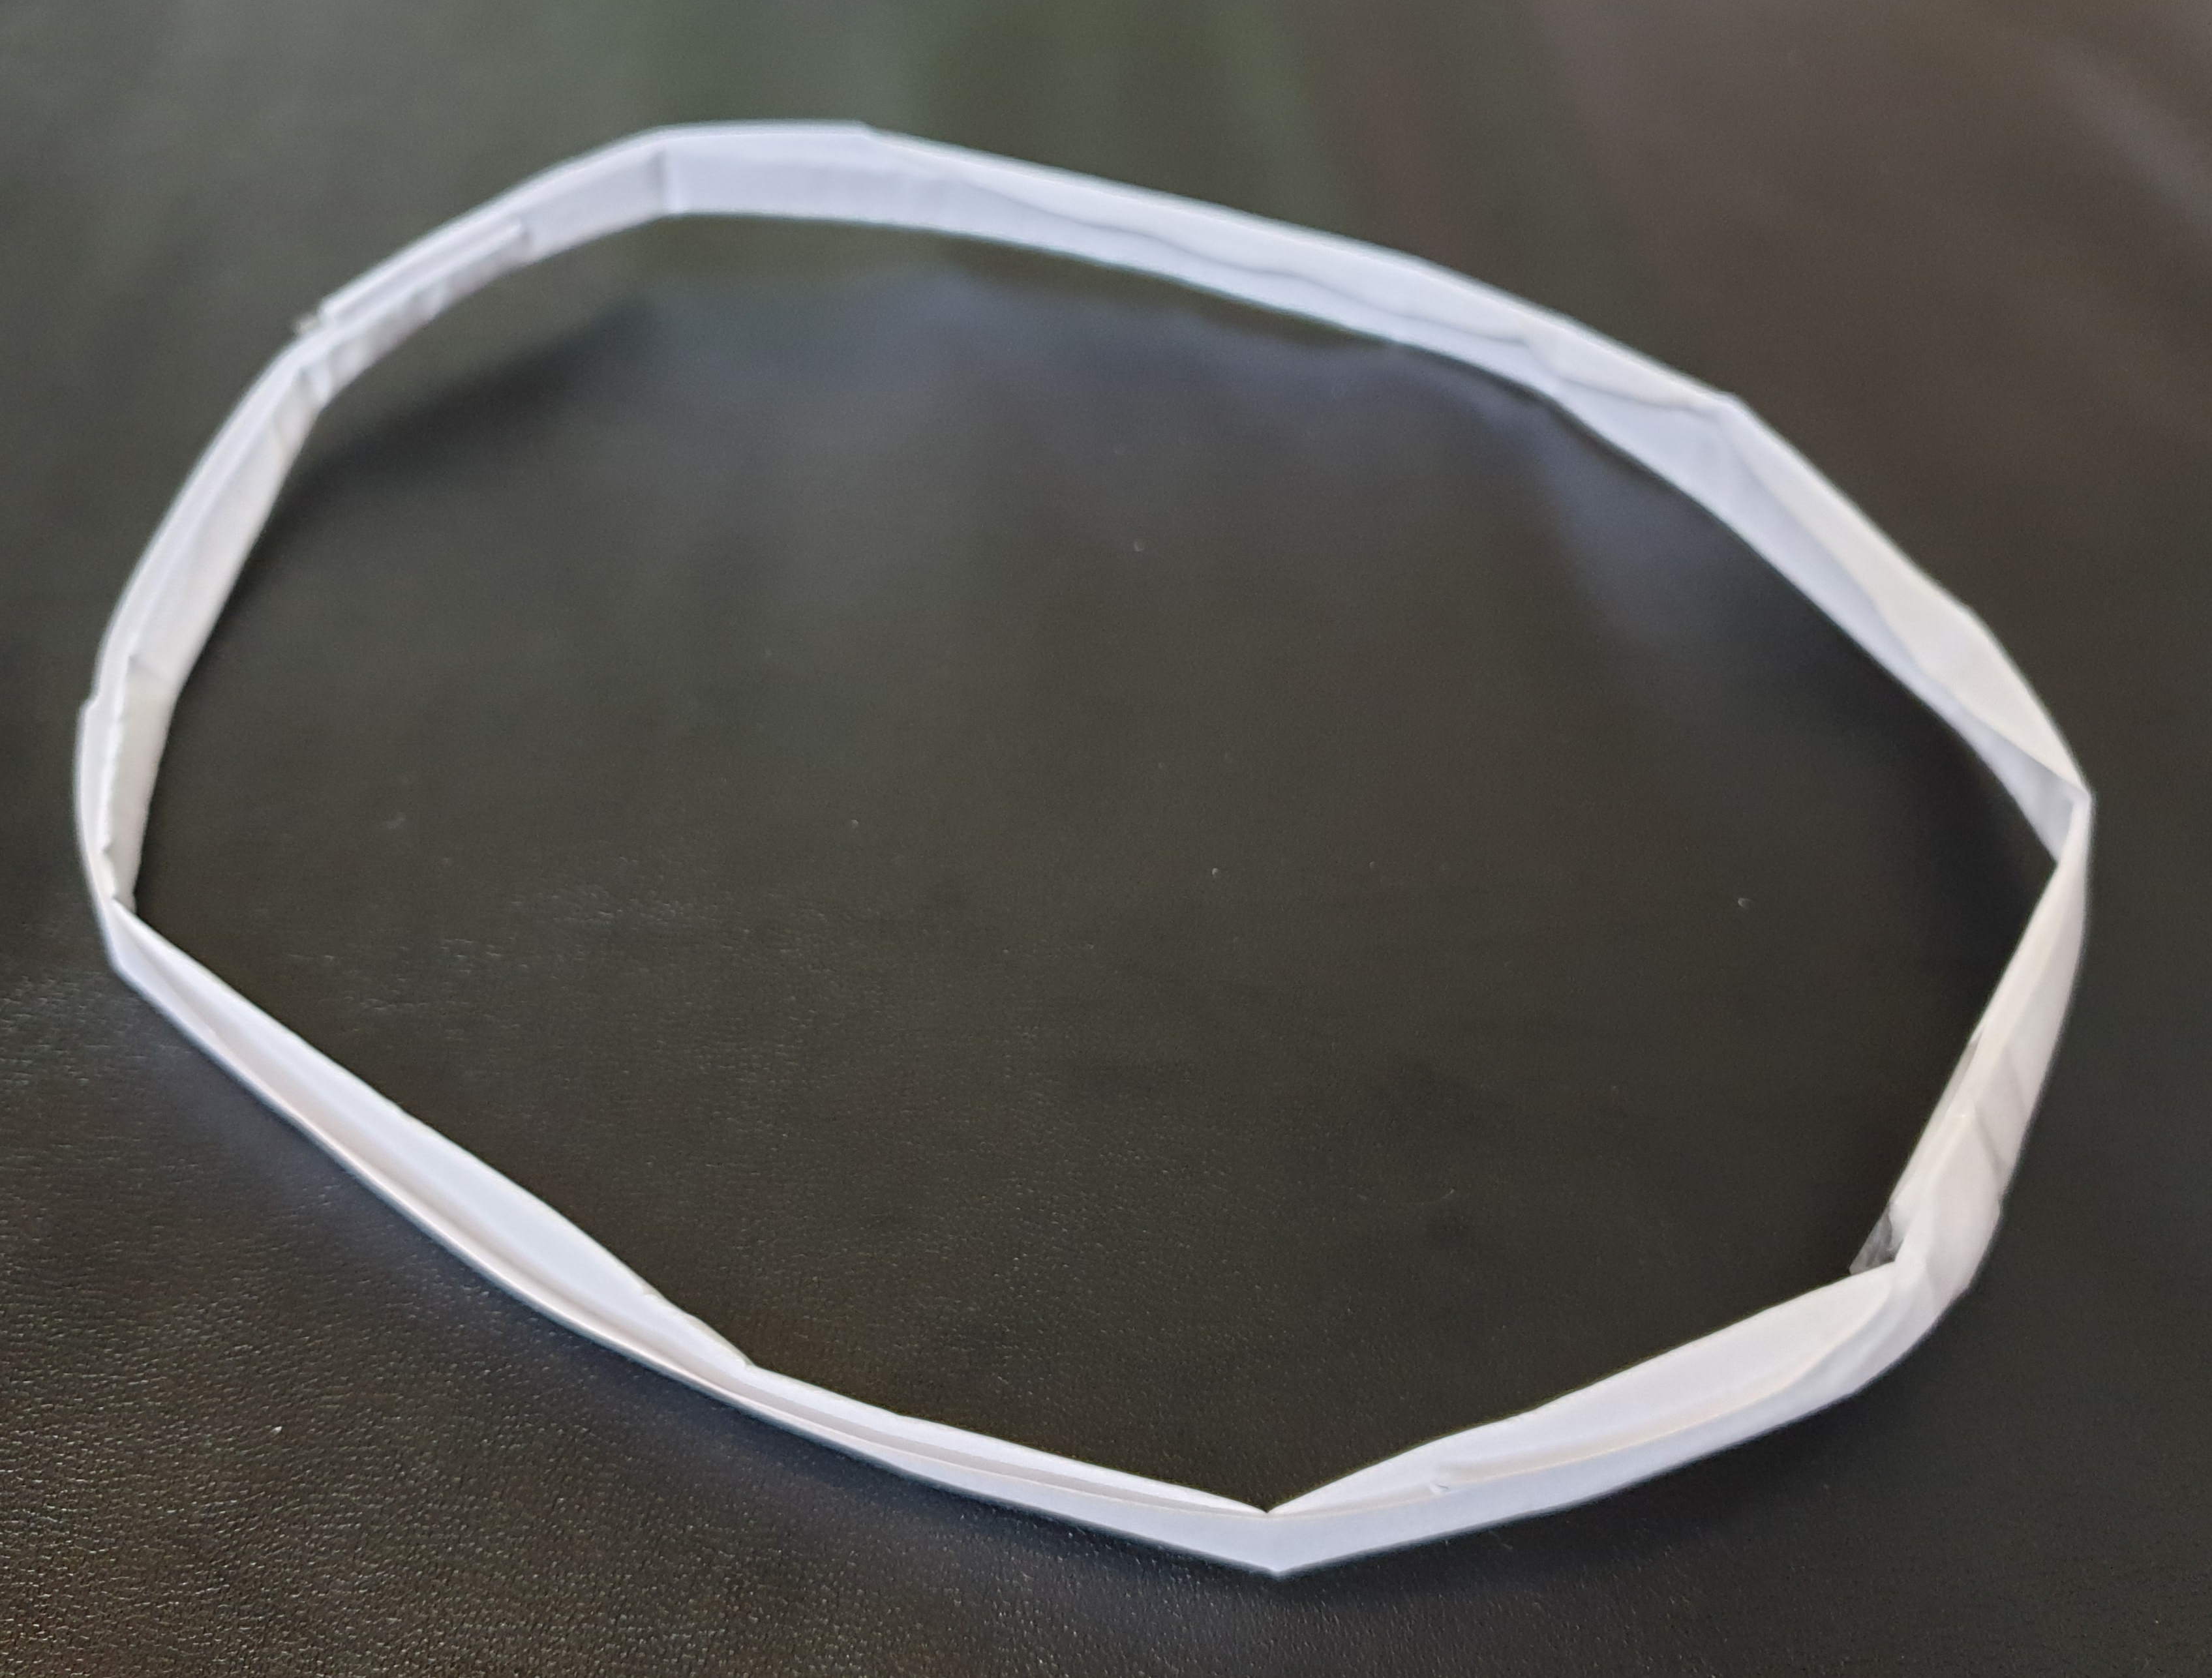
To create the band for the flowers to sit on, I rolled up pieces of paper and taped them together. However you could use wire, an existing headband, or a cut up t-shirt if you’d rather. Ensure the size of the band fits around your head exactly where it will be worn.
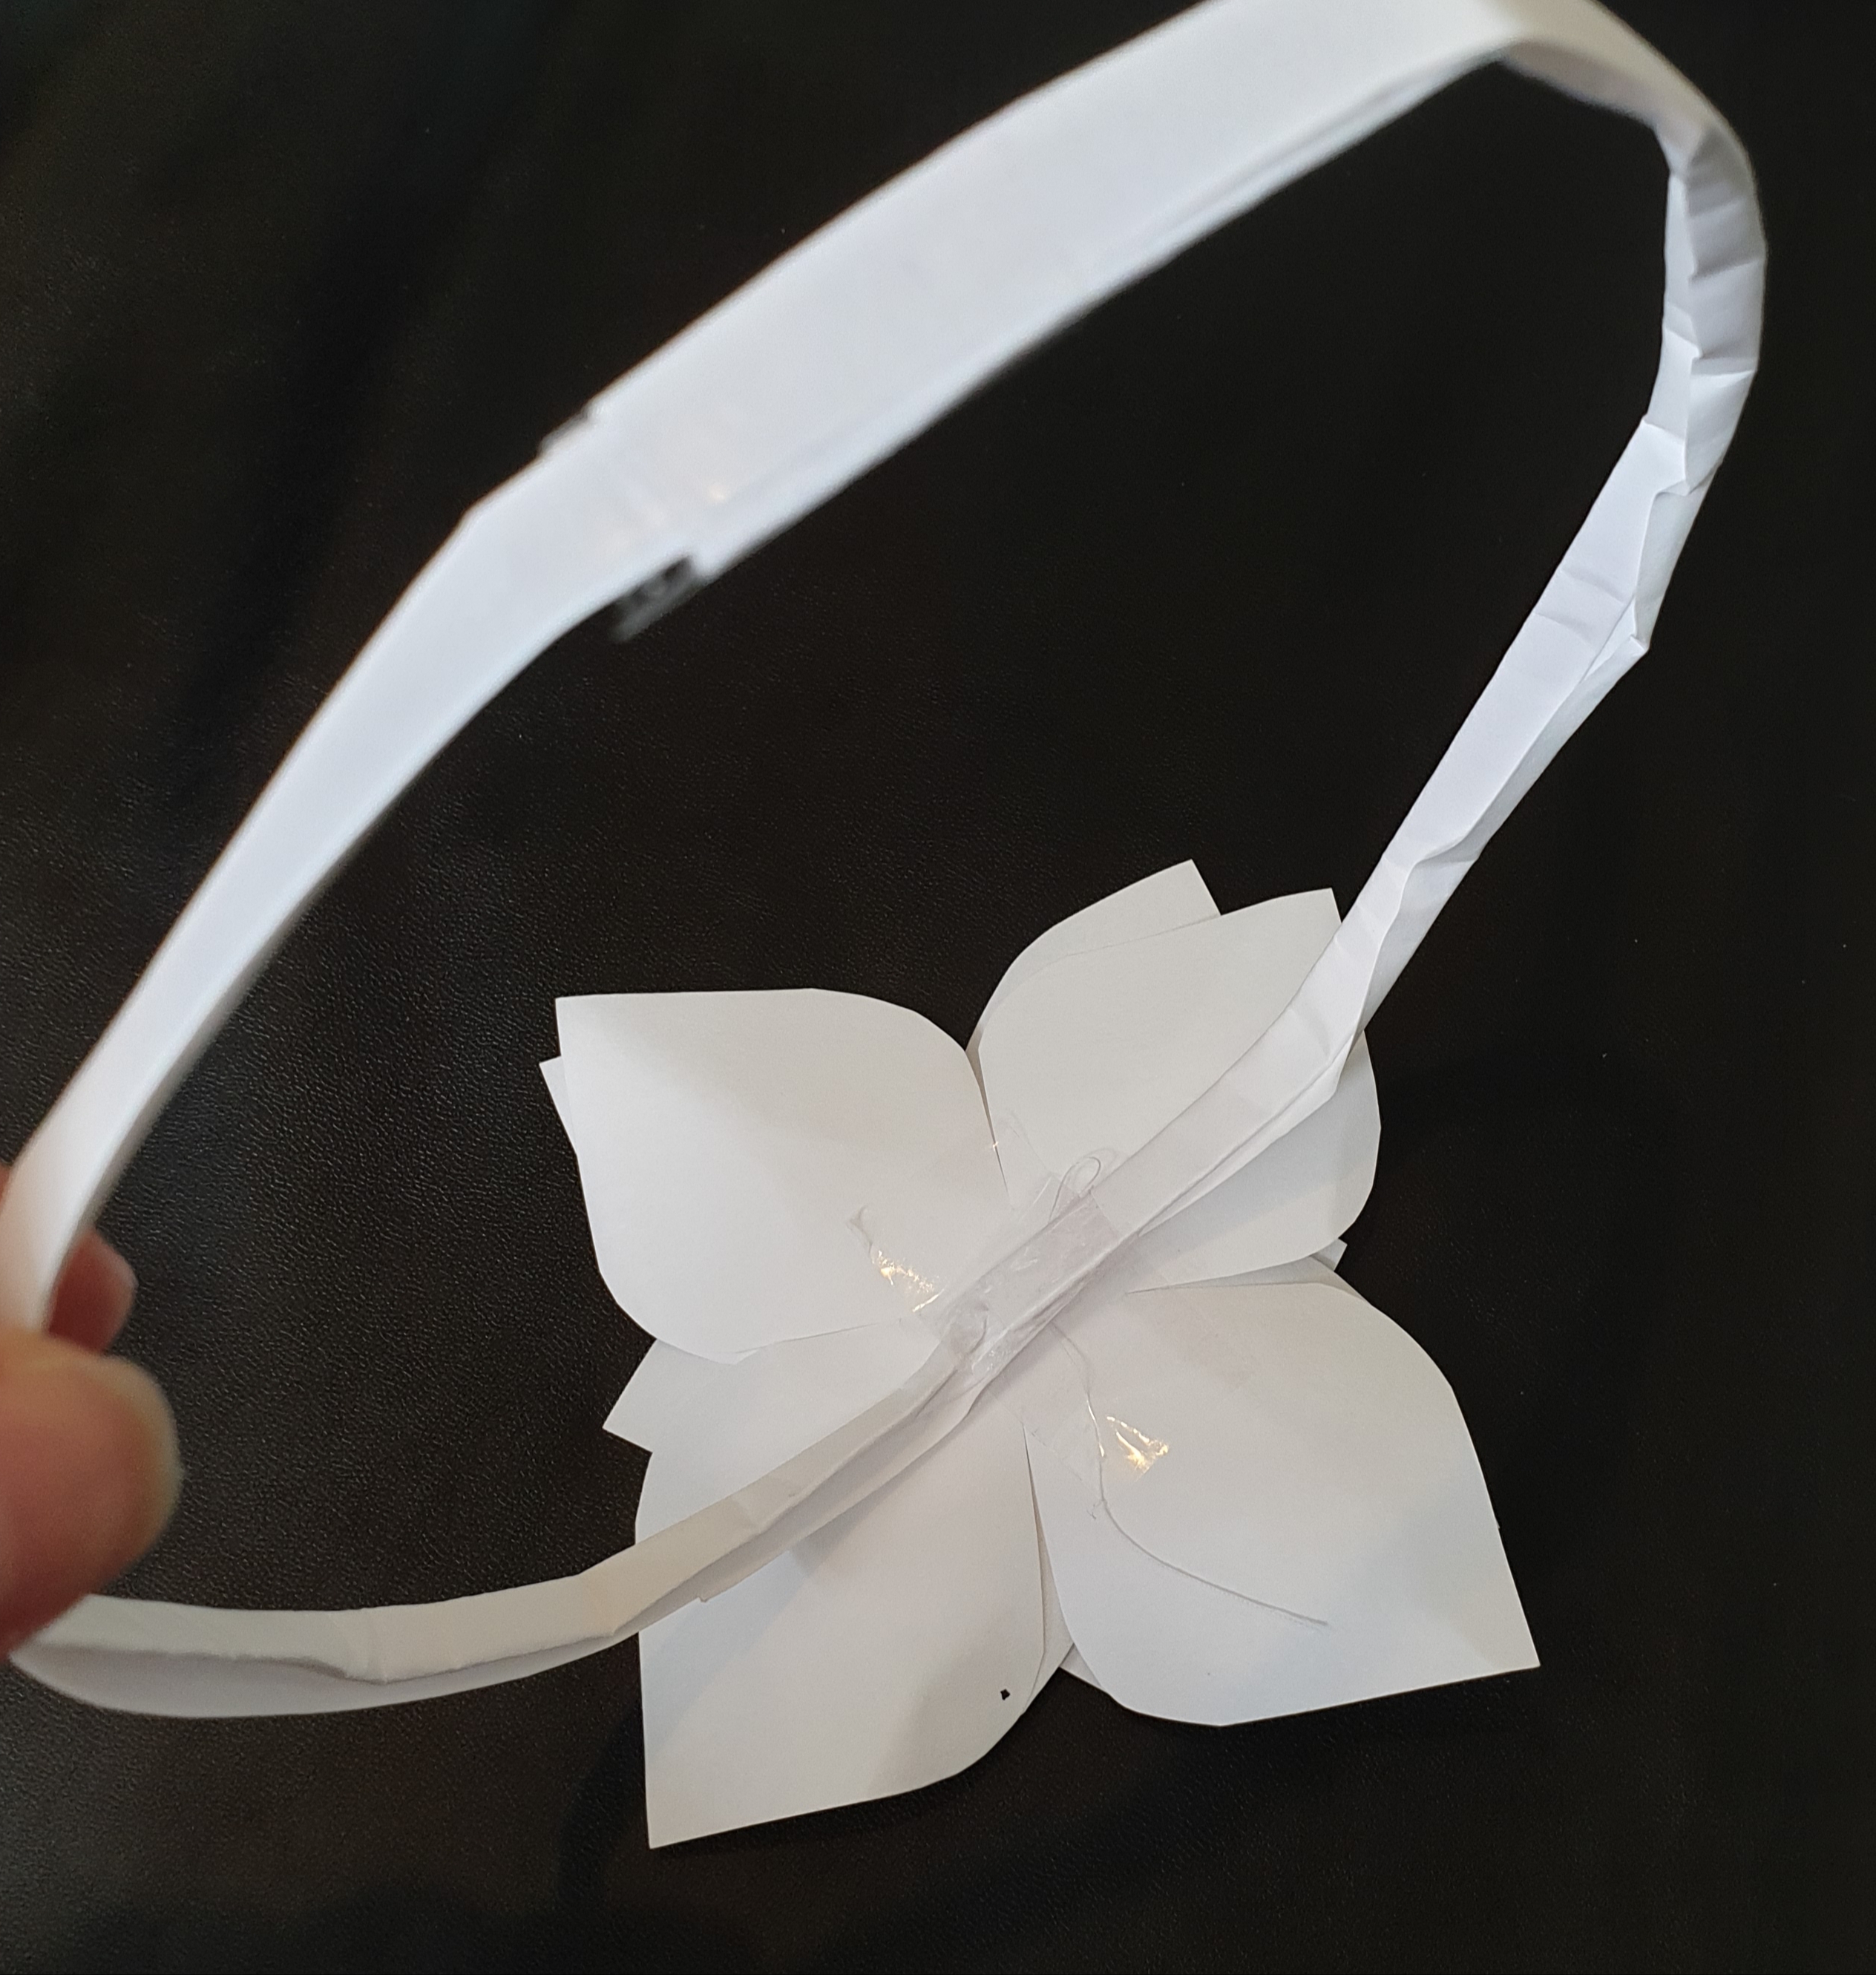
Now you can start to stick your flowers and foliage to the band. I used tape, but you can use glue or stitch them on. Again, glue will have the best results if you have it (pva, UHU or hot glue gun).
A useful tip when deciding on flower placement is to add the larger flowers to the sides of the head and the small flowers to the front and back. This helps the composition of flowers to frame the face and stops the crown from looking too bulky.
I just added flowers on the sides and foliage on the front leaving the back clear, but you can fill the complete band depending on your design.
Further Development
Try experimenting with recycled materials such as food packaging, newspapers, books or old drawings. You can also use the same principles with fabric from old clothing. For example t-shirt jersey won’t fray but the edges will curl to get a new effect, whereas cotton and denim will fray which could be used purposely to create a whimsical look. Old jewellery could even be added as embellishment.
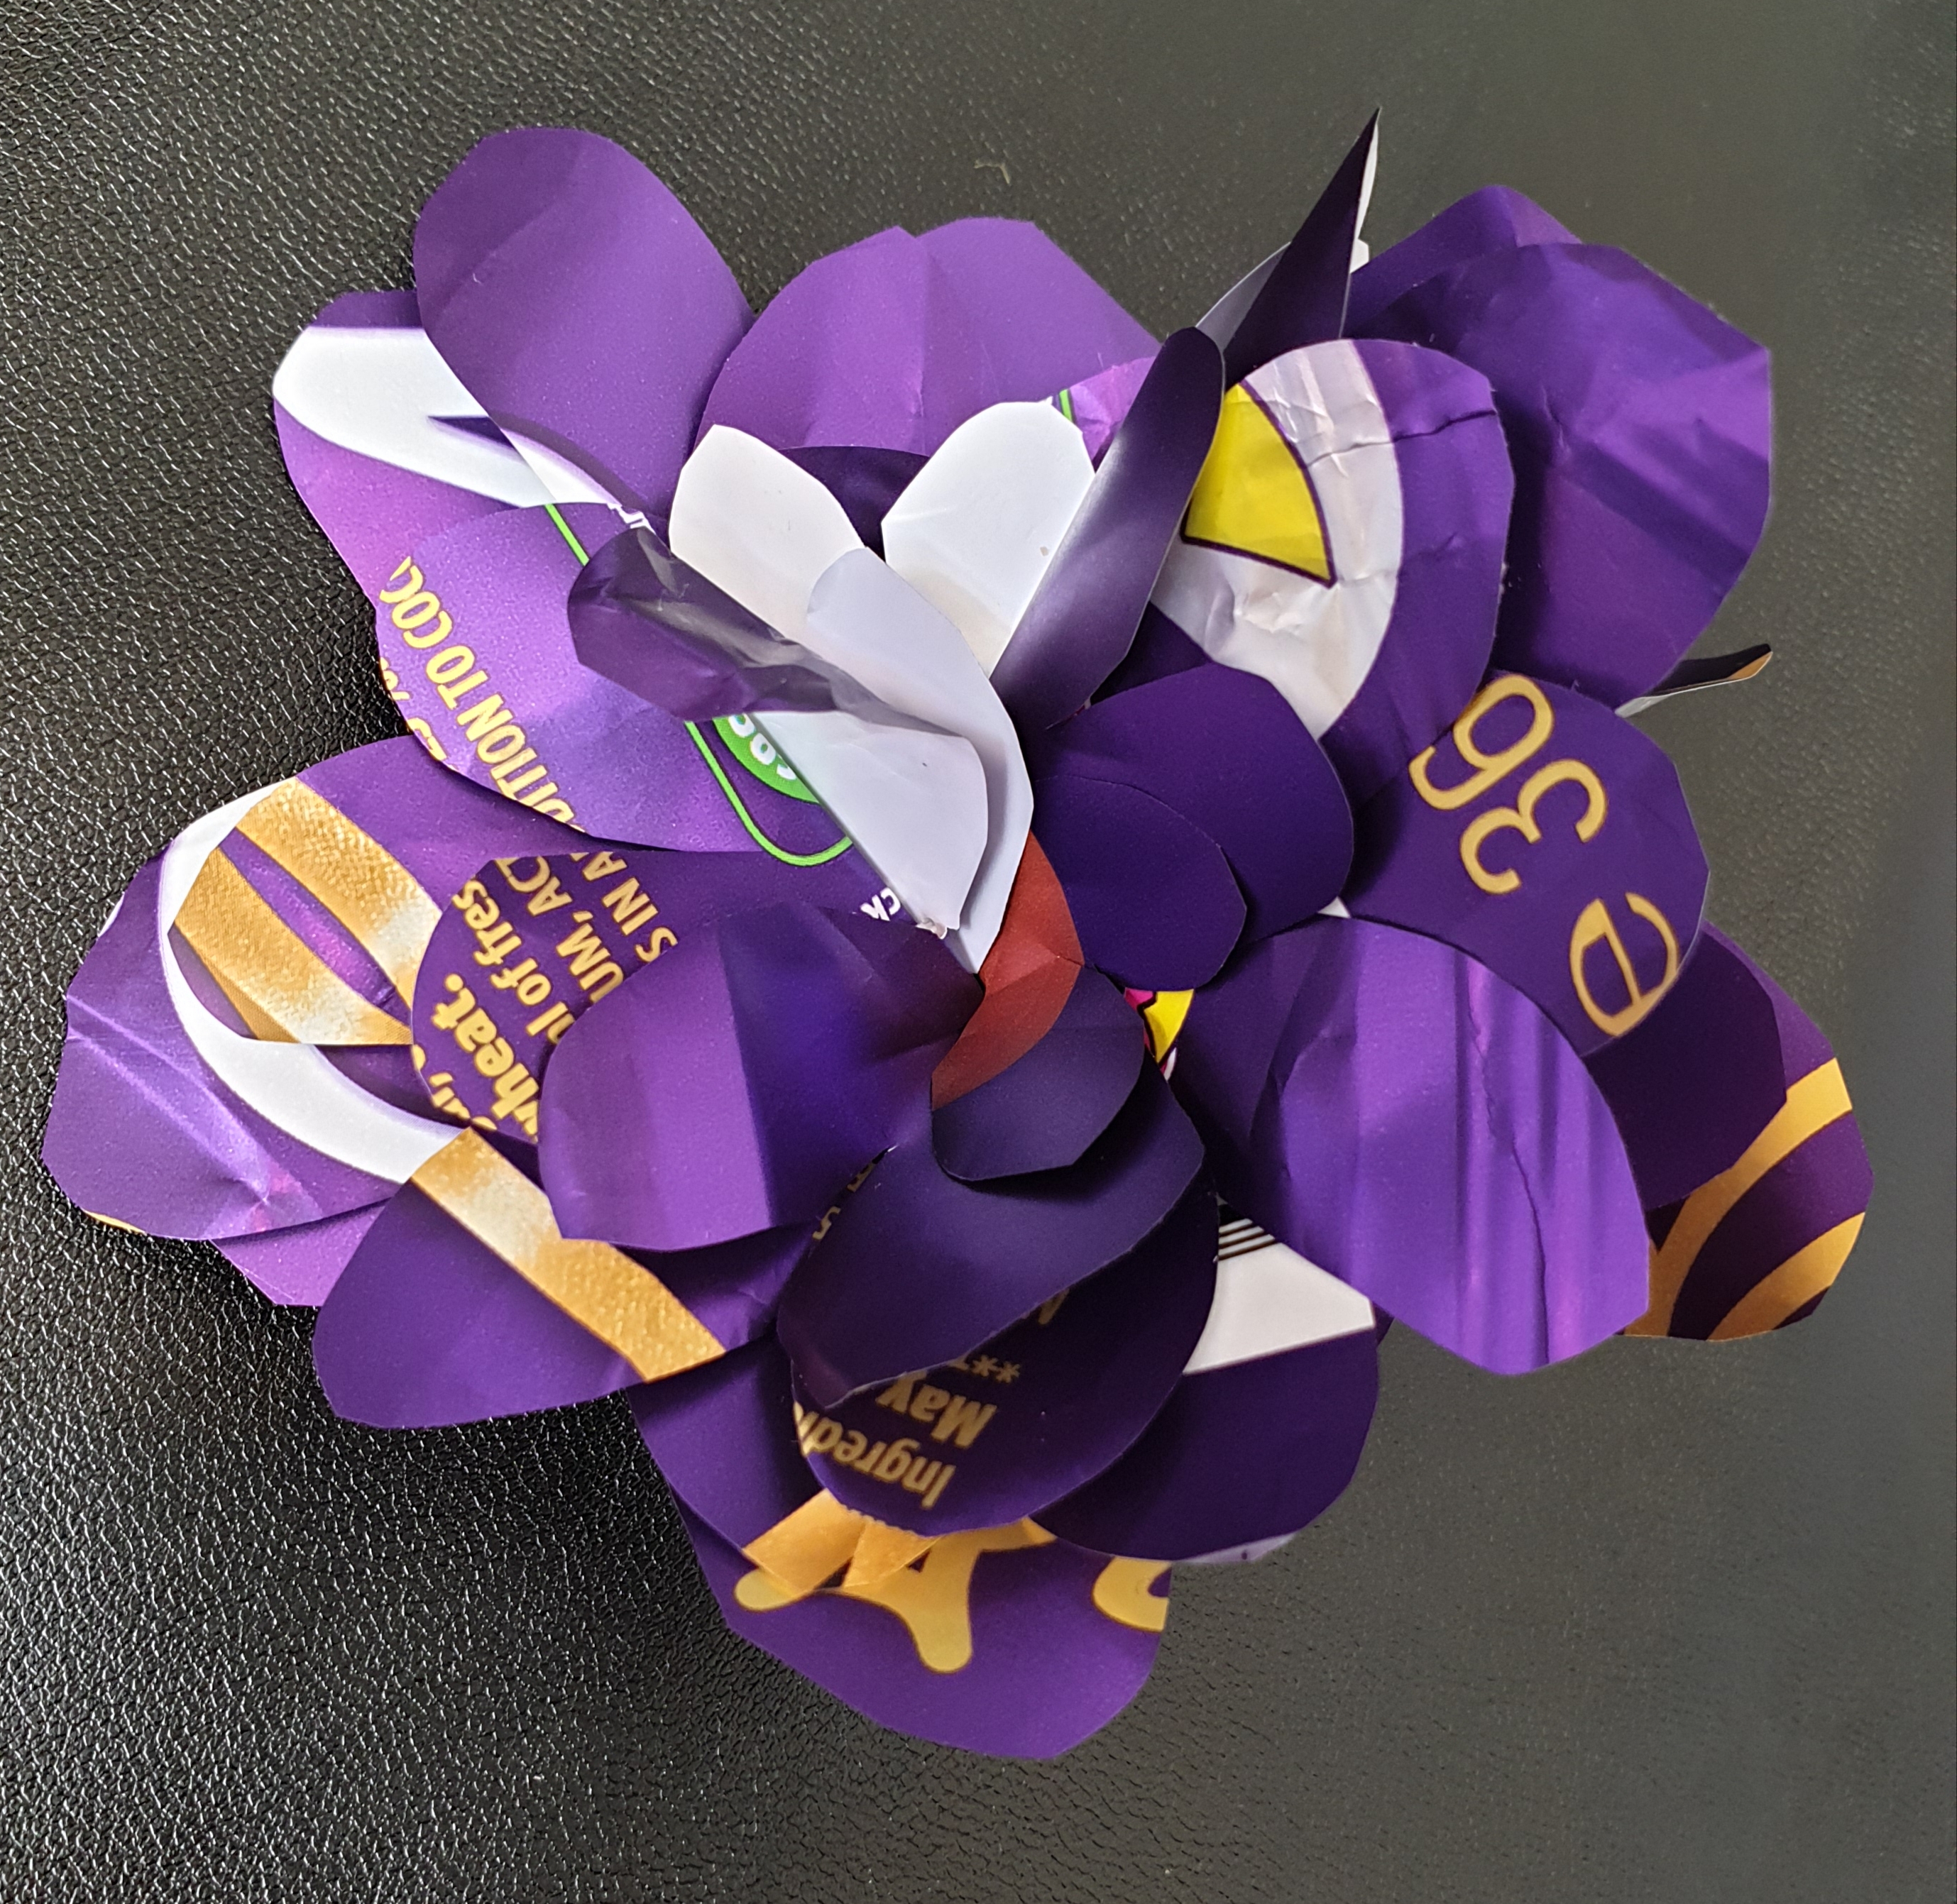
Above image is a flower made with a chocolate wrapper.
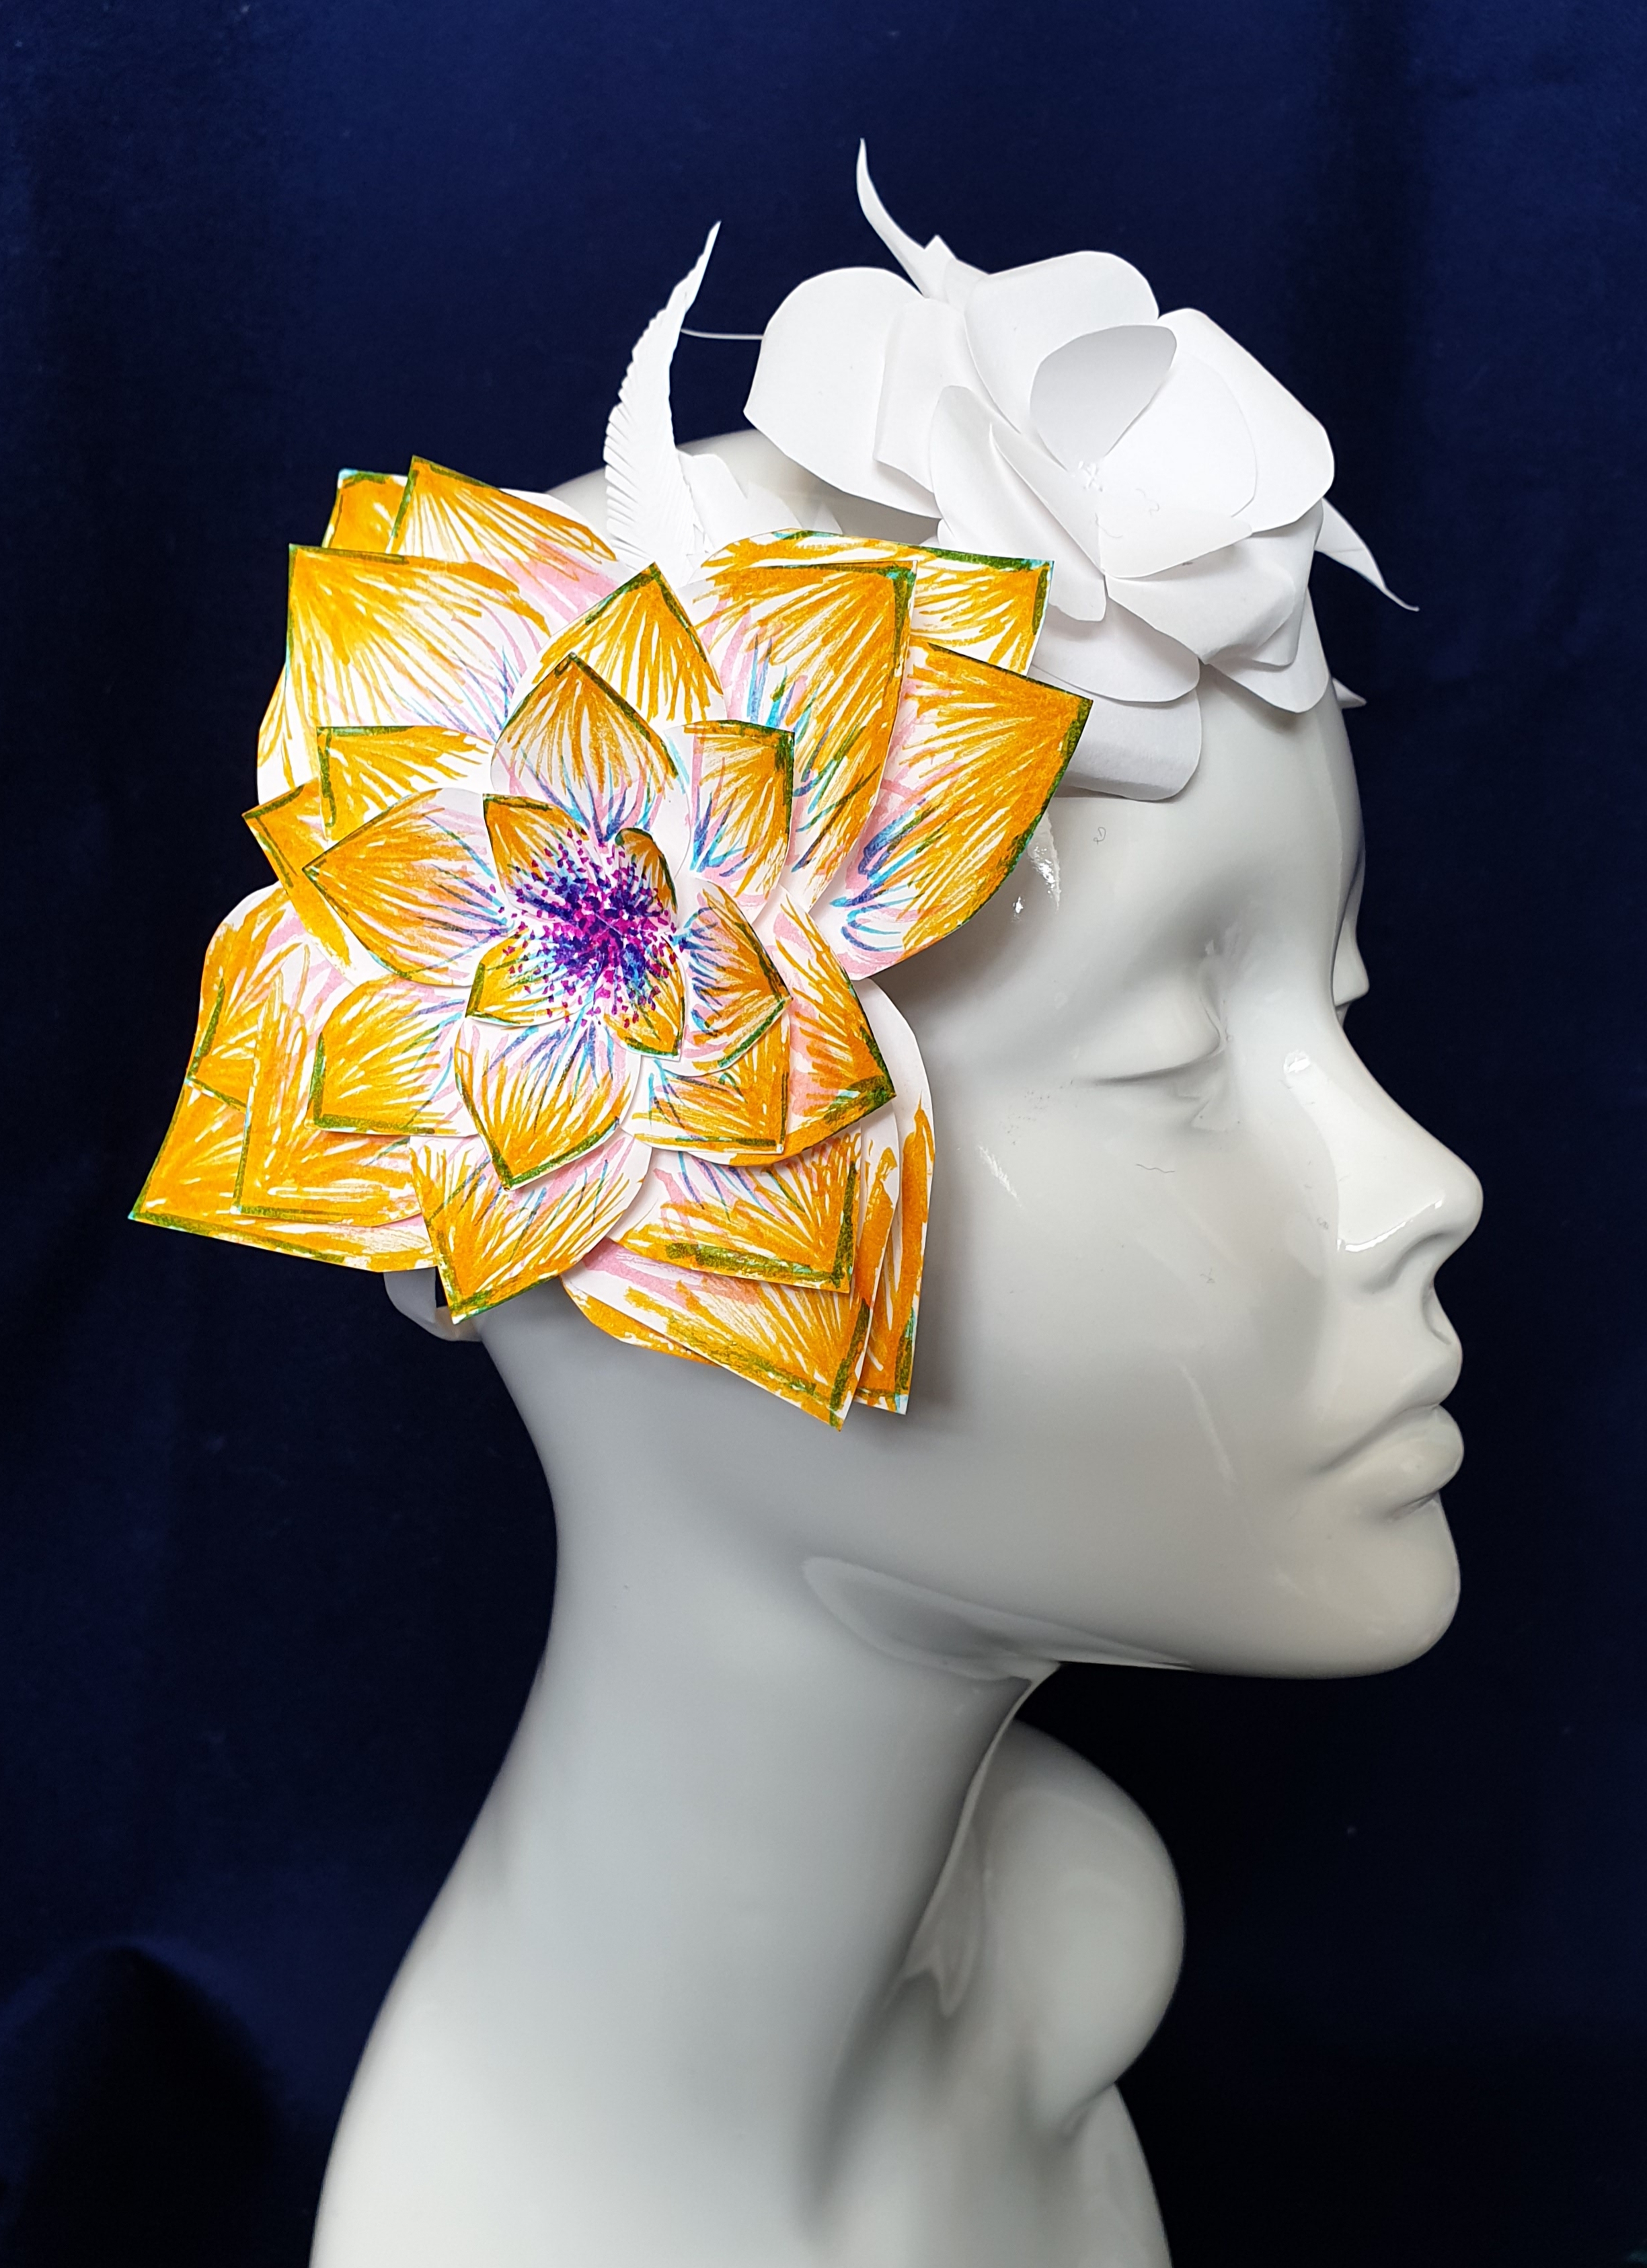
You could also experiment with the addition of colour to a white flower crown. Paint, pastels and pens will all create different looks.
Thank you for taking part in the Northern School of Art Saturday Club Workshop.
Share your work or post online and tag @natsatclub
Contributed by Jayne Elwell, Northern School of Art Art&Design Saturday Club
Jayne Elwell is a milliner based in the North East of England. She has been a National Saturday Club tutor at the Northern School of Art since 2013.