By Chère Reade-Edwards
Using the horticultural process of grafting – grow plants from foods in your kitchen then ‘graft’ one to another!
Don’t forget to submit photos of your plants at all stages or post online and tag @natsatclub
Overview
Grafting: Tomato plants
Grafting is a horticultural process of combining the root system of one plant (rootstock) with the scion (young shoot) of another plant of the same species. This has been practiced for centuries with a variety of plants such as, trees, shrubs and vines.
Grafting is usually used to combine a desired rootstock, (for example, one which is resistant to certain fungi found in soil) with desired fruit, vegetables and/or flowers (for example, extra-large flowers or seedless fruit).
Please note: We refer to tomato plants as our example. This method of grafting can be conducted on many plants. Examples of other plants are:
- Sweet peppers
- Chilli peppers
- Aubergines/Egg plants
- Cucumbers
Use whichever you prefer and/or can find
Materials needed
- Seeds, seedlings or young tomato plants (you can collect seeds from your tomatoes at home!)
- Soil
- Shallow/small container(s)
- Opaque plastic and/or opaque plastic bags
- Supports and/or construction material for frame building or supporting the bag(s)
- Sharp blade such as a precision blade, retractable knife or Stanley knife
- Twine, raffia, masking tape or any other light banding material
Activity part one – Planting the seeds
It may be difficult to go out and get seeds, seedlings or young plants. You can collect seeds from tomatoes at home. Cut your tomato before eating or cooking and remove a segment of the seeds. Plant them about 1cm deep in soil, compost or potting mix. Try to do this for different types of tomatoes. However, if only one type is available, you can still definitely do the grafting experiment as we are trying to create one viable plant from two plants.
If you are growing from seeds and have more than one type of tomato, grow the different varieties of seeds in separate containers and label, if you don’t know the variety names just use another identifier such as numerals, letters or emojis
Activity part two – Grafting two plants together
Once the young plants are between 4cm and 15cm, choose two plants with stems of a similar thickness. The plants should have their two seed leaves. These would be the first two leaves which came out as seedlings and they tend to be smaller or a different shape to their standard leaves. The plants should also have about three to five of their standard leaves. Choose stems that are still nice and green, if the stem is developed to the point where the plant is producing a lot of lignin, the stem will be quite woody and less likely to take to a graft.
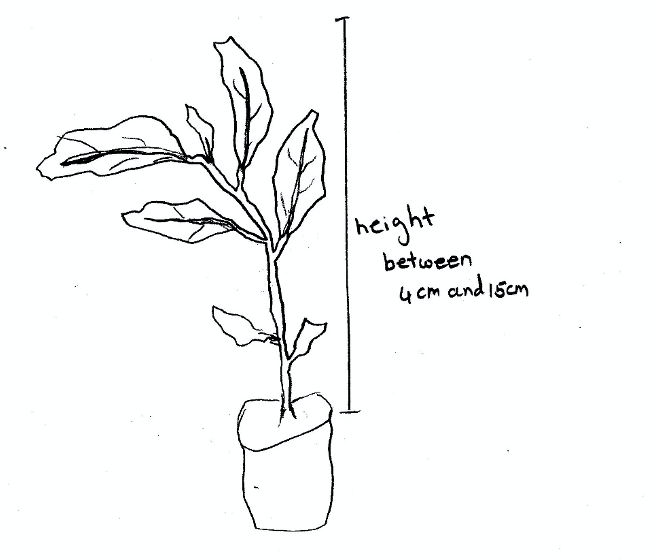
Illustration of approximate height and number of leaves of the average tomato plant suitable for grafting
Either collect opaque plastic bags big enough for your new plant or build a frame tall enough for your new plant and cover in opaque plastic. If using a bag or bags, find a stick or some other support that will keep the bag upright, like a tent. If you are grafting more than one plant, then you will need a bag for each or to build a frame for each. A small container with a little water should go in each bag or frame to create a humid environment inside. Feel free to experiment with both techniques to see which works best for you. You may want to set this up the day before so the interior can be humid for when you are introducing your new plant. You should also place in the desired end location for your plant. Somewhere relatively dark with the temperature within your bag/frame being around 23°c.
For your cut and graft, you will need to work in a shaded, cool location, away from debris and contamination. Many prefer to work indoors at this point and most recommend working early in the morning or later in the evening when the plant will be photosynthesising less, and the rate of transpiration is slower. This is essentially plant surgery so that same way animal and human surgery needs to be as sterile as possible, so does grafting, as the plants can also get infections. Wash you hands and your tools, if possible, use sanitiser on both your hands and tools, gently wipe the stems of both plants to cleanse them.
If the stems of your two plants are close but one is visibly thicker than the other, the thicker of the two should be the rootstock. Carefully, using your sharp blade, cut the plants at an angle, both plants should be cut at the same angle so they can fit together when grafted, like a jigsaw puzzle. A 45° angle is considered best practice. Cut above the seed leaves and below the first of the standard leaves. Now place your shoot/scion onto your rootstock and bind the two plant together with twine, raffia, masking tape or any suitable bands. Ensure the point of incision is covered by the binding material, to help keep bacteria, fungi and any contaminants out of the wound.
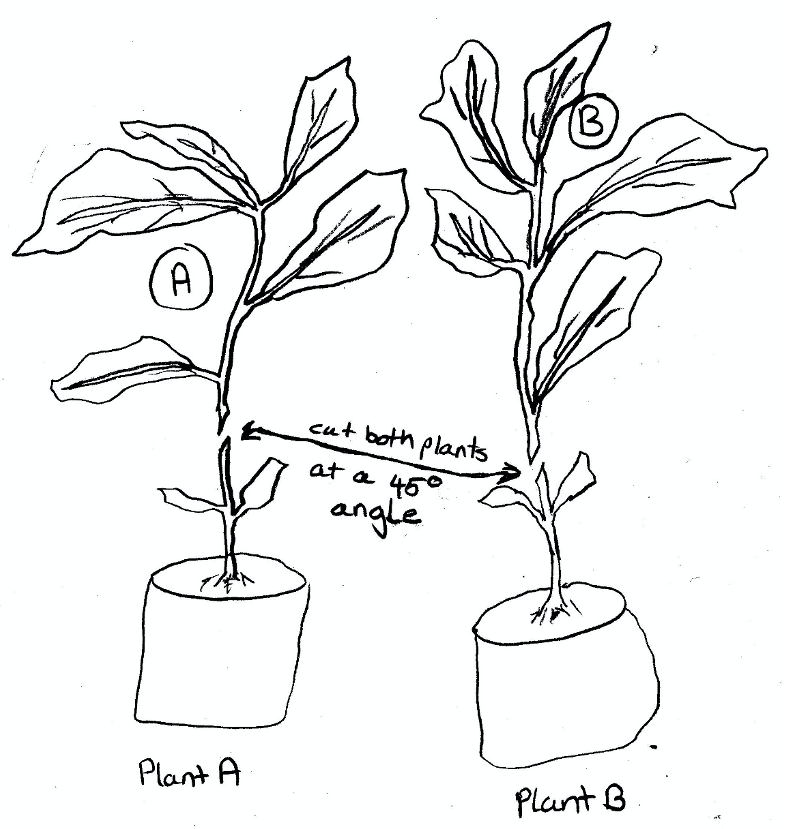
Illustration of the 45° cut on two plants selected for grafting
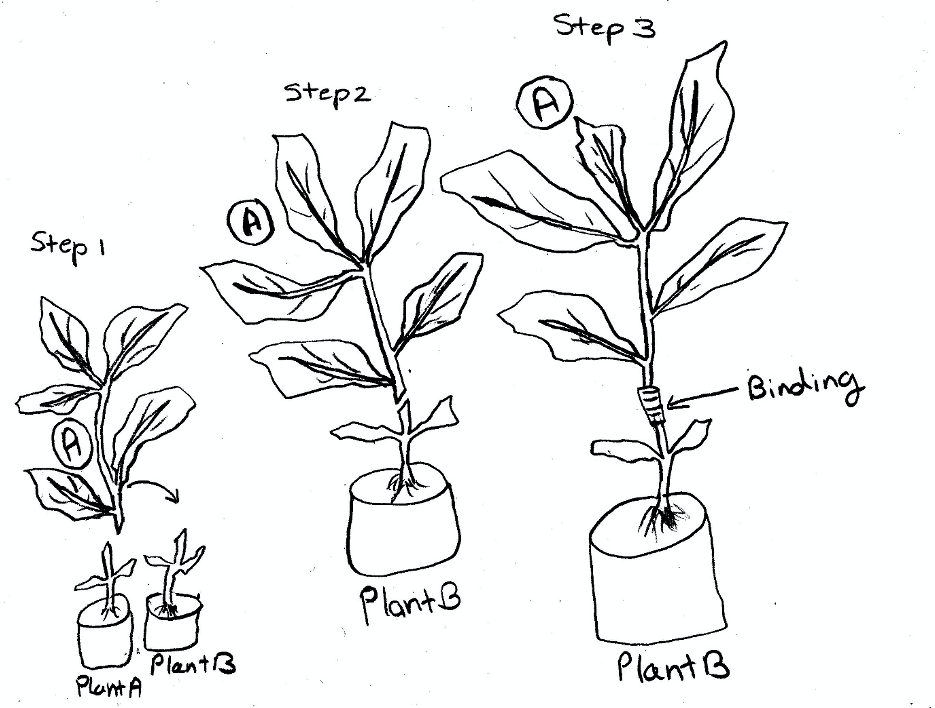
Illustration of the steps taken after the cuts are made to result in the two plants being grafted into one
Place your new plant immediately under its bag or frame. Remember, only one plant in each bag/frame. Check the interior is humid and replenish water in the shallow/small container if needed. The plant will probably droop or wilt at first, make sure the temperature does not get too hot or cold and that the plant does not get a lot of sunlight. After five to seven days, your plant should look healthier if the graft was successful. You can begin to gradually increase the sunlight. Do not put into direct sunlight just move to a slightly brighter spot and begin to lift your plastic a little bit more everyday until it is removed. This will probably take another week. Remember, rehabilitation and reintroducing your plant to sunny conditions is a gradual process, in total your plant should be ready in two weeks.
Further Development
Using the links below, give different techniques of grafting on various types of plants a go. Let’s see what we can grow!
Thank you for taking part in the Kingston University London Science&Engineering Saturday Club Workshop.
Don’t forget to submit photos of your plants at all stages or post online and tag @natsatclub
Contributed by Chère Reade-Edwards, Kingston University London Science&Engineering Saturday Club
Chère Reade-Edwards is a Forensic and Environmental Scientist who leads Kingston University’s Science, Technology, Engineering and Maths (STEM) outreach work including coordinating the Kingston University branch of the National Science&Engineering Saturday Club
“I feel the Saturday Club develops the Club members curiosity further and allows them to investigate different areas of STEM to what they would experience at school.”