By Katie Fitz
Learn how to dye fabric at home, naturally and without any harsh chemicals
Don’t forget to share your creations or post online and tag @natsatclub
Overview
This activity will teach you how to naturally dye fabrics and ‘upcycle’ old garments using kitchen waste, plants and vegetables.
You will end transforming a dull tired piece of cloth into a beautiful piece of unique art. Experimentation is encouraged using various dying matter with various natural fabrics to explore colour intensities and outcomes.

Materials
- Natural, light coloured fabrics (old white cotton t-shirts, bedding, pillow cases etc. are all good). Must be either cellulose or protein fibres.
- A collection of kitchen/garden waste (red and yellow onionskins work really well. Turmeric is also good. Nettle, passion fruit skins, avocado skins, wild flowers, dandelions, poppies, herbs, anything natural that you like the colour of). A handful of each is plenty.
- White/clear vinegar in a spray bottle
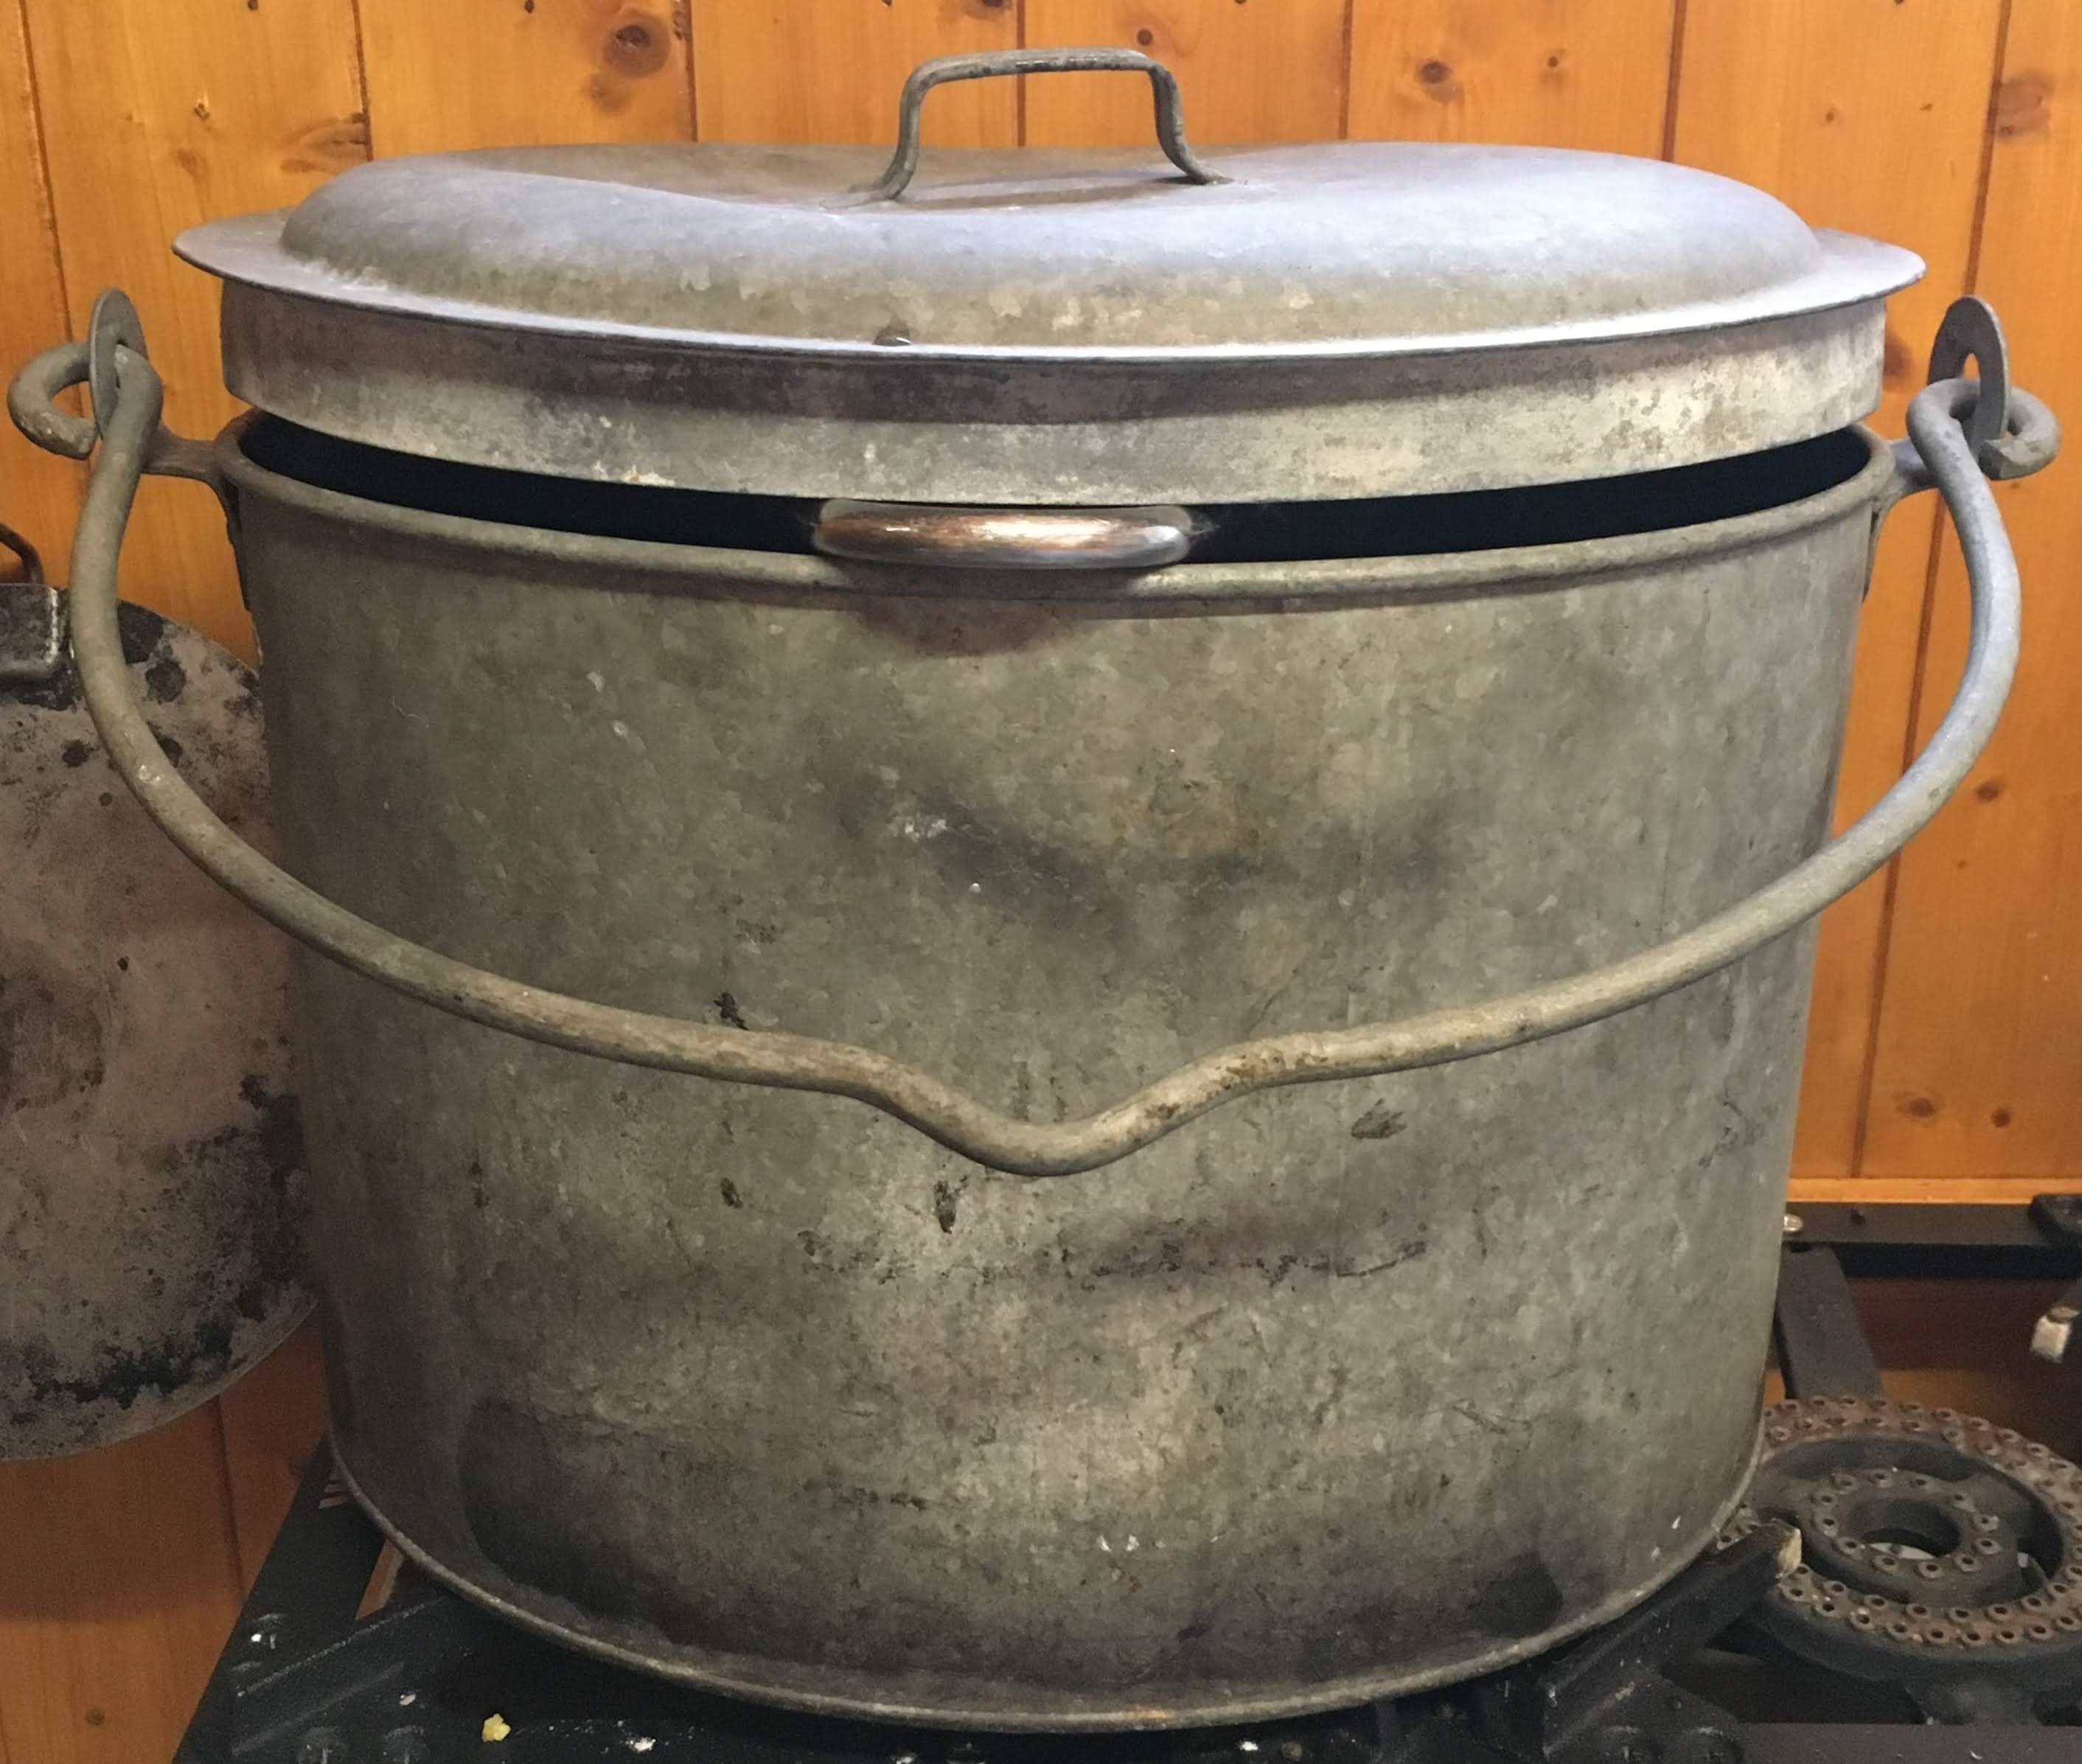
- A kitchen steamer (hob or electric). You could also make one using a saucepan and a colander or sieve and pop a lid over it
- String or elastic bands
- Scissors
- Kitchen tongs
- Oven glove
- Old blanket, towels, tarp, or paper to protect your floor from mess
- Steam Iron
(Note: Fabrics used need to be natural fibres such as cotton, wool, or bamboo etc. Old t-shirts and clothes can be used providing that they are made from natural fabrics, and are light in colour. Lighter colour fabrics show the colour much better. Fabric should be pre-soaked overnight, and left to develop for maximum colour and effect.)
Activity – step-by-step guide
1. Pre-soak your chosen fabric for at least a couple of hours in cold water (overnight soaking is best). Make sure the fabric is evenly soaked right through.
2. Squeeze out the excess water – you can put it in the washing machine on a spin wash if you’d like, but squeezing and ringing by hand is also fine.
3. Lay out fabric flat on your surface protector.
4. Spray all over your fabric with white vinegar.
5. Start spreading your kitchen waste or chosen plant matter over your fabric. Less is more with this process. Think about surface pattern. Do you want lots of colours clustered in one area? Do you want colour and pattern evenly spread? There is no right or wrong with this method – experimentation and playing is key, and the surprise outcomes are what makes the process exciting.
6. Once happy with the placement of your waste pieces, give it all another good even spray with vinegar.
7. Start rolling up the fabric tightly at one end, making sure to keep all of the matter inside. Roll all the way nice and tightly until all of the fabric is in a big sausage.
8. Roll the fabric sausage into a tight bundle, and secure tightly with tied string or elastic bands.
9. Bring the water in your steamer to the boil.
10. Place your tied fabric bundle into your steamer.
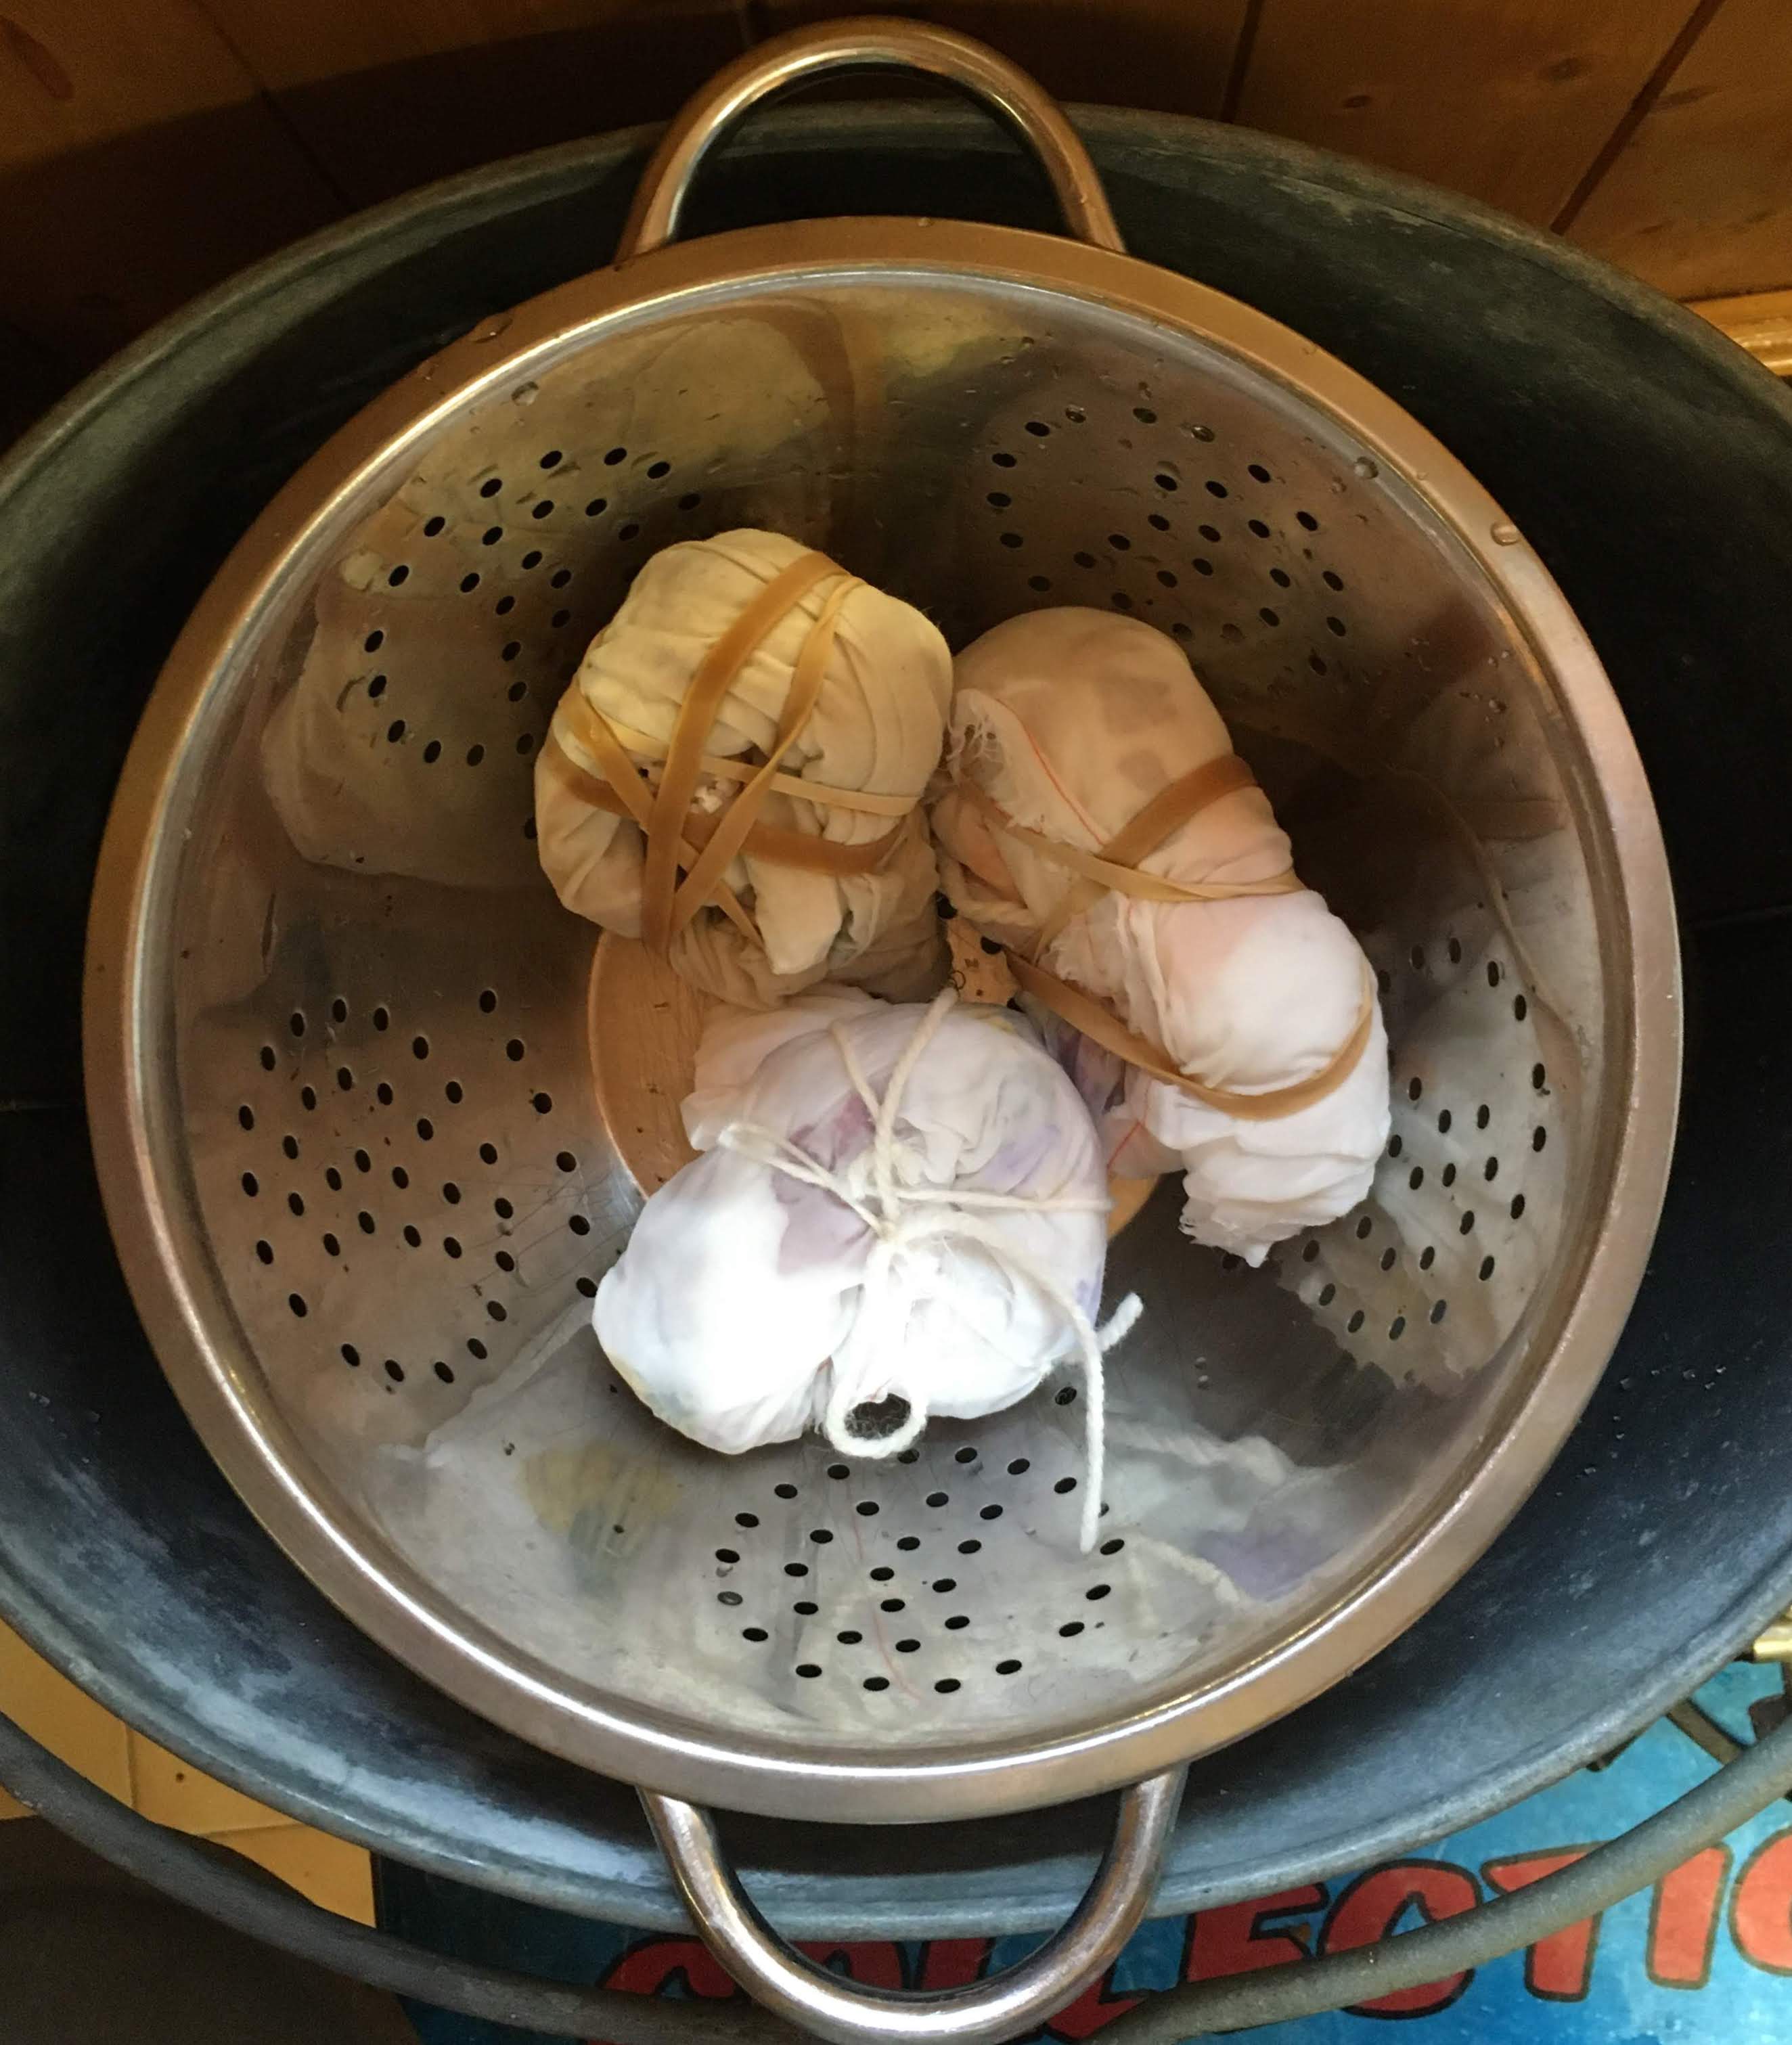
11. Check and rotate your bundle every 15 minutes to allow even coverage of steaming. Wear an oven glove, and use your kitchen tongs for this process so as not to burn. Be careful of the heat, and do not allow the water to boil dry – keep it topped up if it is looking low.
12. Steam your bundle for at least 1.5 hours, and then remove from the heat.
13. Keep your bundle tied up for at least 24hours, the longer you leave it the more intense the colour will be.
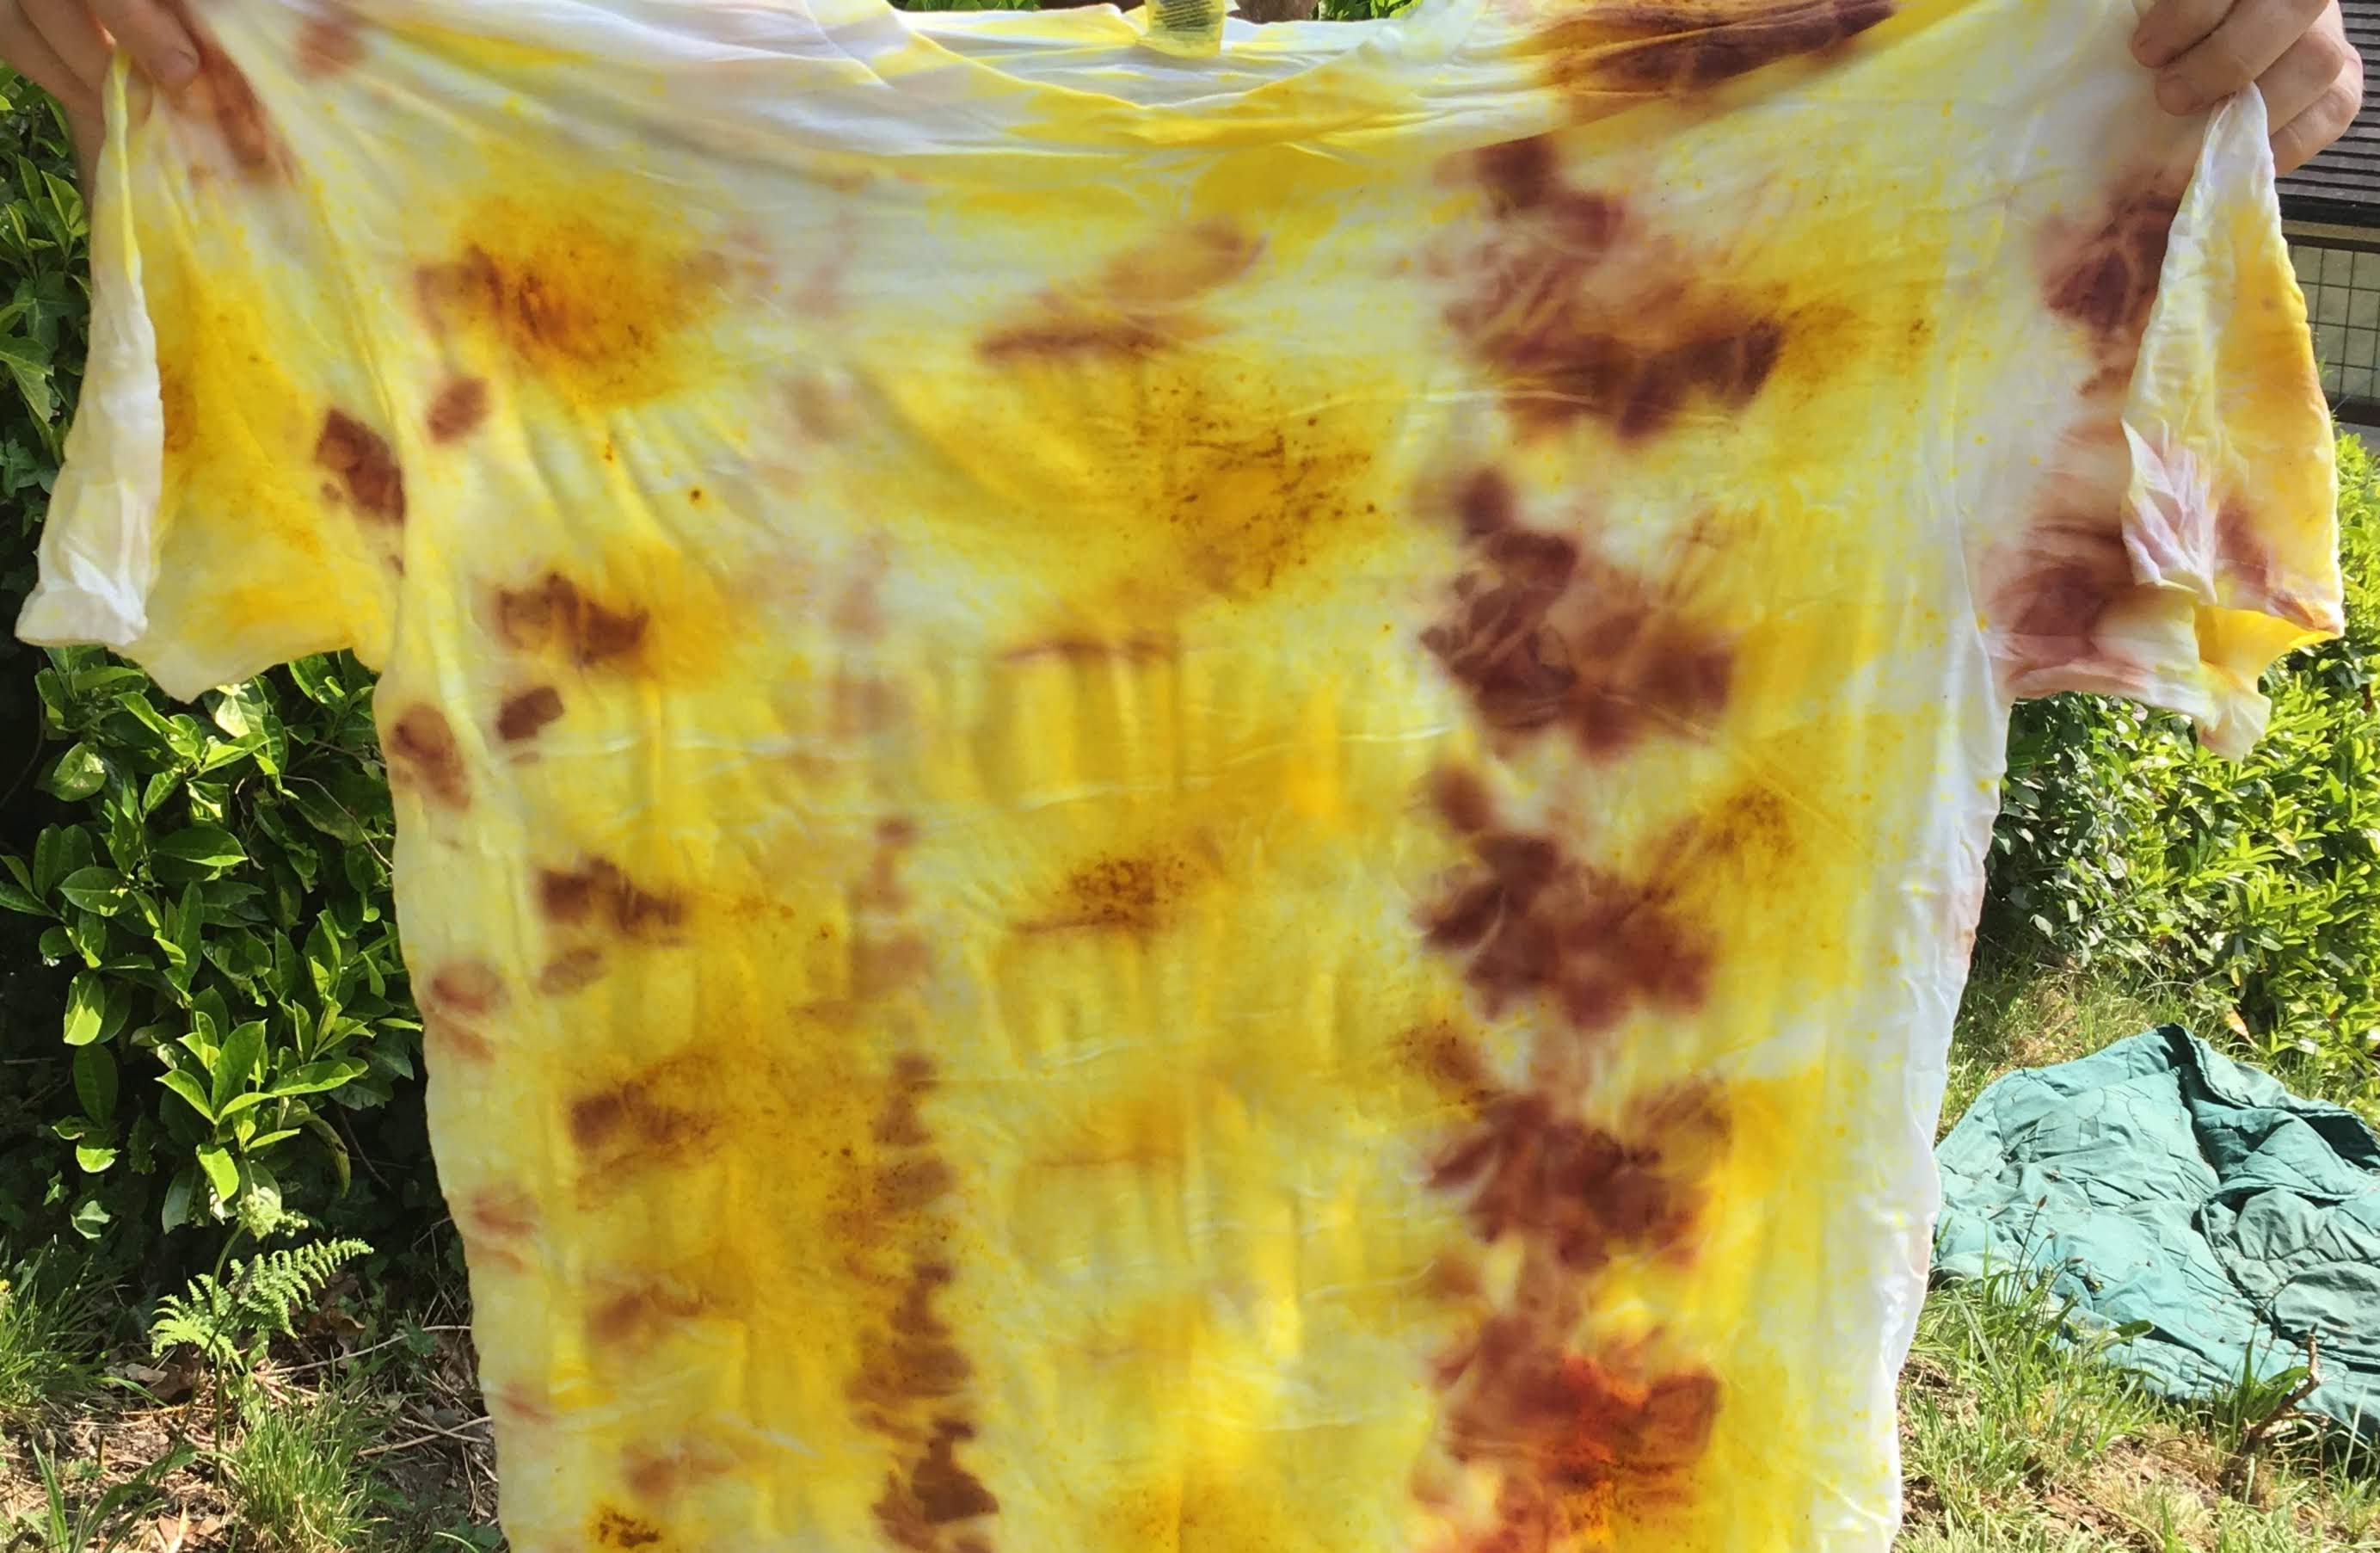
14. After 24 hours, unravel your bundle (outside is best so that you do not make a mess on your floor). You should have a beautifully dyed piece of fabric.
15. Leave your bundle to dry flat.
16. Once dry, iron your fabric with a steam iron – this cures the dye and helps the colour last longer. Et Voila!
17. Only wash your newly dyed fabric in a cold gentle wash.
18. Some dyes last longer than others – but that’s the fun of natural dying, you can do it all over again if you want!
Further Development
Why not create a small film of your dying process? A time-lapse perhaps. Photograph your dying process and your final piece and share your experience and outcomes with us. It would be great to know what worked really well for colour and pigment intensity, as well as what did not work as well.
Thank you for taking part in the College Sir Gâr Saturday Club Workshop.
Share your creations or post online and tag @natsatclub
Resources & References
Colour references:
- Red onion skins gives a pinky/purple colour
- Yellow/White onionskins give a bright yellow
- Turmeric is a very bold yellow
- Some colours last longer than others – this is just the fun and nature of dying with no chemicals
- Fresh and dried of the same thing can give different results, so play around.
- Protein fibres – fibres that come from an animal i.e. wool, silk
- Cellulose fibres – fibres that come from a plant i.e. cotton, bamboo
- Onion skins have a natural chemical in them that helps colourfast
- Using a mordant on your fabric can bring out a more intense or deep colour
- Dipping your dyed fabric in ironised water can dramatically change it’s colour
Contributed by Katie Fitz, Coleg Sir Gâr Fashion&Business Saturday Club
“I joined the National Saturday Club only last year, and have so far loved every minute of it. It is so refreshing to work with aspiring young artists. I deliver workshops in both ‘Art&Design’ as well as ‘Fashion&Business’ for our Saturday Club based at Coleg Sir Gâr, Graig campus in Llanelli, South Wales.
I am a part time Fashion Lecturer at Carmarthen School of Art, and a part time designer, cutter and maker. I specialise in garment construction and pattern cutting. I have worked in the fashion industry since 2010, with experience in couture, tailoring, bespoke and high-end vintage alterations.”