By Eleanor Walker
Create a basket by weaving paper strips
Don’t forget to share images of your basket or post online and tag @natsatclub and @msasatclub
Overview
Weaving is used for so many things the world over. In this project we will be using this technique to create a basket out of paper.
There is no expected time scale as everyone will bond with this craft in their own way, don’t be discouraged if it takes a while to get it, the journey is as important as the outcome.
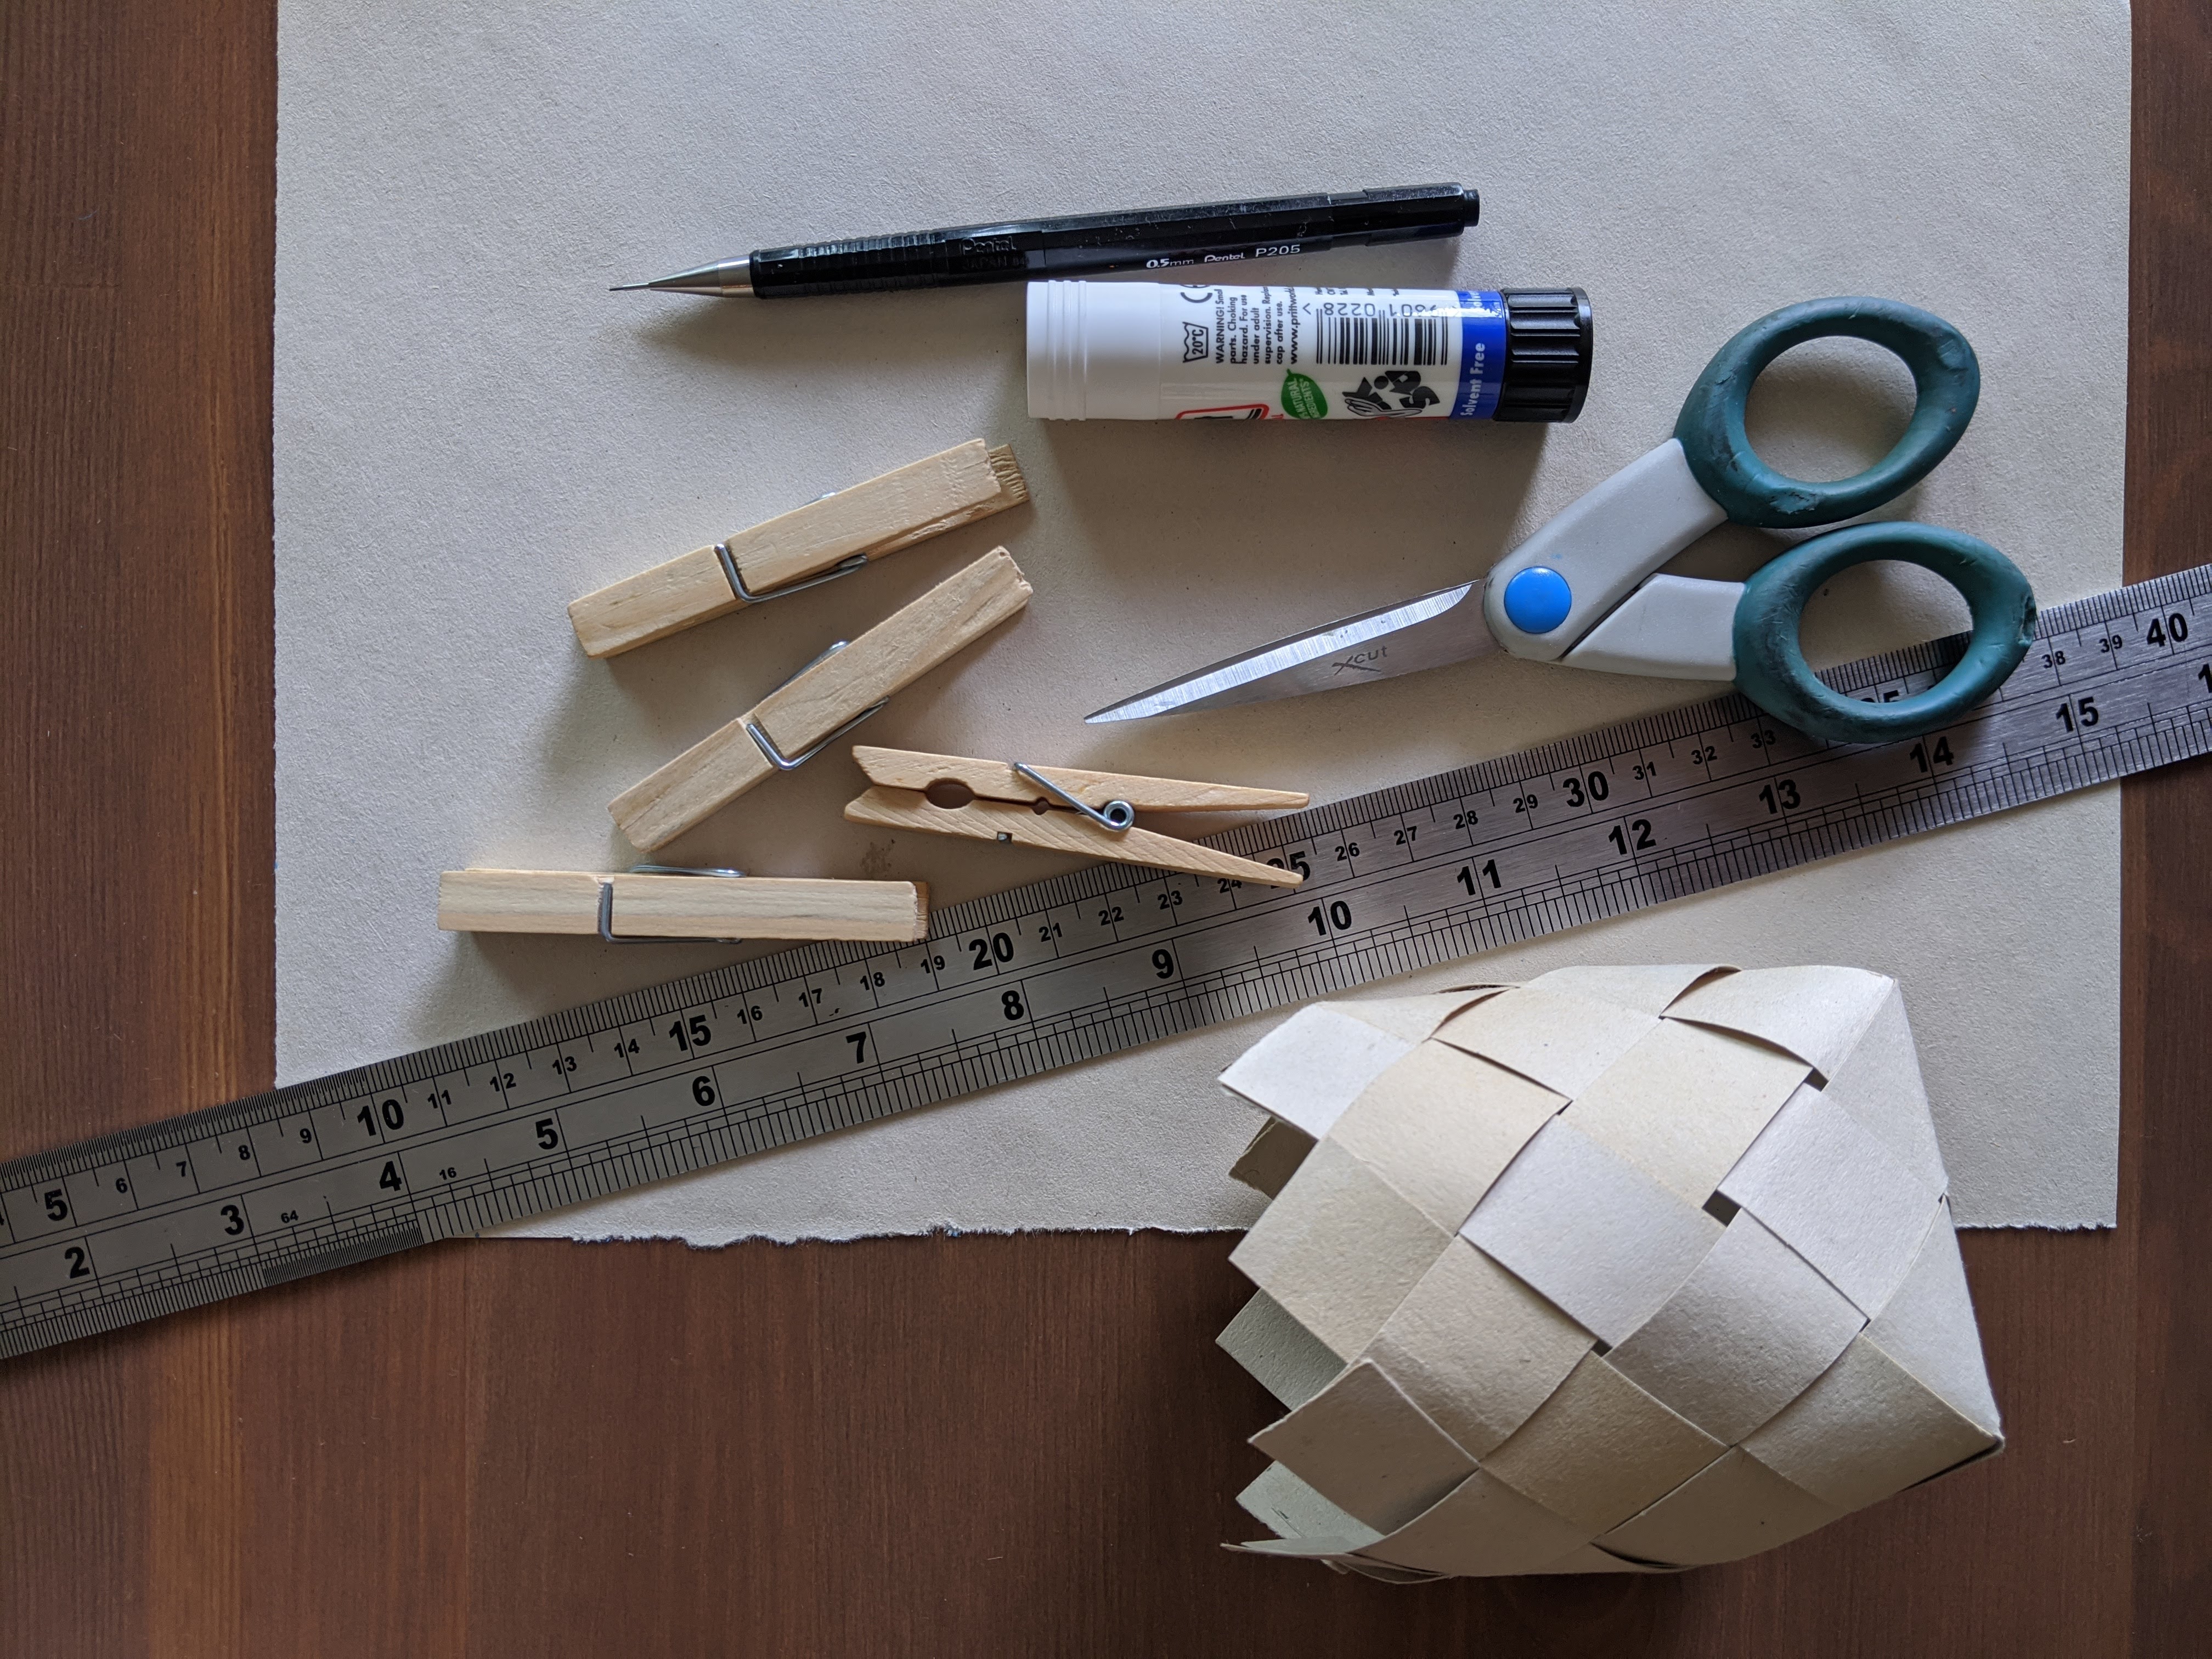
Materials needed
- A4 thick paper or card
- Pencil
- Scissors (or craft knife, paper cutter)
- Ruler (or edge of a book, notepad)
- Pegs (or hairpins, clips)
- Glue (or double-sided tape)
- Optional: paint/pens/crayons for own design
Creating your basket
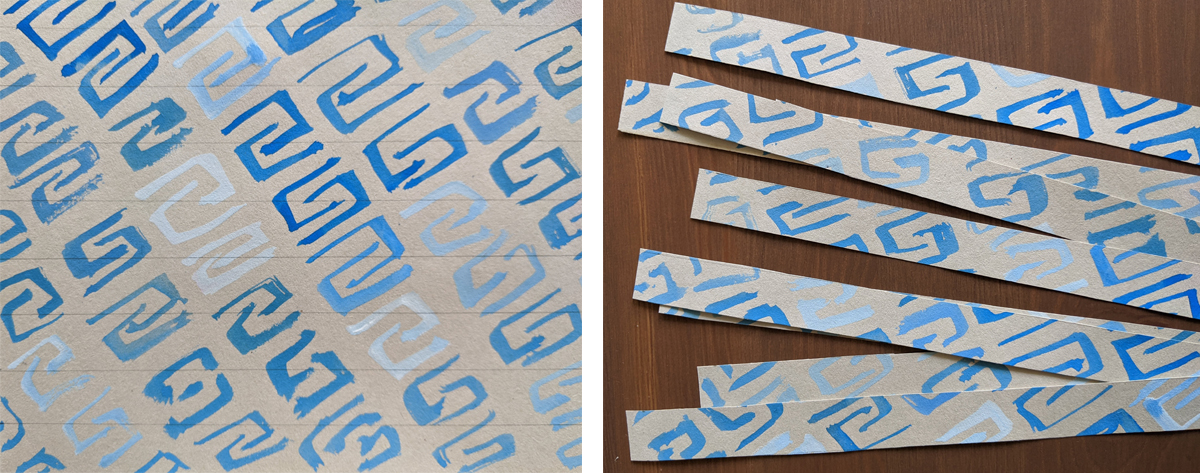
1. Take the A4 paper and decorate it (or not if you prefer). Then, cut it into 2cm wide strips, using the longest side of the paper as the length
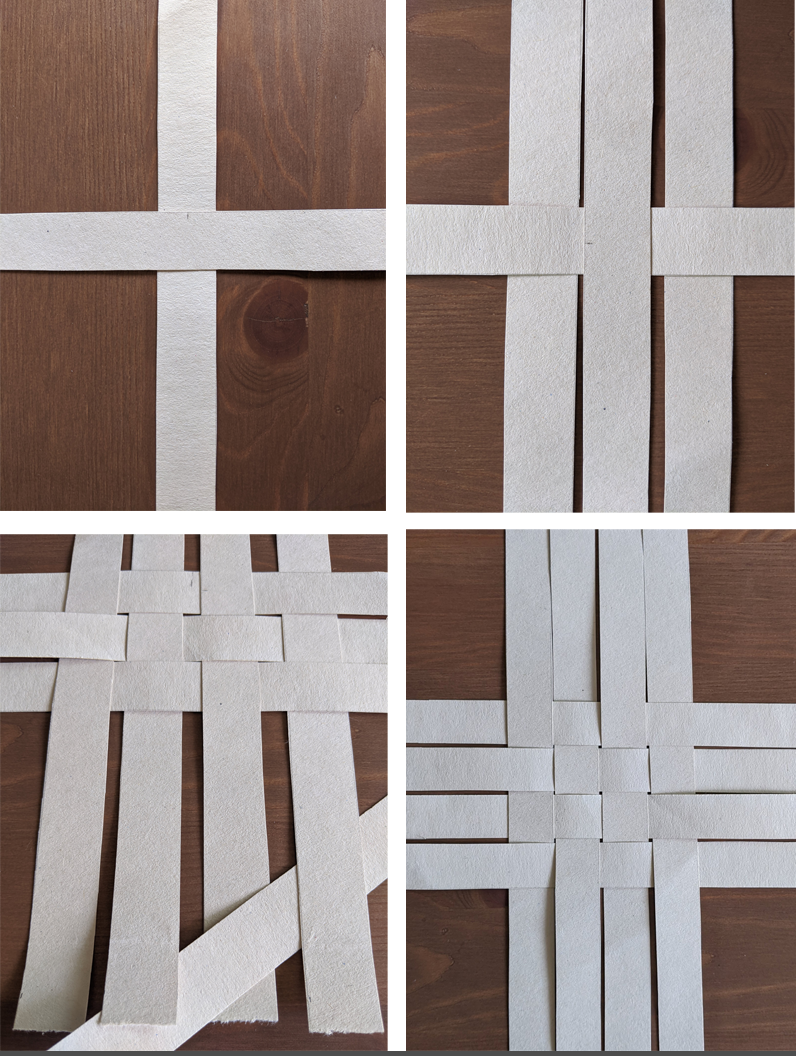
2. Create a cross with 2 strips wrong side up (not the decorated side) then weave the other strips either over or under the strip that they touch, making sure they do the opposite to the one next to it.
3. Creating the base: Use a ruler to create a fold that goes from the middle of one side, to the middle of the next side. Do this on all sides so you end up with a diamond within a square.
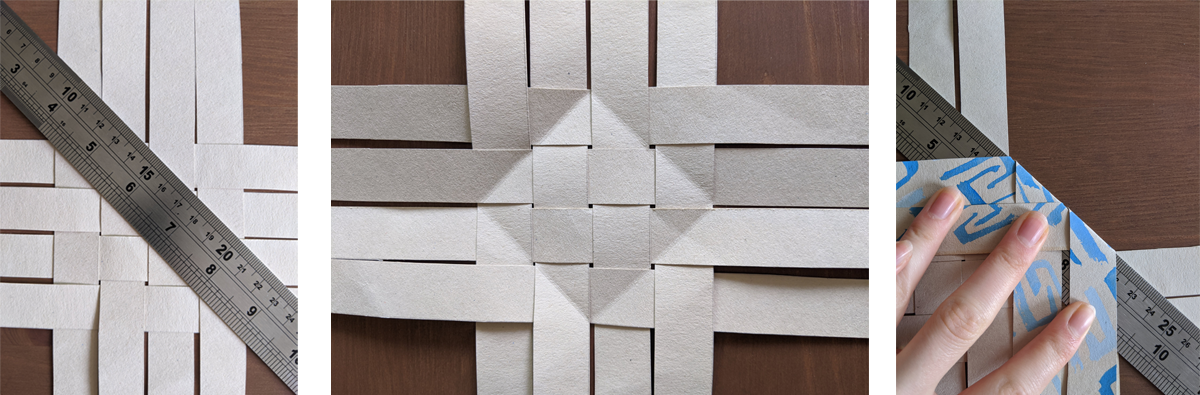
4. Turn it over. Take a corner from your folds and begin to weave the inner left strip under and over the adjacent strip. Now do this with the outer 2 strips. 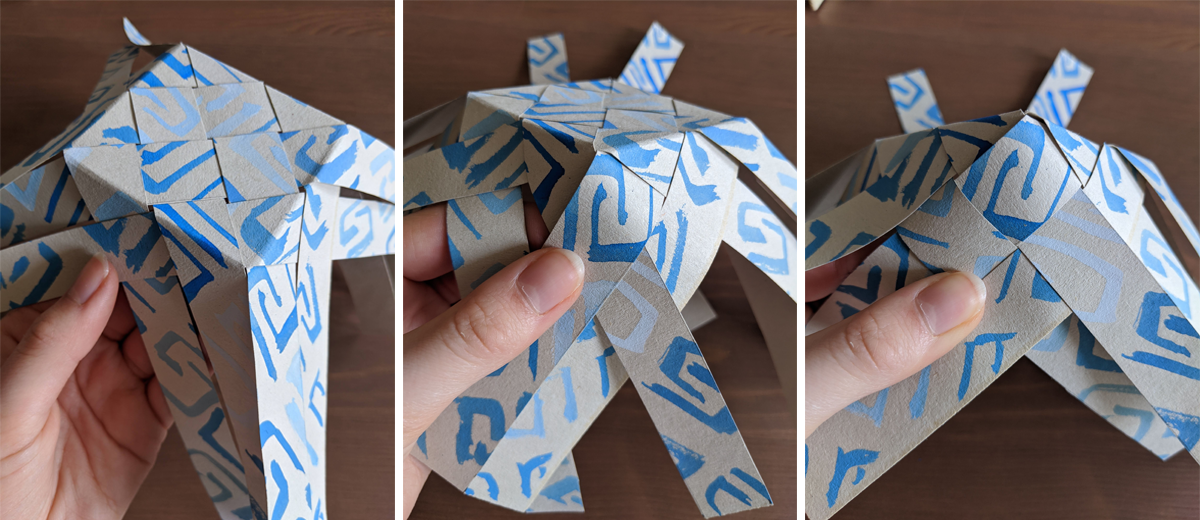
5. Pop a peg on it to keep it in place and do this on all 4 corners.
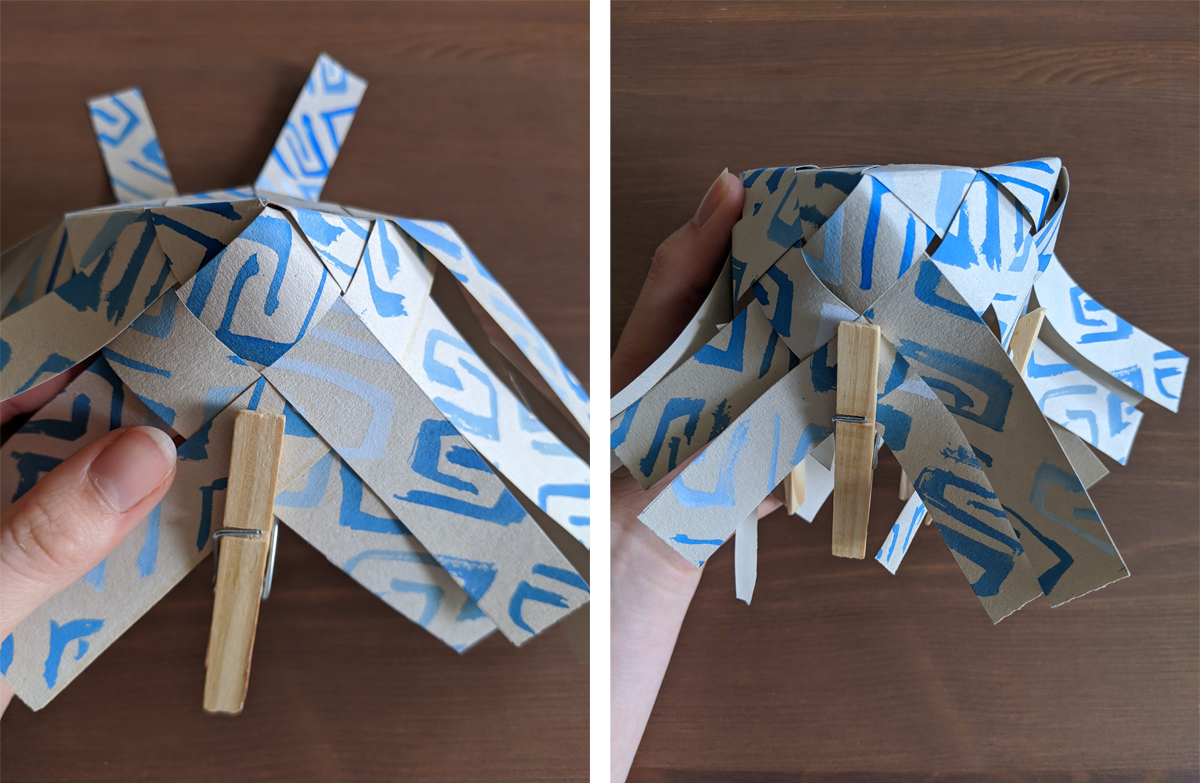
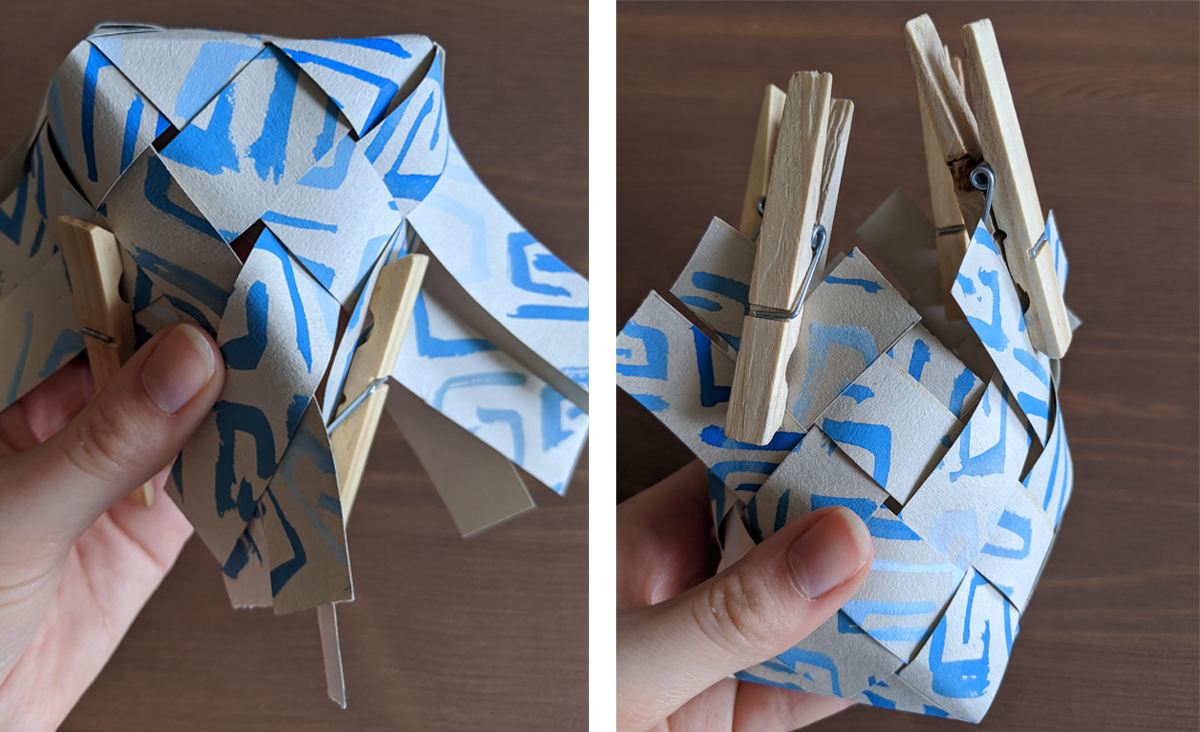
6. This is where it gets a bit fiddly! Weave the remaining length of the strips. The pegs help to keep it all from coming undone when you’re moving around the basket.
Remember: each time you weave a strip make sure it’s doing the opposite to what it last did: under goes to over, over goes to under
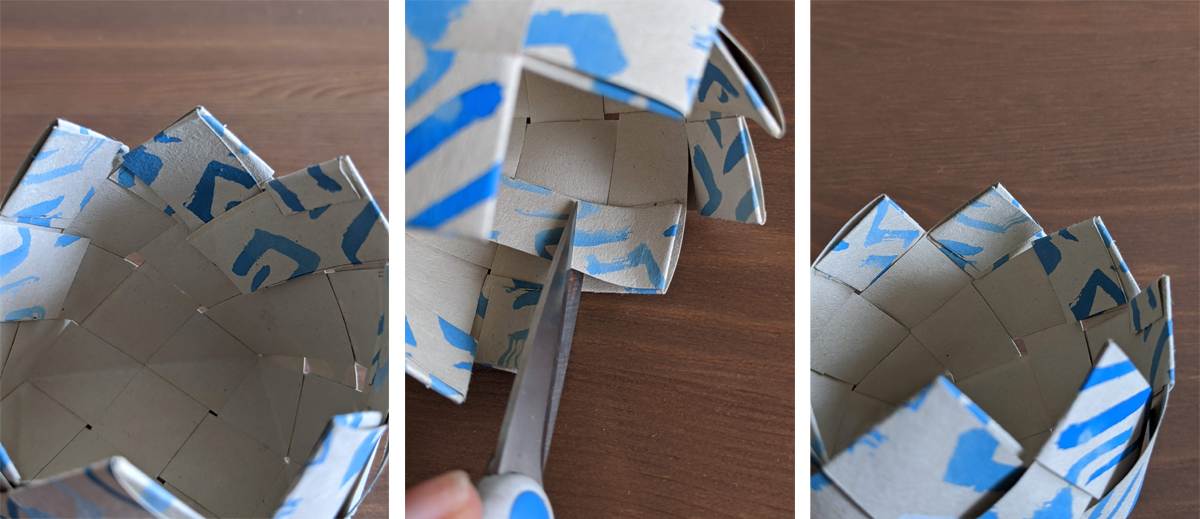
7. Almost there… Once you have finished weaving, you can now decide how tall you want your basket to be, you can go as low or high as the length of your strips allow you to.
Find the shortest end (they won’t all be the same) this will determine your maximum height. Fold one side over the other and do the same on each end, keeping the same height all the way around.
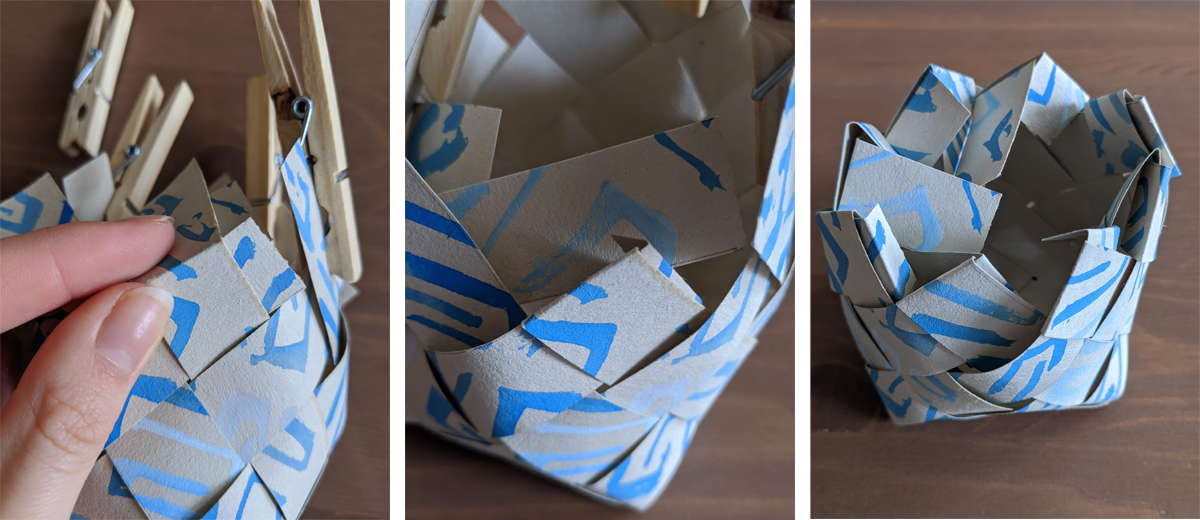
8. Glue the folds together and cut the ends to the same length. It’s easier to cut after in case the length changes whilst you’re gluing.
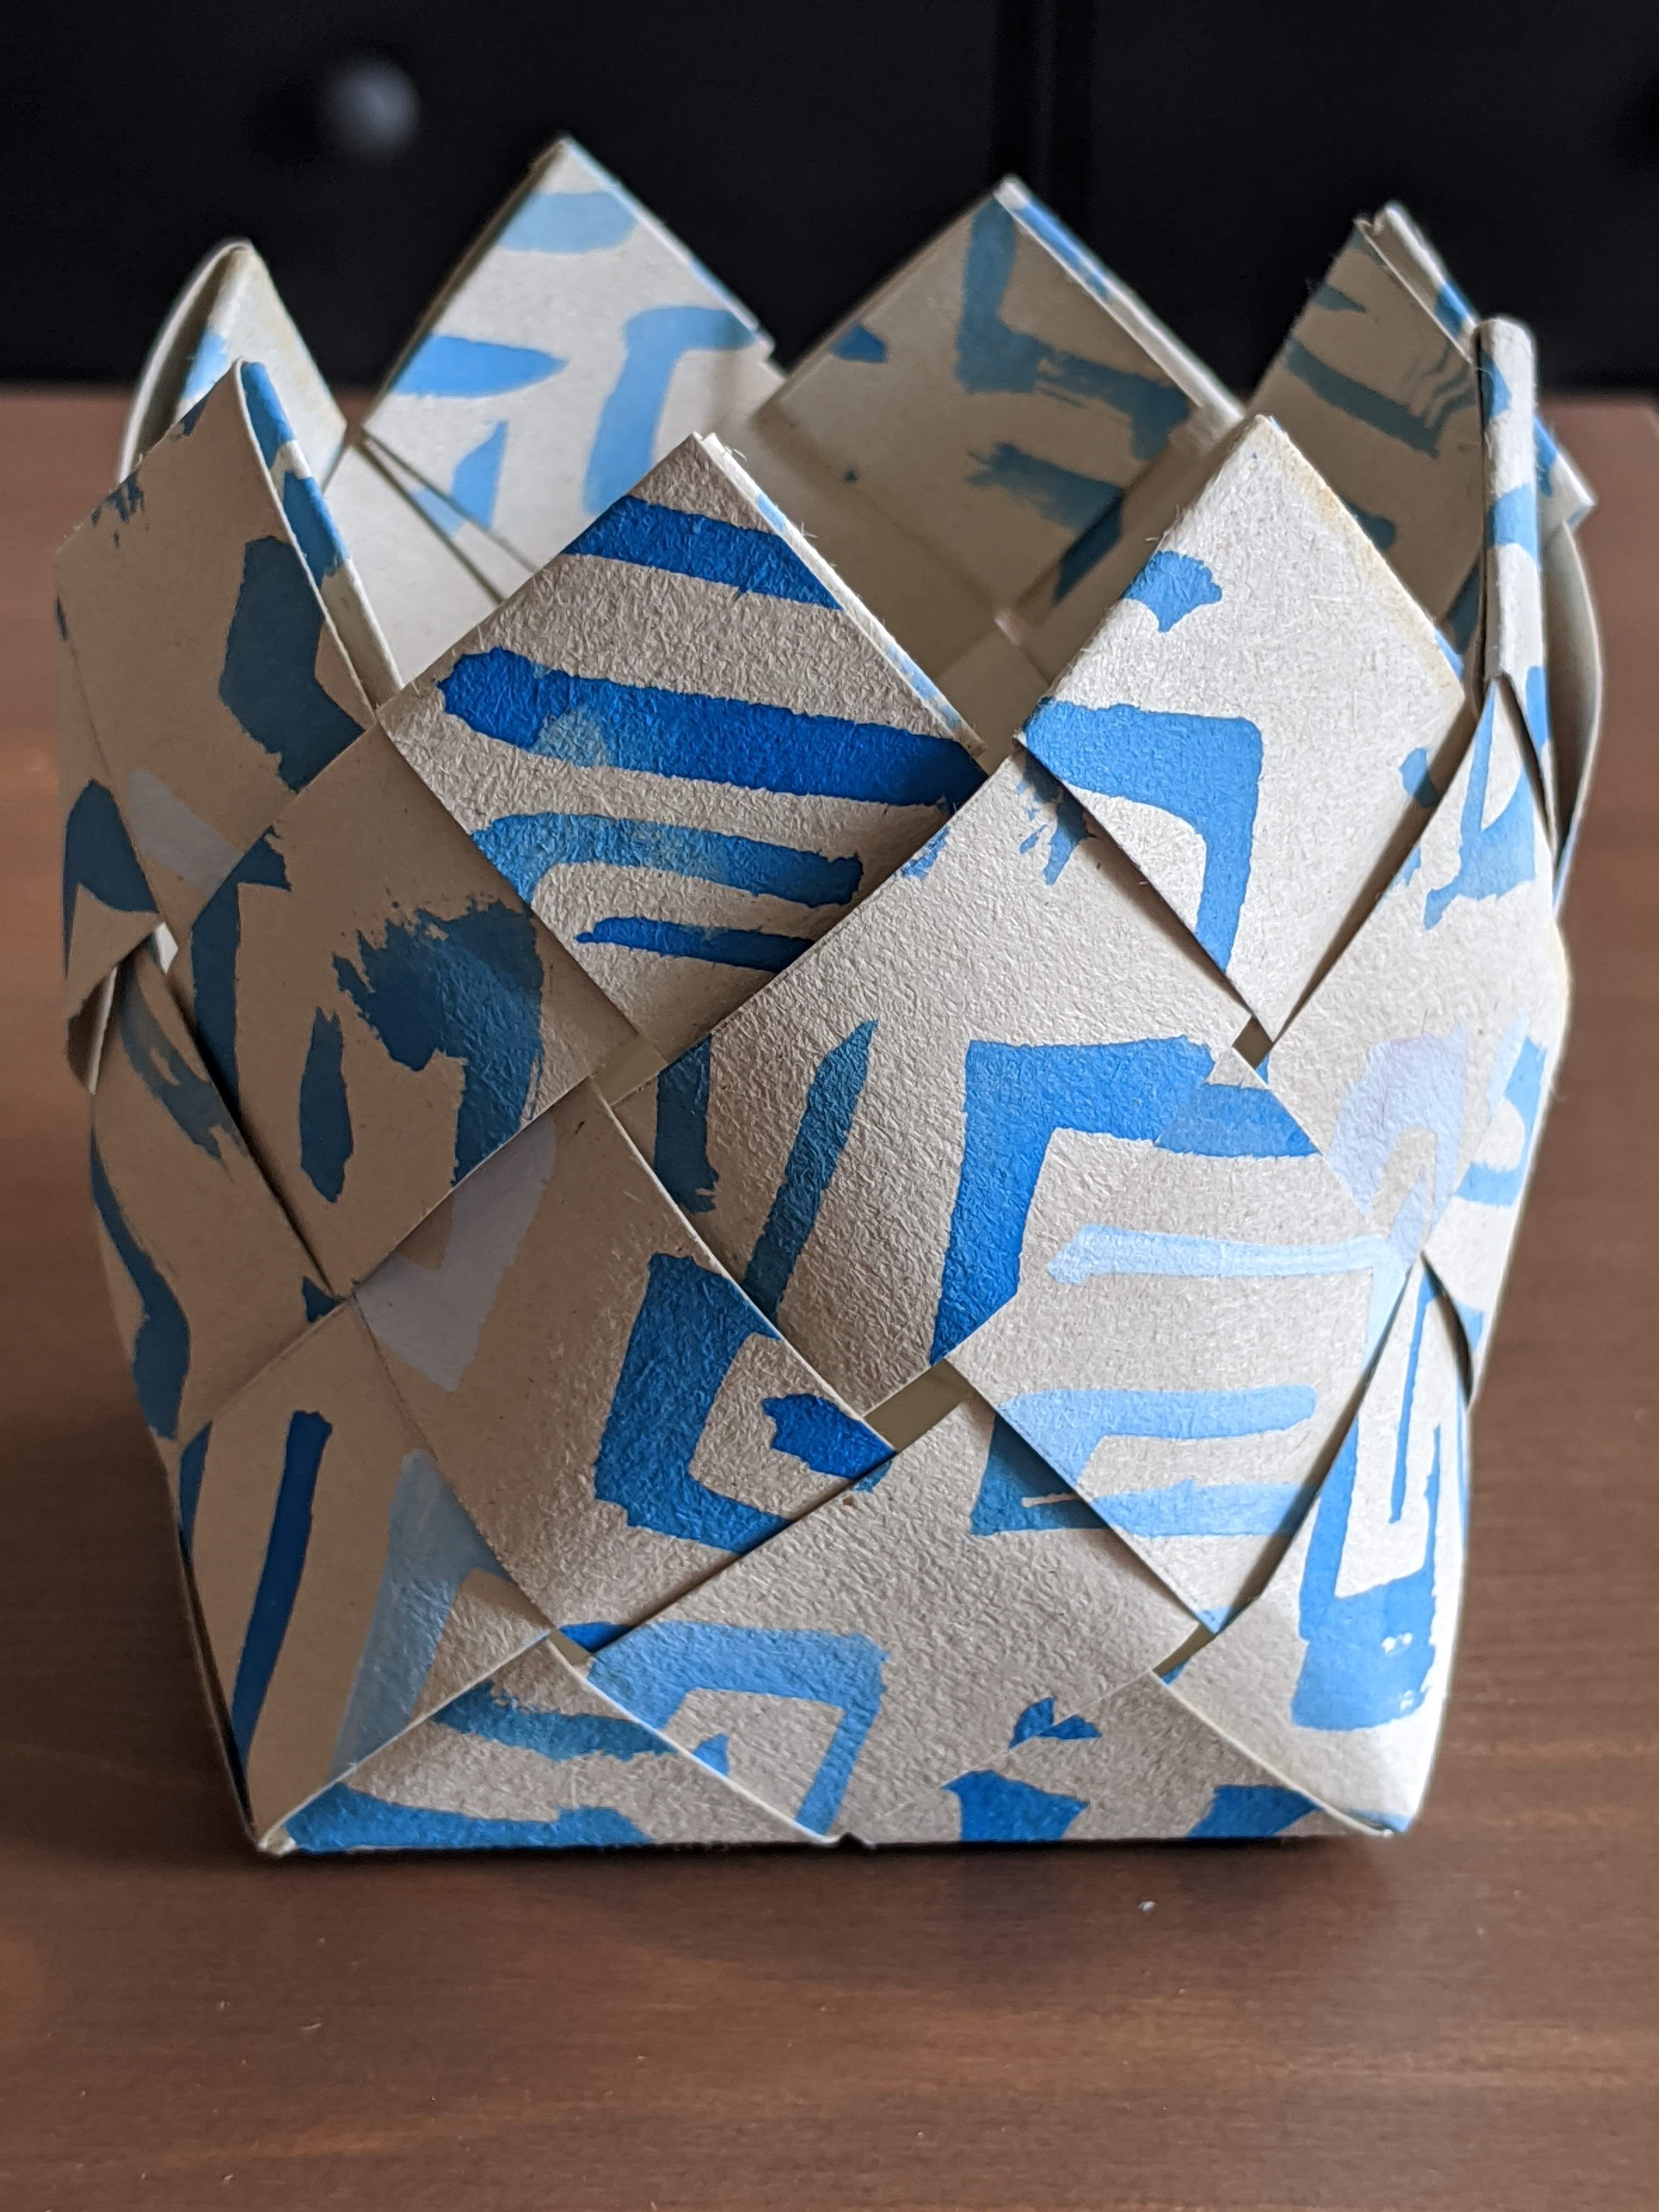
9. Well done! Your little basket can be used for so many things… stationary, scrunchies, snacks (very important) or just be decorative. Don’t worry if it isn’t ‘perfect’ the first time, mine certainly wasn’t! Sometimes mistakes can make something more beautiful and special. Play around with different designs or sizes.
Thank you for taking part in the Manchester School of Art Saturday Club Workshop.
Share images of your basket or post online and tag @natsatclub and @msasatclub
Resources & References
There are so many possibilities with weaving, be inspired, have fun and create!
Six contemporary weavers who are bringing innovation to textile craft
Traditional bamboo basket weaving:
Contributed by Eleanor Walker, Manchester School of Art, Manchester Metropolitan University Art&Design Saturday Club
Eleanor is a BA Textiles student at Manchester School of Art studying Weaving, and she has been a Student Ambassador for the National Saturday Club at MSoA. She is passionate about learning and believes we should always be curious no matter what.